To make a build with a 99 driving dunk at 6’4 in NBA 2K26, you’ll need to prioritize driving dunk, athleticism attributes (speed, vertical, acceleration), and finishing badges while minimizing points spent on other areas. Focus on a scoring machine archetype to maximize dunking potential at that height.
Want to posterize defenders relentlessly in NBA 2K26? Creating a dominant slasher at 6’4 starts with the right build. Many players are wondering how to make a build with a 99 driving dunk at 6’4 in NBA 2K26.
It’s all about maximizing your finishing and athleticism while making calculated sacrifices elsewhere. You’ll need to pinpoint those key attributes to dominate the court.

How to Make a Build with a 99 Driving Dunk at 6’4 in NBA 2K26
Creating a dominant, high-flying player in NBA 2K26 is a dream for many. A 6’4″ build with a 99 driving dunk is a fantastic way to achieve this, offering speed, agility, and highlight-reel finishes. Let’s break down the process of crafting this exciting build.
Understanding the Key Attributes
Several attributes are crucial for a 99 driving dunk build. We need to focus on maximizing these to dominate the paint.
Driving Dunk: This is the foundation of our build. Aiming for 99 allows for consistent dunk animations and posterizing opponents.
Driving Layup: Complementing the dunking ability, a high driving layup attribute will help convert shots near the rim when a dunk isn’t available.
Speed: Speed is vital for getting to the basket and beating defenders.
Acceleration: Paired with speed, acceleration helps with quick bursts toward the rim.
Vertical: This directly affects your dunking ability and how high you can jump.
Strength: Strength will help you absorb contact while driving and finish strong.
Choosing the Right Position
While the specific position isn’t as critical as the attribute distribution, some positions lend themselves better to this build. Point Guard (PG) or Shooting Guard (SG) are typically the best choices.
Point Guard: A PG build offers excellent ball-handling and playmaking capabilities, making you a primary offensive threat.
Shooting Guard: An SG build provides a good balance of scoring and athleticism, allowing you to create your own shot.
Attribute Allocation: Achieving the 99 Driving Dunk
The most crucial aspect is how you allocate your attribute points. Achieving a 99 driving dunk at 6’4″ requires careful planning and trade-offs.
Prioritizing Driving Dunk: Max out the driving dunk attribute first. This is non-negotiable for this build.
Secondary Attributes: After driving dunk, focus on speed, acceleration, and vertical. Maximize these as much as possible.
Balancing the Build: Don’t neglect other essential attributes like driving layup, close shot, and perimeter defense. A well-rounded player is more effective than a one-dimensional one.
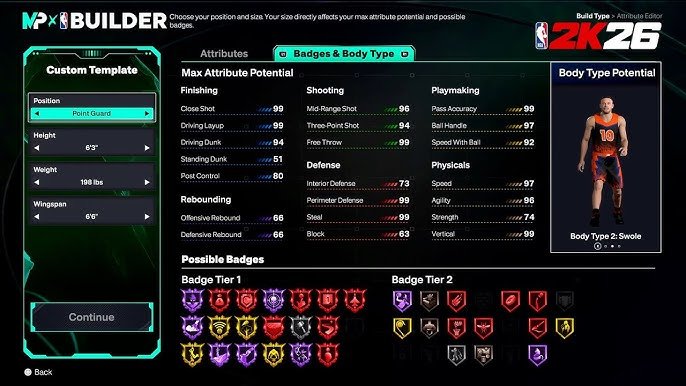
Detailed Attribute Breakdown: Point Guard Example
Here’s an example attribute allocation for a Point Guard build, aiming for the 99 driving dunk. Keep in mind that these are estimates, and slight adjustments may be needed based on the specific NBA 2K26 system.
Driving Dunk: 99
Driving Layup: 85-90
Close Shot: 70-75
Mid-Range Shot: 75-80 (For some shooting versatility)
Three-Point Shot: 70-75 (Just enough for occasional open looks)
Ball Handle: 85-90
Speed with Ball: 80-85
Pass Accuracy: 80-85
Interior Defense: 40-45 (Not a focus, but needs some presence)
Perimeter Defense: 75-80
Steal: 65-70
Block: 40-45
Speed: 90-95
Acceleration: 90-95
Vertical: 85-90
Strength: 60-65
Stamina: 90-95
Detailed Attribute Breakdown: Shooting Guard Example
This is an example attribute allocation for a Shooting Guard build, which prioritizes scoring and athleticism, while still maintaining a 99 driving dunk.
Driving Dunk: 99
Driving Layup: 85-90
Close Shot: 75-80
Mid-Range Shot: 80-85
Three-Point Shot: 75-80 (Slightly better shooting than PG)
Ball Handle: 80-85
Speed with Ball: 80-85
Pass Accuracy: 75-80
Interior Defense: 40-45
Perimeter Defense: 75-80
Steal: 60-65
Block: 40-45
Speed: 90-95
Acceleration: 90-95
Vertical: 85-90
Strength: 60-65
Stamina: 90-95
Choosing Your Takeover
Takeovers can significantly enhance your build’s capabilities. Select a takeover that complements your play style and addresses any weaknesses.
Slasher Takeover: This is a natural fit for a 99 driving dunk build. It boosts your dunking ability, making you virtually unstoppable near the rim.
Playmaker Takeover: If you want to be a more well-rounded offensive threat, the Playmaker Takeover improves your ball-handling, passing, and ability to create shots for yourself and teammates.
Sharpshooter Takeover: If you’ve invested in shooting attributes, the Sharpshooter Takeover can make you a deadly perimeter threat.
Lockdown Defender Takeover: If you value defense, this takeover will make you a menace on the perimeter, disrupting opponents and forcing turnovers.
Badges: Maximizing Your Potential
Badges are essential for optimizing your build. They provide significant boosts to specific actions and abilities.
Finishing Badges
These badges are crucial for a 99 driving dunk build. They will help you finish strong at the rim and dominate the paint.
Posterizer: This badge increases your chances of dunking on opponents. It’s a must-have for this build.
Limitless Takeoff: Allows you to launch dunks from further away, making you even more difficult to guard.
Rise Up: Improves your ability to dunk when standing under the basket.
Slithery Finisher: Helps you avoid contact and navigate through traffic on your way to the rim.
Giant Slayer: Compensates for your height disadvantage when going up against taller defenders.
Fast Twitch: Allows you to gather faster for standing layups and dunks.
Playmaking Badges
These badges will enhance your ball-handling and passing abilities, making you a more versatile offensive threat.
Quick First Step: Improves your acceleration out of triple threat and size-ups.
Handles For Days: Reduces the amount of stamina lost when performing dribble moves.
Killer Combos: Improves the effectiveness of chaining dribble moves together.
Hyperdrive: Increases speed while dribbling.
Ankle Breaker: Gives you a higher chance of freezing or dropping your defender with dribble moves.
Clamp Breaker: Improves a player’s ability to beat defenders in one-on-one situations.
Shooting Badges
If you’ve invested in shooting attributes, these badges will help you knock down shots from beyond the arc.
Green Machine: Increases the bonus given for consecutive excellent releases.
Dead Eye: Reduces the impact of a defender closing out on jump shots.
Agent 3: Improves the ability to hit difficult three-pointers off the dribble.
Claymore: Increases a player’s ability to knock down perimeter shots when spotted up.
Space Creator: Improves a player’s ability to create space from defenders with stepback moves.
Defensive Badges
These badges will help you become a more effective defender, disrupting opponents and forcing turnovers.
Clamps: Improves your ability to stay in front of the ball-handler.
Interceptor: Increases your chances of getting steals in passing lanes.
Pick Pocket: Improves your ability to steal the ball from ball-handlers.
Chase Down Artist: Increases your speed and leaping ability when chasing down opponents for blocks.
Ankle Braces: Reduces the impact of ankle breakers on the player.
Height, Weight, and Wingspan Considerations
While we’re aiming for a 6’4″ build, there are slight variations in height, weight, and wingspan that can impact your attributes.
Height: Sticking to 6’4″ is ideal for maintaining speed and agility while maximizing dunking ability.
Weight: Experiment with weight to find the right balance between strength and speed. A slightly heavier weight can improve your strength and ability to absorb contact, while a lighter weight can increase your speed and acceleration.
Wingspan: A longer wingspan can improve your rebounding and defensive capabilities, but it can also slightly decrease your shooting ability. Consider the trade-offs carefully.
Testing and Refining Your Build
The best way to fine-tune your build is to test it in various game modes. Experiment with different attribute distributions, badges, and takeovers to find what works best for your play style.
MyCAREER: This is a great way to level up your build and earn badges.
The Rec: Test your build against other players in a competitive online environment.
Pro-Am: If you have a squad, Pro-Am is an excellent way to showcase your build’s potential.
Adaptability and Play Style
Ultimately, the success of your build depends on how you play. A 99 driving dunk build is most effective when you’re aggressive and attack the basket.
Utilize your speed and quickness to blow by defenders. Don’t be afraid to drive to the rim and look for opportunities to dunk on opponents.
Mix in some layups and floaters to keep defenders guessing. A predictable offense is easy to defend.
Use your ball-handling skills to create space and get open looks. Don’t rely solely on driving to the basket.
Be a willing passer and look for open teammates. Basketball is a team sport, and sharing the ball will make you a more effective player.
Play smart on defense and try to disrupt opponents. Even though defense isn’t your primary focus, you can still make a positive impact on that end of the court.
Potential Downsides and Considerations
While a 99 driving dunk build is incredibly fun and effective, it’s important to be aware of its potential limitations.
Shooting Inconsistency: If you don’t invest enough attribute points in shooting, you may struggle to consistently knock down shots from beyond the arc.
Defensive Vulnerability: A build focused on offense may be susceptible to defensive pressure, particularly against taller and stronger opponents.
Stamina Management: Constantly driving to the basket can drain your stamina quickly. Manage your stamina wisely and avoid overexerting yourself.
Dependence on Teammates: You may need teammates to create spacing and set screens to maximize your effectiveness as a slasher.
Alternative Build Variations
While the core focus is a 99 driving dunk at 6’4″, there are variations you can explore to suit your preferences.
Two-Way Slasher
Focuses on both scoring and defense. Reduces offensive attributes slightly to invest in perimeter defense and steal.
Playmaking Slasher
Prioritizes ball-handling and passing. Sacrifices some shooting ability for enhanced playmaking skills.
Pure Slasher
Maximizes driving dunk, speed, and acceleration at the expense of other attributes.
NBA 2K26 Specific Adjustments
Keep in mind that specific details about NBA 2K26 might change after its release.
Attribute Caps: Pay attention to attribute caps for different positions and heights.
Badge Requirements: Badge requirements might be different in NBA 2K26.
Animation Packages: Explore different animation packages to find dunks and dribble moves that suit your style.
By carefully considering these factors and experimenting with different attribute distributions, you can create a dominant 6’4″ build with a 99 driving dunk in NBA 2K26 that will terrorize opponents on the court.
NBA 2K25 Best Builds Guide: 6’4 Anthony Edwards Build Template #2k25 #nba2k25
Final Thoughts
To summarize, achieving a 99 driving dunk at 6’4″ requires prioritizing key attributes. Focus on maximizing driving dunk, vertical, and speed with ball. You must carefully balance other stats to avoid major weaknesses.
Remember to allocate remaining points strategically. Fine-tune your physical profile for optimal athleticism. Consider playmaking and finishing badges to complete the build.
Now you know how to make a build with a 99 driving dunk at 6’4 in NBA 2K26. Good luck creating a dominant slasher!