To move games to another monitor, use the Windows key + Shift + Left/Right arrow keys. This quickly shifts the active game window between displays.
Ever found yourself wanting your favorite game on a different screen? Maybe you prefer a larger display, or perhaps you want to multitask while gaming. It’s quite common! So, how to move games to another monitor, you ask? It’s simpler than you might think, and the process is generally straightforward.
You don’t have to fiddle with complex settings most of the time, thankfully. The method described above works with many games and makes switching monitors a snap. You’ll be enjoying your games on your preferred display in no time!

How to Move Games to Another Monitor
So, you’ve got a shiny new monitor, or maybe you just want to enjoy your favorite game on a bigger screen. That’s awesome! But sometimes, getting the game to actually show up on the monitor you want can feel like a bit of a puzzle. Don’t worry, it’s not as tricky as it seems. This article will walk you through all the different ways you can move your games to another monitor, and we’ll make sure it’s easy to understand. Whether you’re using Windows or other platforms, we’ve got you covered. Let’s get started!
Understanding Multiple Monitors
Before we jump into moving games around, it’s a good idea to understand how your computer sees multiple monitors. Your computer thinks of them as different areas to display things. Usually, it has one “main” monitor, and others are considered “extended” displays. Knowing how your computer sees them helps you move the games more easily.
Primary vs. Secondary Monitors
Think of your primary monitor as the place your computer likes to put everything by default. It’s usually where your start menu, icons, and most programs first appear. Secondary monitors are extra screens that let you have more space to spread out your apps and games. You can choose which monitor you want to be the primary one.
Extended vs. Duplicate Display
There are a couple of ways to use multiple monitors.
- Extended Display: This setting makes your monitors act like one giant screen. You can move your mouse from one monitor to the next, and your programs can be placed on any monitor. This is usually the best way to play games on one monitor while using the other for something else.
- Duplicate Display: This setting shows the same thing on all your monitors. It’s handy for presentations, but not ideal for gaming if you want to use different monitors for different things.
Moving Games in Windows
Windows is the most popular operating system for gaming, so let’s look at the main methods for moving your games in Windows:
Using Windows Key + Shift + Arrow Keys
This is a quick and simple way to move a game window from one monitor to another. Here’s how to do it:
- Start your game. Make sure it is running in a windowed mode, not full screen. If it’s in full screen, you can usually change that setting within the game itself (look in the options or graphics menu).
- Click on the game window to make sure it’s active.
- Press and hold the Windows key, then also press and hold the Shift key.
- While holding both keys, press the left or right arrow key. This will move the window to the next monitor in that direction.
The game will quickly jump to the next screen, and you can keep using the arrow keys to move it again if you have more than two monitors.
Changing Game Display Settings
Many games have their own display settings that let you choose which monitor they should use. This is often the easiest way to get a game to appear on the right monitor, and to keep it there. Here’s how to do this for most games:
- Open the game you want to move.
- Look for the “Settings” or “Options” menu. This is usually located in the main menu of the game.
- Inside the settings, find the “Graphics” or “Display” section.
- Look for a setting that says “Monitor,” “Display,” or something similar.
- You should see a dropdown menu or a list of numbers representing your monitors. Select the one you want the game to use.
- Apply your changes and restart the game if necessary.
Some games might not let you pick specific monitors, but they often have an option to select a primary display. In that case, just choose your desired gaming monitor as the main display before you start the game.
Using Windows Display Settings
Another way to get your game on the right monitor is by changing your display settings in Windows. This method can be especially helpful if the game doesn’t have its own built-in monitor selection.
- Right-click on your desktop and select “Display Settings”.
- Scroll down to the section called “Multiple displays.”
- Here, you’ll see boxes that represent each of your monitors. You can click “Identify” to see which number corresponds to each monitor.
- In the dropdown menu that says “Multiple displays”, select either “Extend these displays” or “Show only on (number)”. If you pick “Show only on (number)”, then that monitor will be your sole screen. If you extend the displays, all your screens will act as one larger one.
- Choose the monitor you want the game to primarily appear on and click on it.
- Scroll down to where it says “Make this my main display” and tick the box next to it. This will make your chosen screen the default for new applications.
When setting up your monitors, it is crucial to match the physical orientation of the screens in the Windows display settings. If your second monitor is located on the right side of the primary, drag its corresponding box on the settings to the right side of the first box, so the mouse will flow correctly.
Setting Game Launch Options
Sometimes, you can force a game to start on a specific monitor by using its launch options. This method is mainly used for games on platforms like Steam, Epic Games Store, or Origin. Here’s how you usually go about it on steam:
- Open the game platform (Steam, Epic Games Store, etc.)
- Find the game in your library.
- Right-click on the game and select “Properties”.
- Look for a section named “Launch Options,” “Advanced Options,” or similar. It is usually in the “General” Tab.
- Enter the following command for the monitor you want to use:
- -monitor 1 (for your primary monitor)
- -monitor 2 (for your second monitor)
- -monitor 3 (for your third monitor), and so on.
The number you add corresponds to your display number. You can use the “Identify” button in your Windows display settings to check which number corresponds to which screen. This works great when you want to consistently use a specific screen for a certain game.
Moving Games on Other Platforms
While Windows is the primary platform for gaming, other systems are also available. Here’s how to manage games across multiple screens on macOS and Linux.
Moving Games on macOS
macOS handles multiple screens pretty well. Here’s how you typically move a game to another screen on a Mac:
- Open the game you wish to move.
- If the game is full screen, switch it to windowed mode. You can often do this by pressing Command + Shift + F or by going to the game’s settings and looking for the display options.
- Click on the title bar of the game and drag it to the screen you want it to be on.
- The game will move to the new display. Once you drag it over, you can switch back to fullscreen if that’s the style you prefer.
macOS also has display settings that allow you to make a specific monitor the main display. These options can be found under the “Displays” section in system settings.
Moving Games on Linux
Linux offers more ways to move programs across screens since there are many Linux distributions. However, most of these use the “xrandr” command that is present in many of them.
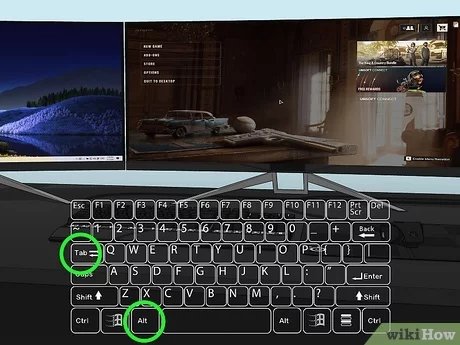
- Open the game you want to move. If the game is full screen, switch it to windowed mode.
- Use the key binding to move the window, which is commonly Alt + Shift + the arrow keys.
- Check which monitor you want to display the game on. If you have not set this before, you can see the available monitor resolutions using the command xrandr.
- Use the command “xrandr –output (monitor name) –mode (resolution)” to move the game to a new monitor.
You can also manage your monitor display order in settings. How this is done varies with the specific Linux distribution that you use.
Troubleshooting Common Issues
Sometimes, even when you follow the steps, things might not work perfectly. Let’s go over some common problems and solutions:
Game Window Keeps Moving Back to the Wrong Monitor
This often happens because the game remembers where it was last opened. Try the following:
- Check Game Settings: Make sure the game’s display settings are set to the monitor you want to use.
- Windows Main Display: Ensure your preferred monitor is set as the main display in your Windows display settings.
- Launch Options: Try using the launch options (as explained above) to force the game to start on a specific monitor.
- Reset Game Settings: In some cases, deleting or resetting the game’s configuration files can fix the problem. These files are usually located in “Documents” or “Appdata” folder.
Game is Stretched or Not Displaying Correctly
If the game looks weird, it probably has a resolution problem. The resolution and refresh rate of your monitors should be properly set:
- Check Resolution: Make sure the game’s resolution matches the native resolution of your monitor. You can usually adjust the resolution in the game’s graphics settings.
- Update Graphics Drivers: Outdated or corrupt graphics drivers can cause resolution problems. Download the newest drivers from the website of your GPU manufacturer (Nvidia, AMD, or Intel).
- Monitor Refresh Rate: Confirm that the monitor refresh rate is properly set in Windows display settings. Usually, you want it to be the highest refresh rate that the monitor can handle.
Game is not Recognizing the Secondary Monitor
This could be an issue with the graphics drivers or display settings of the operating system:
- Check Cables: Make sure the cables to the secondary monitors are plugged in firmly.
- Driver Update: Go to the website of your GPU manufacturer and download the latest graphics drivers, since these can fix the problem.
- Windows Settings: Go to your windows display settings and be sure the secondary monitors are identified correctly and that they are set to “Extend these displays.”
Tips for a Smooth Multi-Monitor Gaming Experience
Here are a few extra tips to make your multi-monitor gaming setup awesome:
- Use a Good Monitor: If you want the best gaming experience, invest in a monitor with good refresh rate and response time.
- Display Settings Match: In Windows, make sure your monitor layout is set to mirror your physical setup. If your secondary monitor is on the right, drag its box in the settings to the right of the primary display.
- Cable Quality: Use high quality cables for the best video signal and to avoid flickering issues. HDMI and DisplayPort cables are the best options for modern monitors.
- Be Organized: Keep your desktop organized to quickly locate files and programs.
Moving games to different monitors can be super easy once you understand how to do it. Whether you’re using Windows, Mac, or even Linux, there are a few straightforward ways to put your game on the screen you want. By using the tips and methods in this guide, you’ll be enjoying games on your favorite monitor in no time.
How to Move a Fullscreen Game Window to Another Monitor in Windows 10 [Tutorial]
Final Thoughts
To move a game, use Windows key + Shift + arrow key. Alternatively, adjust game settings to select the desired display. Remember to check the game’s display options first. Many games allow you to pick the monitor directly from their video settings.
These methods offer simple ways on how to move games to another monitor. A quick key combination or a settings adjustment will get your game playing on the right screen.

