
Prioritize games on PC by using Task Manager to set game processes to high priority, ensuring they receive more system resources than other applications.
Ever felt your game stuttering or lagging when other programs are running? Knowing how to prioritize games on pc can dramatically improve your gaming experience. It’s frustrating when your frames drop at the crucial moment.
This is not some complicated process. By making a few small tweaks you can give your favorite game the resources it needs to perform better. This means fewer distractions and smoother gameplay.

How to Prioritize Games on PC
Okay, gamers, let’s talk about something super important: making sure your favorite games run smoothly on your PC! Sometimes, when you have lots of programs running at the same time, your games might get a little laggy or slow. This happens because your computer has to split its attention between everything. But don’t worry, there are ways to tell your PC, “Hey, this game is the most important thing right now!” This article will help you do just that, showing you all the cool tricks for prioritizing games on your computer. Let’s dive in!
Understanding the Basics: What Does Prioritizing Even Mean?
Imagine you’re a teacher, and you have lots of students (which are like the programs on your computer). You only have so much time and attention. If you have to give a big presentation, you might need to focus most of your attention on the students who are helping you with that presentation. That’s like prioritizing! When you prioritize a game, you’re telling your computer to give most of its resources (like processing power and memory) to that game. This helps it run faster and smoother, preventing those frustrating lag spikes or stutters.
Why is Prioritization Important?
- Smoother Gameplay: Prioritizing helps games run smoothly by making sure the game gets enough power from your PC. This leads to fewer lags, stutters, or freezes, allowing for a much more enjoyable experience.
- Better Performance: When games are prioritized, they often perform much better because they get more of your PC’s power. This can mean higher frame rates (FPS), making the game look and feel much more fluid.
- Less Frustration: There’s nothing worse than a game that keeps lagging. Prioritization helps to prevent these types of problems, giving you less headache and more fun.
- Multitasking: If you like to have other programs running while you game (like a music player or Discord), prioritizing your game can stop those other programs from stealing resources and causing your game to slow down.
Methods for Prioritizing Games: Getting Hands-On
Now, let’s look at different ways you can actually prioritize your games on a PC. Some are super easy, while others involve getting a bit more techy. Don’t worry; we will explain everything step-by-step!
Using Task Manager: A Quick Fix
Task Manager is a built-in tool in Windows that lets you see all the programs and processes running on your computer. You can also use it to adjust how much attention your computer gives to each of them. It’s like a quick, temporary solution when you want to give a game a performance boost.
How to Prioritize a Game Using Task Manager:
- Start your game: First, start the game you want to prioritize.
- Open Task Manager: Press Ctrl + Shift + Esc all at the same time to open Task Manager.
- Go to the “Details” tab: In Task Manager, click on the “Details” tab at the top.
- Find your game’s process: Look for the process that matches your game’s name. It will usually end in “.exe”. For example, if you’re playing Minecraft, it might be called “javaw.exe”.
- Right-click: Once you find the process, right-click on it.
- Set Priority: In the menu that appears, select “Set priority” and choose either “High” or “Above normal”.
- High: Telling your PC to give the most attention to the game. Use this if you have a powerful PC and are looking for the best performance.
- Above normal: Still gives more power to the game, but not as much as “High.” A safe middle ground.
- Confirm Changes: Your computer will ask you to confirm the change; click “Change priority.”
Important Note: Remember, these settings won’t save after you close the game. Each time you open the game you have to repeat these steps.
Task Manager Tips
- Be Careful With “Realtime” Priority: Setting the priority to “Realtime” can sometimes cause problems because it gives the program all the PC’s power. It’s not typically recommended unless you really understand your PC. “High” is usually good enough.
- Close Unnecessary Programs: Before you start prioritizing, make sure you’ve closed programs you’re not using. This can also improve your gaming performance and give the game more resources without changing its priority.
Using Game Mode in Windows
Windows has a feature called “Game Mode” that was specifically designed to make gaming better. When Game Mode is turned on, your PC tries to give the game more resources and helps prevent background processes from interfering. It’s like a switch that tells your computer, “I’m gaming now!”.
How to Turn On Game Mode
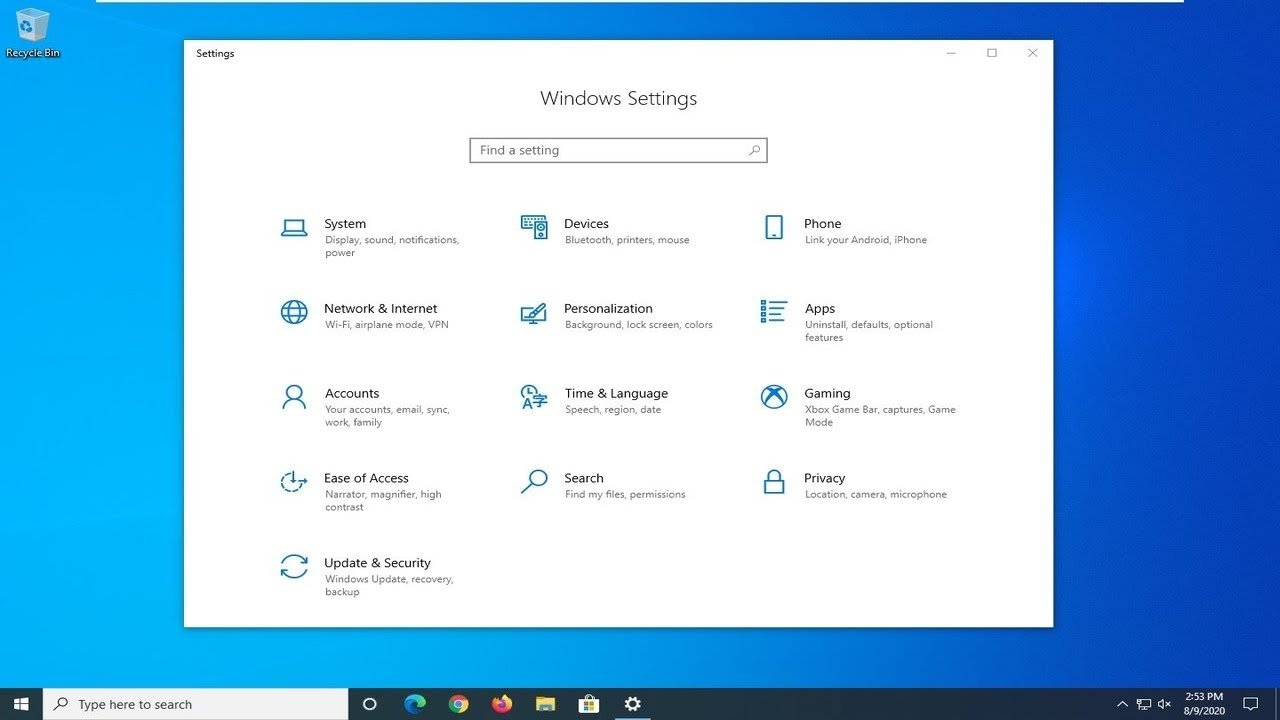
- Open Settings: Click on the Start Menu (the Windows logo in the corner), and then click on the gear icon to open Settings.
- Go to Gaming: Click on “Gaming” in the settings window.
- Turn On Game Mode: In the Gaming settings, click on “Game Mode” on the left-hand side, and flip the switch to “On.”
Game Mode is generally a good option to have turned on all the time while gaming. It’s easy to enable and doesn’t require a lot of extra work.
Benefits of Game Mode
- Consistent performance: Keeps your computer running smoother during game play.
- Automatic Prioritization: Game Mode automatically gives your game the necessary resources.
- Easy to use: It is very simple to turn on and off, making it accessible for everyone.
Adjusting Graphics Settings
Sometimes, the problem isn’t that your game is not getting enough attention; it’s that your PC is trying to do too much with graphics. Adjusting the graphics settings can greatly improve performance by reducing the load on your PC. This is like telling your PC, “Don’t make the game look super amazing, just make it run smoothly.”
How to Adjust Graphics Settings
- Open the Game’s Settings: Start your game and find its settings or options menu.
- Look for Graphics or Video Settings: These settings are often labeled “Graphics,” “Video,” or “Display.”
- Lower the Settings: Start by lowering the following settings one by one:
- Resolution: This is how many pixels your game displays. Lowering it will make the game less sharp, but can drastically increase performance.
- Texture Quality: How detailed the surfaces in your game look. Lowering this can significantly reduce strain on your PC.
- Shadows: How shadows are rendered. Turning shadows down or off can lead to a noticeable performance boost.
- Anti-aliasing: This smooths out the edges of objects. Turning this down or off can free up resources.
- Special Effects: Things like explosions or complex lighting. Turning these down will lower processing demand.
- Test After Each Change: After making a change, play the game for a little bit to see if the performance has improved. You can make more changes if needed.
Tip: It’s often a good idea to start by lowering the highest settings first, as these will typically have the greatest impact on performance.
Using Third-Party Applications
There are also special programs (apps) that you can download that help you optimize your PC for gaming. Some of these apps can automatically adjust settings and give your games more attention. They can also help with other things like managing drivers.
Popular Optimization Apps
- Razer Cortex: A popular application designed to improve gaming performance by optimizing PC settings, closing unnecessary programs, and clearing memory.
- MSI Afterburner: While it’s primarily for overclocking your graphics card, it also has features that can help with performance monitoring and adjustments.
- Game Fire: This program optimizes your system resources for gaming, which includes stopping non-essential services and focusing resources on the game.
Important: When using third-party applications, make sure to get them from a trusted source to avoid problems with your computer. Read reviews and check for information from other users.
Driver Updates: Keeping Things Running Smoothly
Drivers are like special instructions that your computer uses to communicate with hardware, such as your graphics card. Outdated drivers can cause performance issues and sometimes, even conflicts, leading to less smooth gaming. Keeping these drivers updated is a crucial part of ensuring good performance.
How to Update Drivers
- Find Your Graphics Card Model: The most important drivers to keep updated are your graphics card drivers. Find out what graphics card you have (for instance NVIDIA, AMD or Intel) by going to Device Manager in your search bar. Expand the “Display adapters” category, and you’ll see the name of your graphics card.
- Go to the Manufacturer’s Website: Visit the official website of your graphics card manufacturer (e.g., NVIDIA, AMD, or Intel).
- Find the Driver Download Page: Locate the driver download section of the website, and find the correct drivers for your specific graphics card model and your Windows version.
- Download and Install: Download the latest drivers, and follow the instructions on the screen to install them. Sometimes, you may be required to restart your computer.
- Optional: There are also some software applications out there that can automatically update your drivers for you.
By making sure your graphics card drivers are current, you are helping your game run in the best way. Do this regularly to make sure that your game doesn’t have performance issues caused by old drivers.
Advanced Techniques for Tech-Savvy Gamers
For those who like to dig a little deeper, there are a few extra steps you can take to optimize game performance. These tips might require you to be a bit more comfortable with computers, but the rewards can be significant.
Overclocking: Boosting Your Hardware
Overclocking is like giving your hardware, such as your processor or graphics card, a little extra boost of power. This can lead to better game performance, but it also comes with some risks. It can make your hardware generate more heat, and you need to be careful not to push it too hard.
Things to Consider Before Overclocking
- Cooling System: Ensure that your PC has a very good cooling system (such as liquid cooling) before overclocking.
- Hardware Limitations: Do not try to overclock your components beyond their capabilities; you could damage them.
- Research: Before attempting to overclock, you should do your research. Start with small boosts and test thoroughly.
Caution: Overclocking can void your hardware’s warranty and can cause damage if not done correctly, so proceed with extreme caution and if you are not confident you can do it, you should consider not doing it. Seek expert advice before attempting to overclock your components.
Adjusting Power Settings
Windows has a power plan setting that lets you control how much energy your computer uses. Sometimes, the default setting might limit performance for battery saving. Changing this setting can lead to better game performance.
How to Change Power Settings
- Open Power Options: Right-click on the battery icon in your taskbar and select “Power Options.”
- Choose “High performance”: You will see different power options, like “Balanced” and “Power saver.” Choose “High performance.” If you don’t see “High performance”, click on ‘Show additional plans’ to see if the option appears.
- Customize Power Settings (Optional): If you want, you can go into the advanced settings for “High performance” and tweak things such as your processor power management.
Note: Using the “High performance” power setting may increase energy consumption, and if you are using a laptop you may have shorter battery life. Make sure that you only use this when plugged in to the wall.
Common Mistakes to Avoid
Let’s talk about some of the common things gamers do that can actually make performance worse. Knowing these errors will help you avoid them.
Over Prioritizing:
Sometimes, people think that setting all the priority settings to “High” is the best way to have smooth gameplay. But, this can overwhelm your PC. It’s better to use a more moderate approach. Start with a little change at a time and see if the game is getting better, and only go to the next step if you have not received the performance that you need.
Ignoring Background Processes:
Make sure to close all the background processes that are not essential, as these can slow down your game. It’s always a good habit to close programs like internet browsers, messaging applications, and other things that you are not currently using. It’s like cleaning out your room so that you have more room to play.
Neglecting Regular Maintenance:
Your PC needs to be maintained regularly to make sure that games are running well. Make sure to keep your computer free from viruses, keep your storage drives clean and defragmented, and that your drivers are up to date. This simple practice can make a significant difference in your gaming experience.
Prioritizing games on your PC doesn’t have to be hard. By following the techniques and tips described in this article, you can make sure your games run smoothly without having to constantly buy new hardware. Keep these tools in your mind, and you are going to have a much better time playing your favorite games.
How to Set HIGH Cpu Priority Any App or Games – Quick Tutorial
Final Thoughts
Prioritizing games involves adjusting settings within Task Manager. Set your game’s process to “high” priority. This directs more system resources toward your gameplay, improving performance.
You can also use game mode, if available in your system. Game mode often automatically prioritizes games. This action ensures a smoother and more responsive experience.
Learning how to prioritize games on pc is crucial for optimal performance. Apply these techniques to see improved gameplay and reduced lag. Remember to regularly check the game’s performance and make adjustments as needed.

