
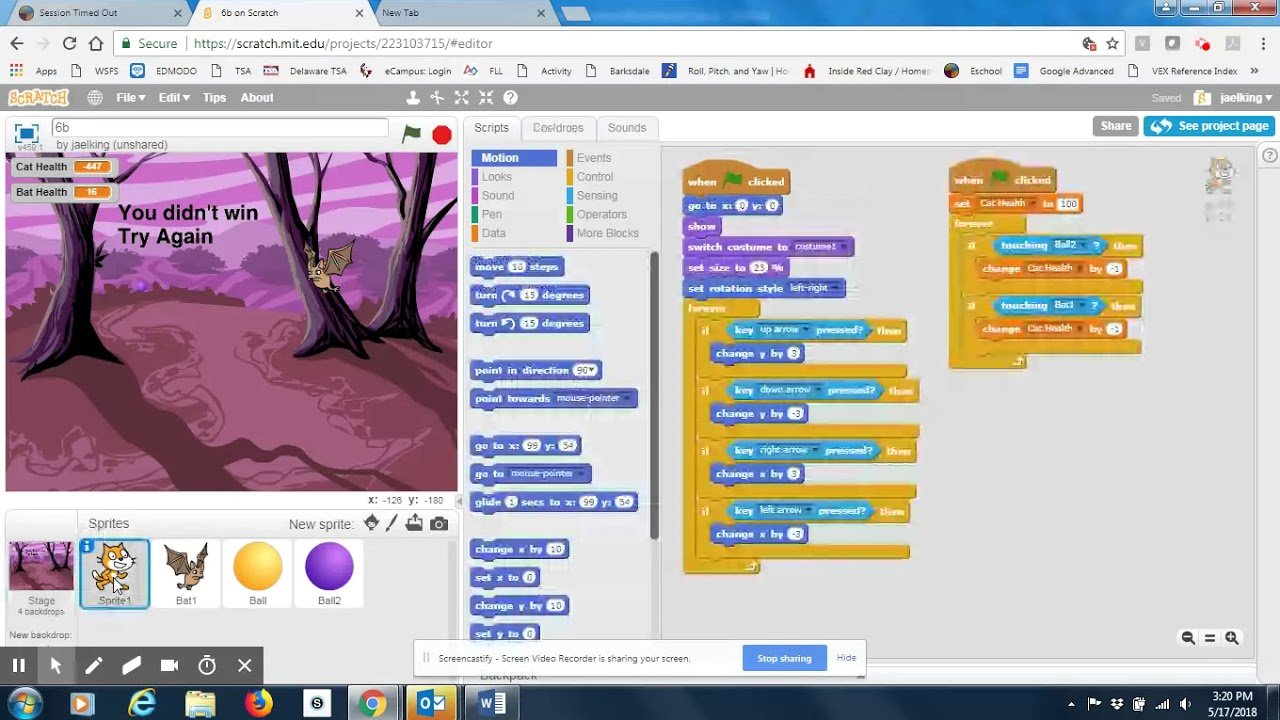
To stop the game in Scratch, use the “stop all” block found in the Control category.
Have you ever created a fantastic game in Scratch, only to find it running endlessly? Figuring out how to stop the game in Scratch is a crucial skill for any budding programmer. It’s important to know how to control your game’s flow effectively.
It’s a simple yet essential function. This control allows you to finish the game at specific points, or when a particular condition is met. We will explore how that is achieved.

How to Stop the Game in Scratch
Scratch is a fantastic tool for creating your own games and interactive stories. But, sometimes, you need to make sure your game knows when to stop! Just like a real game, your Scratch creation needs a way to end gracefully. Let’s explore all the different ways you can make your Scratch games stop.
Using the Stop Sign
The most straightforward way to stop your Scratch project is by using the big red stop sign at the top of the Scratch editor. This is like a giant “pause” button for your entire creation. When you click the stop sign, all the scripts running in your project will halt immediately.
How to use the stop sign
It’s super easy! Imagine you are playing a game and click the stop sign. All the actions of sprites and the background are interrupted and the game is ended. Here’s how it works:
- Look for the red octagon stop sign above the stage. It’s near the green flag.
- Click the stop sign.
- Every sprite will pause its actions.
- All sounds will stop immediately.
It’s crucial to remember that stopping with this button halts the game immediately, without considering any final actions or displays you might want to perform.
Stopping Scripts with Blocks
While the stop sign is simple, often you want to control when the game stops withing your own code. This is where the stop blocks come in handy. These blocks let you program specific events to make your game end.
The “Stop all” Block
The “stop all” block is found in the “Control” category. Think of it like a miniature version of the big stop sign, but you can place it within a script. When this block is executed in any sprite’s code, it will halt all the scripts of all sprites in your project.
Here’s a simple example:
    when green flag clicked
    forever
      move 10 steps
      if touching edge?
        stop all
In this example, the sprite keeps moving until it touches the edge of the screen, then the “stop all” block kicks in and the game ends. This is often used when a player loses, hits a game-ending object, or when a timer has run out.
The “Stop this script” Block
Sometimes you only want to stop the current script and allow other things in your game to keep going. For this, you can use the “stop this script” block. It will halt the execution of only the script where it’s placed, allowing the project to continue running other scripts and code.
Here is a demonstration:
        when green flag clicked
           say "I'm going to move."
           forever
             move 5 steps
             if touching edge?
              stop this script
             say "I'm still moving."
In this example, the “say I’m still moving” block will not run, when the sprite touches edge of the screen. because “stop this script” block will halt the script.
The “Stop other scripts in sprite” Block
The “stop other scripts in sprite” block, as the name suggests, halts other scripts in the same sprite that contains this block. It is very useful when you want one part of sprite’s code to stop another part of the sprite’s code, without affecting other sprites’ operations. Here’s how it operates:
- It’s used inside a specific sprite’s script.
- When triggered, it stops all other running scripts related to same sprite (except the script containing the “stop other scripts in sprite” block).
Here’s how you might use this:
     when green flag clicked
       forever
       change y by 1
     when space key pressed
       stop other scripts in sprite
In the above example, when the space bar is pressed, the first script stops while the second script continues to run when space key is pressed. This is particularly helpful for managing complex sprite behaviors or overlapping actions.
Stopping Based on Conditions
Often, you want your game to stop when a certain condition is met. For instance, the game should end when the player runs out of lives, reaches a specific score, or when a timer goes to zero. Let’s see how to do this using conditions.
Using a Variable as a Stop Condition
Variables are like containers to store information which can be changed. Variables can be numbers, text, or true/false. You can use a variable to store score, lives, time, or other information, then check it in a “stop all” condition.
Let’s look at a lives system. First, set the lives variable:
     when green flag clicked
        set [lives v] to [3]
Now, each time the player makes a mistake, you can subtract from the lives and check if it is zero to stop the game.
       when collision with [obstacle]
         change [lives v] by [-1]
         if <(lives) = [0]>
             stop all
Here, when lives reaches 0, the game will stop using the ‘stop all’ block. This allows for a clean stop based on a variable that changes during the game.
Stopping with a Timer
Time is also a good condition to use to stop the game. You can set a timer and make the game end after certain amount of time. Scratch has a built-in timer, but you can also use your own.
Using Scratch’s timer
Scratch includes a timer that starts when the green flag is clicked. You can reset it to zero and check if it’s reached a specific value to stop your game.
Here is an example:
     when green flag clicked
       reset timer
       forever
         if <(timer) > [30]>
           stop all
In this scenario, the game will stop once the timer exceeds 30 seconds. This gives you a simple way to create time-based challenges.
Making your own timer
Instead of using Scratch’s timer, you can also create your own with a variable. This helps with more custom timing. Here’s the code for a countdown timer:
        when green flag clicked
          set [time v] to [60]
          repeat until <(time) = [0]>
            wait (1) seconds
            change [time v] by [-1]
          stop all
In this example, the game counts down from 60 seconds. When it reaches zero, the game stops. You could also add a script to show the timer on the stage to help the user.
Using Broadcasts to Stop the Game
Broadcasts are like sending messages in your Scratch project. You can use them to signal when the game should stop. This is useful when different parts of your game need to know the game is finished.
How to Use Broadcasts for Stopping
When an event occurs, like the player losing all lives, you can use a broadcast instead of a “stop all” block. This lets other sprites react to that broadcast. For example, you can tell all sprites to hide and display a “Game Over” message.
Here’s how you would do it:
       when green flag clicked
         set [lives v] to [3]

      when collision with [obstacle]
        change [lives v] by [-1]
        if <(lives) = [0]>
          broadcast [game over v]

      when I receive [game over v]
        stop all
Here, when lives becomes 0 a message “game over” is broadcasted, and every sprite will receive this message and stop all scripts. Other scripts could receive that message and use that to trigger a “game over” screen or play a sound.
Ending with a Game Over Screen
Often, just stopping the game isn’t enough. You want to display a “Game Over” screen or a “You Win” screen. This requires a bit more than just a “stop all” block. Let’s explore how to set up a final screen after your game stops.
Creating a “Game Over” Sprite
First, you need a sprite that will serve as your “Game Over” or “You Win” screen. Here’s how you can create it:
- Draw or import an image that says “Game Over” or “You Win”.
- Set the initial visibility to “hidden”.
- Name the sprite something descriptive, such as “GameOverScreen”.
Displaying the Game Over Screen
Now, add a script to display the game over screen when you want the game to end. You can use the same “game over” message from earlier.
      when I receive [game over v]
        show
        stop other scripts in sprite
The “stop other scripts in sprite” block is essential here. Without it, the game over sprite might continue with other scripts that might keep the sprite hidden, or perform unnecessary action.
Make sure all other sprites will also have a script to stop all script when they receive the message “game over”.
      when I receive [game over v]
       stop all
This way every sprite will stop their actions, and the game over screen will be displayed only.
Using the “Wait” Block Before Stopping
Sometimes, you want to pause for a moment before your game actually stops. This is useful for showing an animation, playing a sound, or giving the player a moment to process what’s happened. You can use the “wait” block before you use a stop block. Here’s how to use it.
Adding a Wait before the “Stop all” Block
Simply insert a “wait” block before a stop block. Here’s a simple code snippet:
     when green flag clicked
     forever
       move 5 steps
       if touching edge?
          wait (1) seconds
          stop all
In this example, the sprite will wait for one second before stopping the game once it touches the edge. This slight delay can enhance the experience.
Using Wait with a Broadcast
You can also add a wait block before your broadcast to provide a short delay before stopping the game
       when green flag clicked
         set [lives v] to [3]

      when collision with [obstacle]
        change [lives v] by [-1]
        if <(lives) = [0]>
         wait (0.5) seconds
         broadcast [game over v]
Now the game will wait for 0.5 seconds after the collision, before broadcasting game over message.
Common Issues and How to Fix Them
Sometimes, stopping the game doesn’t work as planned. Here are some typical challenges and tips to fix them.
Game Doesn’t Stop When It Should
If your game continues running when it’s supposed to stop, there can be multiple reasons:
- Check the condition: Make sure your if statement to check the condition is correct and working as you want. Check that your variable is changing in the code.
- Script not active: Verify that the script containing the “stop” block is actually running. Check that other script are not stopping or interrupting the script that stops the game.
- “Stop all” too early: Make sure the “stop all” block is not triggered too early. For example, it might trigger before you have completed animation or playing the game over sound.
Scripts Keep Running After the Stop
If some scripts are still running after you have clicked the stop sign, or have used the “stop all” block, it means that that script is likely not part of those script that has been stopped. Here is how you can fix it:
- Check all sprites: Make sure all sprites have the “stop all” block in the code that is triggered by your stop condition. If not, then you can copy your code to other sprites.
- Check for forever loop: Ensure no sprite has any script that continues to run even when the stop block is triggered. Check all the forever loop in your code to see if any are interfering with your stop function.
- Use “Stop other scripts in sprite” : Make sure you have used this block, inside your sprite for stopping the other scripts of that sprite.
Game Over Screen Not Displaying Correctly
If your game over screen doesn’t show up when the game should stop, try these steps:
- Check the hide block: Make sure game over screen sprite has the hide block at the beginning of the game, so that game over screen won’t be visible at the start of the game.
- Ensure the show block: Verify that the game over screen sprite has the show block when the “game over” message is broadcast.
- Use “stop other scripts”: Make sure you are using “stop other scripts in sprite” in your game over sprite, so that the current script is stopped.
- Check order of scripts : Make sure the show block is executed before the stop block, in the game over sprite.
By following these tips, you can manage to make sure your game stops working correctly, and prevent your game from getting glitches.
Stopping your game effectively in Scratch is a key part of making it a smooth and complete experience. By using the different stop blocks, broadcasts, conditions, and game over screens, you can create games that feel polished and fun to play. Remember to test your game thoroughly to catch any unexpected behaviors or bugs and always use logic to stop your game.
How to End a Game in Scratch
Final Thoughts
To stop a Scratch game, use the stop sign button located above the stage. Alternatively, you can program a ‘stop all’ block into your scripts; this will halt all running code. These are the primary methods for ‘how to stop the game in scratch’.
A common technique is to trigger the stop block through an event, like pressing a specific key or when a condition is met. The stop block directly stops all your scripts. You can use these to create controlled endings for your project.

