Taking in-game screenshots typically involves pressing a designated key (like Print Screen or F12) or using a game’s built-in screenshot function.
Have you ever had that perfect gaming moment you just had to capture? Maybe it was a stunning vista, a hilarious glitch, or an epic victory. Knowing how to take in-game screenshots is essential for sharing these experiences with others.
Different games have different methods, some offer simple keybinds, while others have dedicated photo modes with advanced controls. I will guide you to capture those memories.

How to Take In-Game Screenshots
Have you ever played a game and seen something so amazing you just had to share it? Maybe it was a funny glitch, a beautiful landscape, or an awesome moment of victory. That’s where screenshots come in! They let you capture those moments and save them to your computer or share them with your friends. Taking screenshots in games is like taking a photo in the real world, but instead of your camera, you use your computer’s special keys. Let’s explore how to do it on different devices and learn some cool tricks to make your pictures even better.
The Basics: Capturing Your Game
The most basic way to take a screenshot involves using the built-in features of your computer or game console. Think of it like having a hidden camera ready to go at any time. These methods are very user-friendly and you will probably use them the most often.
Using the Print Screen Key (Windows)
On a Windows computer, you’ll find a special key labeled “Print Screen,” “PrtScn,” or something similar. It’s usually located near the top-right of your keyboard. When you press this key, your computer takes a picture of your entire screen and saves it to your computer’s clipboard—an invisible place where your computer temporarily stores copied things. It doesn’t automatically save the picture as a file, you’ll need to paste it into an image editor.
Here’s how it works step-by-step:
- Start the game you want to take a screenshot of.
- When you get to the moment you want to capture, press the “Print Screen” key on your keyboard.
- Open an image editing program like Paint (comes with Windows), or a better one like Photoshop.
- Create a new, blank image.
- Press “Ctrl + V” on your keyboard to paste the screenshot from your clipboard.
- Now you can save your screenshot as a picture file, usually in formats like JPEG (.jpg) or PNG (.png).
Tip: Sometimes, pressing “Alt + Print Screen” will capture only the active window. This is handy when you have multiple windows open and just want the game to be in your screenshot.
Using the Windows Game Bar (Windows 10 and 11)
If you are using Windows 10 or Windows 11, you can use the built in Game Bar. This is a handy tool that provides shortcuts for game capture, recording, and more. It’s designed for gamers and it makes screenshotting even easier!
To use the Windows Game Bar:
- Press “Windows key + G” simultaneously. This will open the Game Bar overlay.
- Find the camera icon on the Game Bar. This is your screenshot button.
- Click the camera icon, or press “Windows key + Alt + Print Screen”. Your screenshot is now saved in the ‘Captures’ folder usually located within your Pictures library.
Using the Snipping Tool (Windows)
The Snipping Tool is another handy Windows tool that gives you more control over your screenshots. Instead of capturing the entire screen, it lets you select specific areas.
Here’s how to use it:
- Search for “Snipping Tool” in the Windows search bar and open it.
- Click “New” and select the type of snip you want (free-form, rectangular, window, or full-screen).
- Drag your mouse cursor to select the portion of the screen you wish to capture.
- The screenshot will appear in the Snipping Tool window where you can save it.
Taking Screenshots on a Mac
Mac users have a different way of taking screenshots that’s pretty easy and versatile. The main key combination involves “Command” (⌘), “Shift”, and a number key.
Here are the primary options:
- Command + Shift + 3: Takes a picture of the entire screen. The screenshot will appear on your desktop.
- Command + Shift + 4: Lets you select a specific area of the screen. When you press these keys, you will see a crosshair appear, then drag your mouse to select the part of the screen you want to capture. The screenshot will be saved to your desktop.
- Command + Shift + 5: Brings up a small toolbar at the bottom of your screen. You can choose to take a screenshot of the entire screen, selected window, or selected portion of the screen. You will also have options to record screen or customize capture preferences.
Taking Screenshots on Game Consoles (PlayStation, Xbox, Nintendo Switch)
Game consoles like PlayStation, Xbox, and Nintendo Switch have their own built-in systems for taking screenshots. Each console has a dedicated button or a combination of buttons for this purpose.
PlayStation (PS4 and PS5)
- Press the “Share” button on the controller.
- Select “Take Screenshot.” The screenshot will be saved to your Capture Gallery.
- You can also press and hold the “Share” button to take a screenshot quickly.
Xbox (Xbox One, Xbox Series X|S)
- Press the “Xbox” button on the controller.
- Press “Y” on your controller to take a screenshot. The screenshot will be saved to your Capture Gallery.
- You can also press and hold the “Xbox” button to bring up the overlay and then press “Y” to capture.
Nintendo Switch
- Press the “Capture” button (the square button with a circle in the middle) on the left side of the controller.
- Your screenshot will be saved to your Album, where you can view, edit and share it.
Advanced Techniques for Better In-Game Screenshots
Now that you know the basics, let’s look at some tricks that will help you take even better screenshots. You don’t need to be a pro to take impressive pictures of your games!
Using Built-in Game Photo Modes
Many modern games, particularly those with beautiful graphics and immersive worlds, have dedicated “photo modes.” These photo modes are like having a virtual camera that you can control with lots of different features.
In a photo mode, you typically get:
- Free camera movement: You can move the camera around to get the perfect angle, completely separate from the in-game character.
- Zoom and tilt adjustments: You can adjust how close you are to the subject and rotate the camera.
- Filters and effects: You may be able to add different visual styles, like black and white, sepia, or vignette effects.
- Depth of field control: You can focus on the main subject and blur the background. This creates a more artistic photo.
To use a game’s photo mode, look for an option in the game’s menus or settings. Sometimes it might be mapped to a specific button on your controller or keyboard. Explore it and see what it can do! The great thing about photo modes is that they often let you take really high quality screenshots, compared to the default screenshotting methods. These enhanced screenshots can be shared online, set as backgrounds, or used to create promotional content for game developers.
Hiding the User Interface (UI)
Sometimes, the user interface elements like health bars, mini maps, and button prompts can get in the way of your beautiful shot. Many games provide the ability to hide these elements. This often can be done using specific keybind or menu option, and differs game to game. Look for such an option within the game’s settings menu, typically in the “graphics” or “interface” settings. Hiding UI elements lets you take cleaner and more captivating screenshots, focusing on the game’s visuals.
Screenshot Resolution Settings
The resolution of your screenshot will impact how clear and detailed it appears. In general, higher resolution screenshots look better. Some games may allow you to adjust the screenshot resolution in the settings menu. If you are using the Print Screen key, the resulting resolution will be the same as your current monitor resolution. For optimal quality, try setting the in-game resolution as high as possible before you take a screenshot. A higher resolution picture will capture more detail and provide a better experience when sharing or using the screenshot.
The Importance of Framing and Composition
Even if the graphics of your game look amazing, the way you frame a picture can make a big difference in how impressive it looks. The goal is to make your screenshot visually appealing.
Here are some composition tips that are used in the real world by photographers that you can apply to your in game screenshots:
- Rule of Thirds: Imagine dividing your screen into nine equal sections using two horizontal and two vertical lines. Place key elements in your picture along these lines or at their intersections. This can create more balanced and dynamic shots.
- Leading Lines: Use lines in the game world (like roads, rivers, or paths) to guide the viewer’s eye towards the main point of your screenshot.
- Symmetry and Patterns: If a game has symmetrical elements (like architecture or landscapes), use them to create a balanced picture. Patterns are also great for making eye-catching screenshots.
- Avoid Clutter: Try to frame your shot with minimal distracting elements. This makes the main focus of your screenshot stand out.
Using Third-Party Software for Enhanced Screenshots
If you want even more control and options, there are third-party software options that are specifically made for taking screenshots and game recording.
Here are a few popular options:
- Nvidia GeForce Experience (for Nvidia Graphics Card Users): This tool comes with Nvidia graphics cards and allows you to capture screenshots with a hotkey or with a software tool. It also features shadowplay to capture previous gameplay moments. GeForce Experience supports various capture options, such as customizable hotkeys, instant replay, and video recording.
- OBS Studio: Though mainly used for recording and streaming, OBS is free and provides robust capture capabilities. With OBS, you have control over capture regions, frame rates, and more. OBS supports multiple sources, such as game captures, screen captures, and image overlays
- Fraps: Fraps is a popular, paid screenshotting tool known for its high capture quality and performance. With Fraps you can capture screenshots and videos and monitor your FPS in real time. Fraps is a paid application with a license to use.
- ShareX: This free, open-source application offers a range of screenshot and annotation tools that can come in handy. ShareX supports hotkey customizable capture, region capture, annotation, and sharing. It’s a powerful alternative for users looking for a free and feature rich tool.
Organizing Your Screenshots
Once you start taking lots of screenshots, it can get hard to keep track of them. Here are some tips to help you keep everything organized:
- Create folders: Create specific folders for each game you play, or for different types of screenshots.
- Rename files: Give your screenshots descriptive names, like “Battle with dragon,” “Sunset over castle,” or “Funny glitch.” This makes it easier to find what you are looking for.
- Use tags: Some file managers or image editors let you add tags to images. This can help when you search for screenshots based on certain characteristics.
- Cloud Storage: Use cloud storage services like Google Photos, Dropbox, or OneDrive. They automatically back up your photos, and make them easily accessible from any device.
Troubleshooting Common Issues
Sometimes, taking screenshots may not go as planned, and you could experience a few issues. Here are some solutions to those issues:
- Screenshot is all black: Some games may have graphics settings that interfere with screenshot capture. Try changing your graphics API or switching between windowed and full-screen mode and then take another screenshot.
- The Print Screen key is not working: Sometimes this key gets blocked by other programs. Try restarting your computer, and make sure no program is blocking it, like cloud storage software.
- Poor image quality: If your screenshot looks blurry or pixelated, make sure you are capturing the highest resolution possible. Check the game’s settings for options, or ensure you have chosen the optimal image format.
- Can’t find the screenshots: Use Windows search to search for your screenshot directory if you cannot find it. By default, screenshots taken with print screen are stored on your clipboard until you paste them. If you have used the Game Bar or other third-party tool, your screen captures will be saved to their specified folder.
Taking screenshots in video games is a fun way to capture exciting or beautiful moments and share them with friends. With the basic methods like using the Print Screen key or the Game Bar, you can get started quickly. When you use photo modes, third-party apps, or compose screenshots with the ‘rule of thirds’, your screenshots get a big boost. Try experimenting with the options available to you, so you can take some amazing photos of your games!
You should take gameplay screenshots with OBS – here's why and how to do it
Final Thoughts
To capture in-game moments, usually press the Print Screen key for a full-screen capture. The screenshot then saves to your clipboard. Paste it into an image editor to save the file.
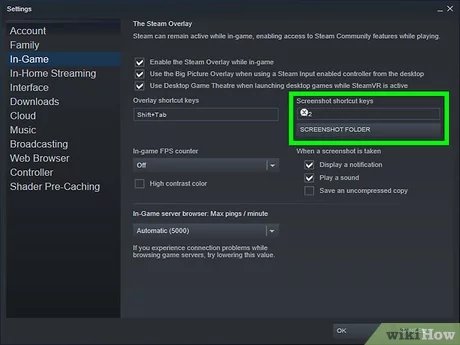
Alternatively, use the built-in game capture tools offered by many games or platforms like Steam. These typically provide convenient ways to quickly take and save images. Understanding how to take in game screenshots this way will improve your experience.
You can also utilize third party applications like Fraps for capturing. Make sure you check which method is suited to your requirement.

