To uninstall Rockstar Games Launcher, you can typically do so through the “Apps & features” or “Add or remove programs” section of your computer’s settings.
Have you decided it’s time to say goodbye to the Rockstar Games Launcher? Maybe you’re freeing up space or switching platforms. Whatever your reason, understanding how to uninstall Rockstar Games Launcher is quite straightforward. This guide will give you the simple steps.
We’ll walk you through locating the launcher in your system settings. Then we’ll show you how to remove it safely from your computer. This process is similar to uninstalling any typical application.

How to Uninstall Rockstar Games Launcher
Alright, so you’ve decided to say goodbye to the Rockstar Games Launcher. Maybe you’re making space on your computer, or perhaps you’re just not using it anymore. Whatever the reason, uninstalling the launcher is a pretty straightforward process. This guide will walk you through all the steps, making sure you get it done right. We’ll explore everything from the simple way to uninstall, to some extra steps in case things get a little tricky. So, let’s get started and get that launcher off your machine!
Understanding the Uninstall Process
Before we jump into the “how-to,” it’s good to know what’s actually happening when you uninstall software. The Rockstar Games Launcher, like any other program on your computer, has files and settings spread across different locations. Uninstalling correctly means removing these bits and pieces so they don’t clutter your system. We will do this by two main ways: the typical way via Windows settings and a more advanced method if problems occur.
The Easy Way: Uninstalling Through Windows Settings
This is the most common and generally the best way to get rid of programs. It’s simple and doesn’t require any special skills.
Step-by-Step Guide to Uninstalling via Settings
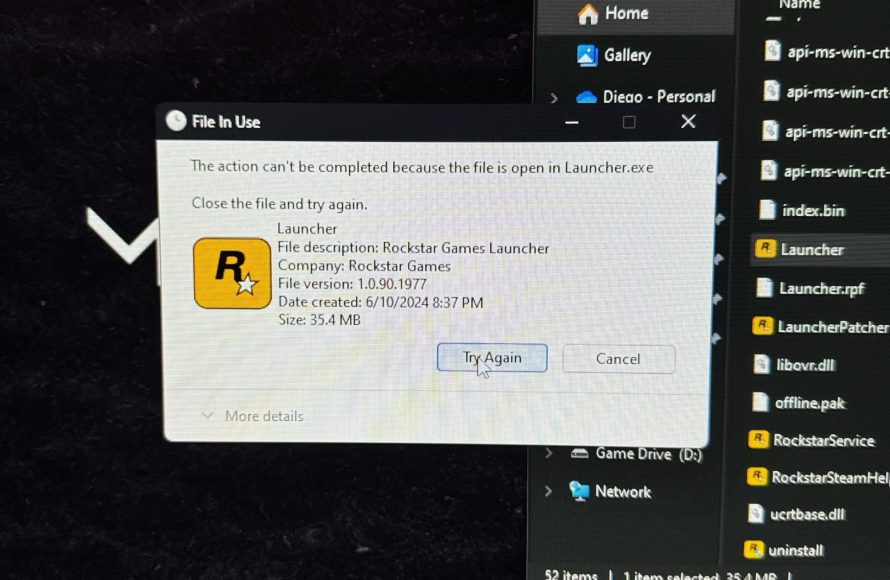
- Close the Rockstar Games Launcher: First, make absolutely sure that the Rockstar Games Launcher is not running. Look for its icon in the system tray (usually at the bottom-right corner of your screen near the clock). If you see it, right-click on the icon and select “Exit” or “Quit”. If you don’t see it there, you can press CTRL + SHIFT + ESC to bring up Task Manager, find “Rockstar Games Launcher” under the Processes tab, select it and then click “End task”. This will fully shut down the program and any related processes running in the background.
- Open Windows Settings: Click the Start button (the Windows logo usually located at the bottom-left corner). Then, click the gear-shaped icon to open the Settings menu. Alternatively you can press the windows key + i to directly open settings.
- Navigate to Apps: In the Settings window, click on “Apps.” Then select “Apps & features” in left sidebar of the newly open window.
- Find the Rockstar Games Launcher: Scroll down or use the search bar to find the “Rockstar Games Launcher” in the list of installed programs. The list of programs is usually in alphabetical order, so it should be easy to find.
- Uninstall: Click on the Rockstar Games Launcher entry. You’ll see an “Uninstall” button appear. Click on it.
- Follow the On-Screen Prompts: A confirmation window will pop up. Click “Uninstall” again to begin the removal process. The uninstaller might take a moment, and then a second confirmation message may show up. Just continue following the instructions it provides.
- Restart Your Computer: Once the process is complete, a restart is generally a good idea to complete the changes to the system.
That’s it! If all goes smoothly, the Rockstar Games Launcher should now be gone from your computer.
Troubleshooting: When the Easy Way Doesn’t Work
Sometimes, things don’t always go according to plan. If you run into problems while uninstalling through the Settings, don’t worry! We have some other options we can try to fix this problem. These methods are a bit more advanced, but they can be very effective for troubleshooting various issues related to uninstalling programs. Here are some things to try if the standard uninstall doesn’t work:
Using the Program’s Built-In Uninstaller
Most programs, including the Rockstar Games Launcher, often come with their own uninstaller application. This file is usually stored within the program’s installation directory, often in the location where the files of the game are stored.
Locating and Running the Uninstaller
- Go to the Installation Folder: Find where the Rockstar Games Launcher is installed on your computer. The default location is usually: C:\Program Files\Rockstar Games\Launcher. You can find the exact location by going to Settings > Apps > Apps & features, selecting Rockstar Games Launcher, and then clicking on “Advanced options”. You can find the installation folder path below the program name.
- Look for an Uninstaller: In the folder, search for a file with a name like “uninstall.exe” or something similar. There may also be other files with the word “uninstall” in its name, select the one which is clearly an executable application.
- Run the Uninstaller: Double-click on the file to run the uninstaller program. It’ll start a process very similar to what you saw when you did the uninstall via settings.
- Follow the Prompts: Just as before, follow the instructions it gives you, making sure to confirm any messages it might show.
- Restart Your Computer: Reboot after the uninstaller has completed its work, this can help to ensure that all the changes are correctly applied.
Using Third-Party Uninstaller Software
If even the built-in uninstaller doesn’t work, then you can use third party uninstaller programs. These programs are very effective at removing software and they ensure that any leftover files are also removed. Revo Uninstaller, IObit Uninstaller, and Geek Uninstaller are some of the popular choices that you can find online.
How to use third party uninstallers
- Install the Uninstaller: Download and install the uninstaller software on your computer from the official website. Follow their setup process carefully.
- Find the Rockstar Games Launcher: After the software is installed, open the third-party uninstaller program. It will show a list of all the installed programs on your system. Search or scroll through to find the Rockstar Games Launcher.
- Uninstall: Select the Rockstar Games Launcher entry. Usually these programs have two main uninstall options. The first method is a regular uninstall, which will first try to remove the program with its built in uninstaller. The second option is a deeper scan, which will scan for left over files and remove them as well. Try the first option if that does not work you can try the deeper scan method. Follow the instructions as they appear on screen, they are pretty clear and easy to follow.
- Follow the prompts: Complete the uninstallation steps by following the prompts as they are displayed on screen.
- Clean Up Leftovers: The uninstaller program may ask to perform an extra scan for leftover files. If given the option, it’s a good idea to perform that scan so that all associated files are removed. These files usually do not have impact on computer performance, but for cleaning purposes, it is recommended to remove these leftover files.
- Restart Your Computer: After everything is finished, reboot your computer.
Manual Removal (Use with Caution)
This method is the most complex and should only be used if all other methods have failed. Manually removing files can cause problems if you remove the wrong files, so use extra caution and double-check everything. Only use this as a last resort.
Manual Removal Steps
- Close the Launcher: Make sure the Rockstar Games Launcher is not running. You can do this via the Task Manager if you can’t close it normally.
- Show Hidden Files: You need to be able to see hidden files and folders to do this. To show hidden files go to file explorer, click on ‘View’ on the top menu and check “Hidden Items”.
- Delete Installation Folder: Go to the installation folder of the Rockstar Games Launcher. The default location is C:\Program Files\Rockstar Games\Launcher. If you see the installation folder here delete it.
- Remove User Data: User data and some settings are stored in another location. It is usually in: C:\Users\[Your Username]\Documents\Rockstar Games\Launcher. Delete this folder as well.
- Delete LocalAppData Folder: There might be some files stored in the local appdata folder. Go to the path: C:\Users\[Your Username]\AppData\Local and find any related Rockstar Games folders and delete them.
- Clean the Registry: This part is the most dangerous part, make sure you carefully and correctly perform this step. The registry is a very important part of windows and deleting the wrong thing in the registry might lead to issues and computer not working as intended. Make sure you back up the registry before trying to do anything. To backup the registry, open it by searching ‘regedit’ in the start menu, then right click on ‘Computer’ in the left sidebar and click on export. Then choose a safe place to save the registry backup file. Next open regedit and find registry keys by searching with CTRL + F and find any folders related to “Rockstar Games” and delete them. These folders are usually found in the paths HKEY_CURRENT_USER\Software and HKEY_LOCAL_MACHINE\SOFTWARE. Be very careful when doing this step.
- Empty Recycle Bin: Delete all the files you just removed from recycle bin, by emptying it.
- Restart Your Computer: Restart your computer to finish everything.
Once all those steps are done, your computer should not have any remaining parts of the rockstar games launcher. This is the hardest method, and if not performed correctly, it might lead to some computer issues, so do it with caution.
Verifying Successful Uninstallation
After you’ve gone through the steps, you should confirm that the launcher is really gone. Here’s how:
- Check the Start Menu: Search in the start menu for Rockstar Games Launcher. It should not appear in the results.
- Check Apps List: Open Settings > Apps > Apps & features and see if the launcher is still there. If not, then you have correctly removed it from the computer.
- Check Installation Folder: Look for the installation folder (usually C:\Program Files\Rockstar Games\Launcher). If it’s gone, that’s a good sign.
If you do all these steps, and you see that the rockstar games launcher is removed from all of the places, then the uninstall is complete.
Important Notes
- Game Installations: Uninstalling the launcher will not automatically uninstall the games you have installed through it. To uninstall the games, you will have to uninstall them from windows settings individually as you would uninstall other programs.
- Account Information: Your Rockstar Games account information is not stored on your computer. It’s on Rockstar’s servers. So, uninstalling the launcher doesn’t affect your account.
- Future Installation: If you plan to reinstall the launcher in the future, you can simply download it again from the official Rockstar Games website.
Remember, taking your time and carefully following the steps will help ensure a smooth uninstallation process. Don’t panic if something goes wrong, just double-check each step and try again.
You’ve now successfully explored different ways to get rid of the Rockstar Games Launcher. Whether you used the simple settings uninstall or had to use a more advanced method, you are now able to remove the launcher completely. With this detailed guide, you’re well-equipped to keep your computer tidy and clutter-free.
How to Uninstall Rockstar Games Social Club 100%
Final Thoughts
To uninstall Rockstar Games Launcher, first close the application completely. Then, navigate to your system’s control panel or settings app and locate the installed programs list. Find Rockstar Games Launcher on that list.
Click the uninstall option associated with the launcher. A wizard will guide you through the remaining steps. Follow its instructions carefully to remove the software.
The process is simple and quick. You should now have successfully uninstalled the Rockstar Games Launcher. If facing any issues, refer to the official support documentation for ‘how to uninstall rockstar games launcher’.

