To create a delay in Code.org Game Lab, use the setTimeout() function. This function pauses the code execution for a specified duration in milliseconds before running the given code.
Ever found yourself needing a pause in your game? You know, a moment where something happens after a short delay instead of instantly? Many beginners using code.org Game Lab wonder how to wait in codeorg game lab to accomplish that desired effect. It’s a common question and thankfully, the answer is pretty straightforward.
Using a simple command can create that brief pause. This allows for animations, timed events, or even just a break between actions that would normally occur immediately.

How to Wait in Code.org Game Lab
Have you ever been making a super cool game in Code.org Game Lab and wished you could make something wait a little bit before it happens? Maybe you want a character to pause before they jump, or you want a message to appear on the screen for a few seconds. Well, you’re in the right place! Learning how to create pauses, or “waits,” in your code is a very important skill for making your games more exciting and engaging. It’s like giving your game some breathing room, making sure the player isn’t overwhelmed with too much happening at once. We will dive into the different ways to make your game wait, and we’ll explain each method step-by-step.
Why Waiting Is Important in Game Development
Before we get into the “how,” let’s talk about “why.” Why is it even important to make your code wait? Think about your favorite video game. Does everything happen all at once, or is there a nice flow to the action? Usually, games use waits to do several important things:
- Controlling Game Pace: Waits allow you to control how fast your game progresses. You can make an action wait a bit before starting, giving the player time to react to what’s happening.
- Creating Dramatic Effects: Imagine a countdown timer, or a cool animation that slowly appears. Waits are essential for building suspense and dramatic effects.
- Synchronizing Events: If you want something to happen right after something else, you will probably need a wait to make that synchronization perfect and natural.
- Improving User Experience: If everything happens at the same time, the user might feel a bit overwhelmed. A well-placed wait can make the game more understandable and less chaotic.
Basically, waits make your games feel smoother, more intentional, and a lot more fun! Now that we know why they’re needed, let’s jump in to the different ways of creating pauses in your Code.org Game Lab project.
Using setTimeout for Basic Waits
The most common and direct way to make something wait in Code.org Game Lab is by using the setTimeout function. This function takes two main pieces of information: a function (which is the code you want to run later) and a number (which is how many milliseconds you want to wait). Milliseconds are tiny time units, where 1000 milliseconds equal 1 second. Let’s see an example:
Understanding the setTimeout Function
Here’s how the structure of setTimeout looks:
              setTimeout(function() {
                  // Code to run after waiting
              }, milliseconds);
Let’s break this down:
- setTimeout(): This is the function that tells your program to wait.
- function() { … }: This part is an “anonymous function.” It’s a little piece of code that you’ll run after the wait time is up. Whatever code you put inside these curly braces {} will run after the delay.
- milliseconds: This is how long (in milliseconds) you want the code to wait before it executes. Remember, 1000 milliseconds = 1 second.
Example: Making a Sprite Wait Before Moving
Let’s say you have a sprite named “mySprite” and you want it to move after a 2-second wait. Here’s how the code would look:
               var mySprite = createSprite(200, 200);
               mySprite.setAnimation("robot");

               setTimeout(function() {
                   mySprite.velocityX = 5; // Move the sprite to the right
               }, 2000); // Wait for 2 seconds (2000 milliseconds)
In this code, we first create a sprite and set its animation. Then we use setTimeout to move the sprite. Inside the setTimeout function, we set mySprite.velocityX to 5, which makes the sprite move to the right. The wait time of 2000 milliseconds means the sprite will stay still for 2 seconds before it starts moving.
Using setTimeout with Other Actions
You can also use setTimeout to wait before many actions like displaying text, changing sprite animations, or playing sounds. Let’s look at how we can do it.
            setTimeout(function() {
               text("Hello!", 200, 200);
             }, 1000); // show "Hello!" text after 1 second.

            setTimeout(function() {
               mySprite.setAnimation("walking");
            }, 3000) // Change sprite animation after 3 seconds
Handling Multiple Waits and Sequences
Sometimes you’ll need to do more than one wait. You might want a character to move, pause, then move again, or have several messages appear one after the other. In such cases, you can nest multiple setTimeout functions. However, be cautious when nesting as it can make your code harder to read if you do too many nests inside each other.
Chaining setTimeout Calls
Chaining setTimeout functions mean we put one inside another, making sure the second action doesn’t start before the first one finishes. Here is an example.
        var mySprite = createSprite(100,100);
        mySprite.setAnimation("alien");

        setTimeout(function(){
            mySprite.x = 300;  // Move sprite after 1 second
             setTimeout(function(){
                mySprite.y = 300;  // move sprite down after a 2 seconds wait from first wait.
            }, 2000)
        }, 1000);
In this example, the first setTimeout moves the sprite to the right after a 1-second wait. Inside the first setTimeout call, we have another setTimeout call, which moves the sprite down after a further 2 seconds. This means in total, the second move happens 3 seconds after the initial start of the game.
Be Careful with Too Many Nested setTimeout Calls
While nesting setTimeout functions is helpful, it can also make your code more complicated. If you have too many nested setTimeout calls, it becomes harder to read and understand your code and track the timings of each individual action. If you find yourself with many nested setTimeout, you should consider an alternative approach, which we’ll discuss in a later section.
Using frameCount for Wait Logic
Another technique to create waits is to use the built-in variable frameCount. frameCount keeps track of how many frames have been drawn since the game started. By using frameCount within the draw loop, you can create time-based actions, although it’s slightly more complex than setTimeout. Since the draw loop runs constantly, frameCount increase by one at each frame, meaning the higher the frameCount value, the more time that’s passed in your game.
Understanding the draw Loop and frameCount
Game Lab uses a draw loop which redraws the entire screen at every frame. This draw loop executes continuously while the game is running. frameCount automatically increases by one every time the draw loop runs. By checking the frameCount, we can make something happen at a specific point in time during our game.
The basic idea is to check if frameCount is equal or greater than a certain number. If it is, that means we’ve passed the time we want to wait, and we can execute a given action.
Implementing Waits Using frameCount
Here’s an example of using frameCount to create a wait before a sprite moves:
    var mySprite = createSprite(100, 100);
    mySprite.setAnimation("turtle");

    var waitTime = 100; // wait for 100 frames
    var spriteMoved = false; // Flag to ensure movement only occurs once

    function draw(){
      background("white");
        drawSprites();

       if (frameCount > waitTime && !spriteMoved) {
           mySprite.velocityX = 5;
           spriteMoved = true; // set the flag to true, so the movement code does not execute again.
        }
    }
In this code, we have a variable called waitTime, which is set to 100, meaning that the sprite will move after 100 frames. Inside the draw loop, we check if the current frameCount is greater than waitTime and that the movement code has not already executed by checking the spriteMoved flag. If both conditions are true, we set the velocity of the sprite to start it moving and change the spriteMoved flag to true which will ensure that this movement action will not execute again.
Adjusting Wait Time with frameRate
The exact amount of time that frameCount represents depends on the frame rate of your game. Code.org Game Lab uses a default frame rate of 30 frames per second. This means that for every 30 frames that pass, one second passes. If you change the frame rate, the number of frames needed for a wait of one second will change too. If you want to change the frame rate of your game, you can use the frameRate(number) function. Here is an example:
         frameRate(60); // set the frame rate to 60 frames per second
         var mySprite = createSprite(100, 100);
         mySprite.setAnimation("turtle");

         var waitTime = 60; // wait for 60 frames (1 second at 60 fps)
        function draw(){
             background("white");
             drawSprites();
           if (frameCount > waitTime ) {
               mySprite.velocityX = 5;
          }
      }
In this case the frameRate is set to 60. Then we set waitTime to 60 frames. At 60 frames per second, 60 frames equals 1 second. Thus, the sprite will move after a 1 second wait.
Pros and Cons of Using frameCount
Let’s talk about the good and not-so-good aspects of using frameCount for creating waits:
- Pros:
- More precise timing: When you are dealing with multiple actions happening simultaneously, frameCount can provide more accurate control over the timing.
- Good for continuous actions: For actions that need to happen every few frames, rather than once, using frameCount can be more appropriate.
- Cons:
- Requires constant checking: You need to use a condition statement inside the draw loop to make frameCount work, which can sometimes make the code more complex and a bit harder to read.
- Frame rate dependent: If you change the frame rate, you also need to change all the values for waits, which can be a bit tedious.
Using Variables and Flags for Timing Control
When dealing with many different waits and actions, simply using setTimeout or frameCount can sometimes be difficult to manage. An efficient method to create waits is to combine the use of variables and “flags” (which are boolean variables that you set as true or false). These flags help your program remember if certain parts of your code have already been executed or not.
Setting up Timer Variables
Let’s start with an example using a timer variable. First, you need to create a variable to track the timing of your actions. This could be in terms of frameCount or in milliseconds.
      var mySprite = createSprite(100,100);
      mySprite.setAnimation("bug");
      var timer = 0;
      var waitTime = 100; // how many frames to wait
       var spriteMoved = false;


      function draw(){
           background("white");
           drawSprites();
           timer++;

          if(timer >= waitTime && !spriteMoved){
             mySprite.velocityX = 5;
             spriteMoved = true;
            }
        }
In the above example, we create a variable called timer and set it to 0. Inside our draw loop, we increase timer by one in each frame. Then we check if the value of timer is greater than our defined waitTime and that the action has not already been executed using a boolean spriteMoved variable. If both of these conditions are true, then we execute the action and set the flag spriteMoved to true so this block does not execute again.
Using Flags to Control Actions
Boolean flags are variables that have only two values: true or false. Flags are extremely useful to keep track of whether an action has already happened or not. Let’s see an example:
     var messageDisplayed = false;
     var waitTime = 150;
     var timer = 0;

     function draw(){
          background("white");
           timer++;
         if(timer >= waitTime && !messageDisplayed){
           text("Game Over", 200,200);
           messageDisplayed = true;
         }
     }
In the code above, we create a flag variable named messageDisplayed and initialize it to false. Inside the draw loop we track a timer as before. When the timer is greater than our defined waitTime and the messageDisplayed is still false (meaning the message has not been displayed yet), then we display the text and change the messageDisplayed flag to true. So, if the timer condition is satisfied again on subsequent draw loops, the code will not display the message multiple times, because messageDisplayed is now set to true.
Combining Timers and Flags for Complex Sequences
Combining timers and flags is a powerful technique that can help you manage many waits and actions in a clear and controlled way. You can set multiple flags to control a sequence of actions in your game, making sure things happen in the right order. Using multiple flags you can create a complex set of sequential actions.
Let’s look at an example that combines timers and flags for multiple sequential actions.
     var mySprite = createSprite(50, 100);
     mySprite.setAnimation("cat");
     var timer = 0;

     var action1Done = false;
     var action2Done = false;
     var waitTime1 = 100;
     var waitTime2 = 200;

     function draw() {
        background("white");
        drawSprites();
       timer++;

       if(timer >= waitTime1 && !action1Done){
           mySprite.x = 200;
          action1Done = true;
        }
       if(timer >= waitTime2 && !action2Done){
            mySprite.y = 200;
            action2Done = true;
         }
    }
In this code, we define two boolean flags called action1Done and action2Done which are initialized as false. We also define two variables called waitTime1 and waitTime2 for different waiting times. Inside the draw loop, we check two different conditions separately. First, if timer has reached waitTime1 and action1 has not been executed yet, then we execute the first action and we change action1Done to true. Similarly, if timer has reached waitTime2 and action2 has not yet been executed, then we execute the second action and set action2Done to true. This ensures that these action will not be executed again.
Using this method, you can create complex series of actions which will happen in a controlled manner. Remember that you need to carefully manage your flags to ensure actions do not execute more than once.
Practical Applications of Waits in Games
Now that we’ve learned how to create waits, let’s see how we can use this in different situations and common game scenarios:
Creating a Countdown Timer
Let’s say you want to show a countdown before the game starts. You can use setTimeout or frameCount to do that. Here’s a basic code snippet using setTimeout:
        var counter = 3;
        function showCountdown() {
            if (counter > 0) {
              text(counter, 200, 200);
              counter--;
              setTimeout(showCountdown, 1000); // wait 1 second, then recursively call the function again.
            } else {
               text("GO!", 200, 200);
               // Start the game
              }
        }

        showCountdown(); // Start the countdown
In this code, the showCountdown function calls itself every second until the counter becomes 0. Then the “GO!” text is displayed and the game could start.
Adding a Delay Between Levels
When the player completes a level, you might want to add a short pause before starting the next one. Here is how you can do it:
         var levelCompleted = false;

          function draw(){
            background("white");

             if(levelCompleted){
             text("Level Completed", 200, 200);
              setTimeout(function(){
               levelCompleted = false;
               // Load next level
            }, 2000)
          }
        }


          // when level is completed set the variable to true
         levelCompleted = true;
Creating a Splash Screen
Many games show a title or logo when the game first loads. Here is how we can use waits to implement this functionality.
      var splashScreen = true;
      var timer = 0;
      var waitTime = 200;

      function draw(){
        background("black");
          if(splashScreen){
               textSize(30);
                fill("white");
            text("Awesome Game Title!", 100, 200);
            timer++;
            if(timer > waitTime){
               splashScreen = false;
             }
           } else {
              // Draw Game elements
              textSize(12);
               fill("black");
              text("Welcome To the Game", 100, 200);
            }
        }
In this example, we show a title when splashScreen is set to true. A timer is used to set a delay. After the delay, we set splashScreen to false and the game starts normally.
These examples show that you can use waits in a huge variety of ways. You can creatively add them to your games and make them more interesting for your players.
By combining these techniques, you can bring a very high level of polish to your games, making them more fun and more professional in terms of their presentation. Remember that timing is everything, and well-placed waits will make your game experience much better.
So, as you continue to develop your games, think about how you can add waiting periods strategically to enhance player experience and create a high-quality polished game. The possibilities are endless, and with some practice, you will become a pro in using waits in your game development journey.
Continue practicing, and experimenting with your projects, you’ll find the right way to use waits in your game! Happy coding!
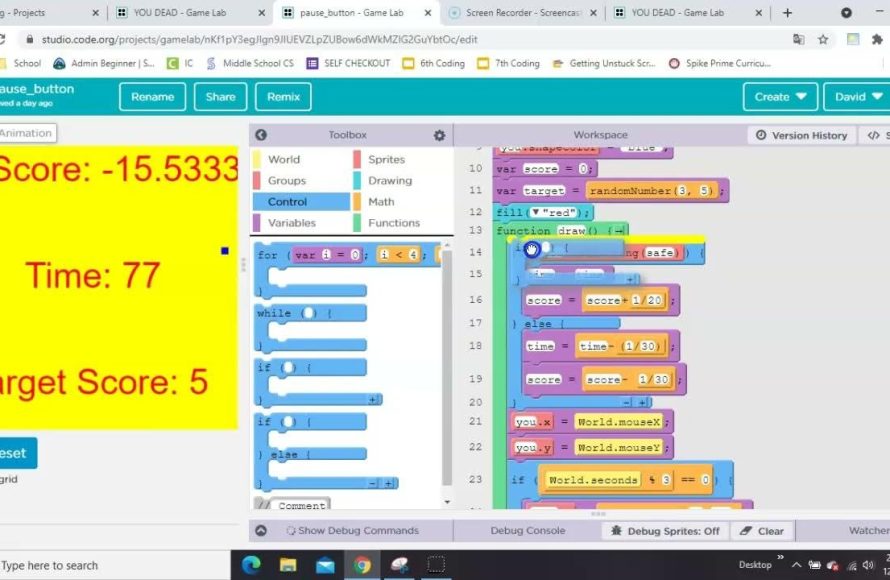
Countdown Timer in Game Lab on Code.org
Final Thoughts
To wait in Code.org Game Lab, you must use the setTimeout() function. This function lets you delay actions for a specific duration in milliseconds. You provide a function to execute and the waiting time.
Remember that setTimeout() only pauses a single event or action. It does not cause your whole program to stop. Effective use of this function is key to correctly creating time-based mechanics in your game. So, that’s how to wait in codeorg game lab.

