
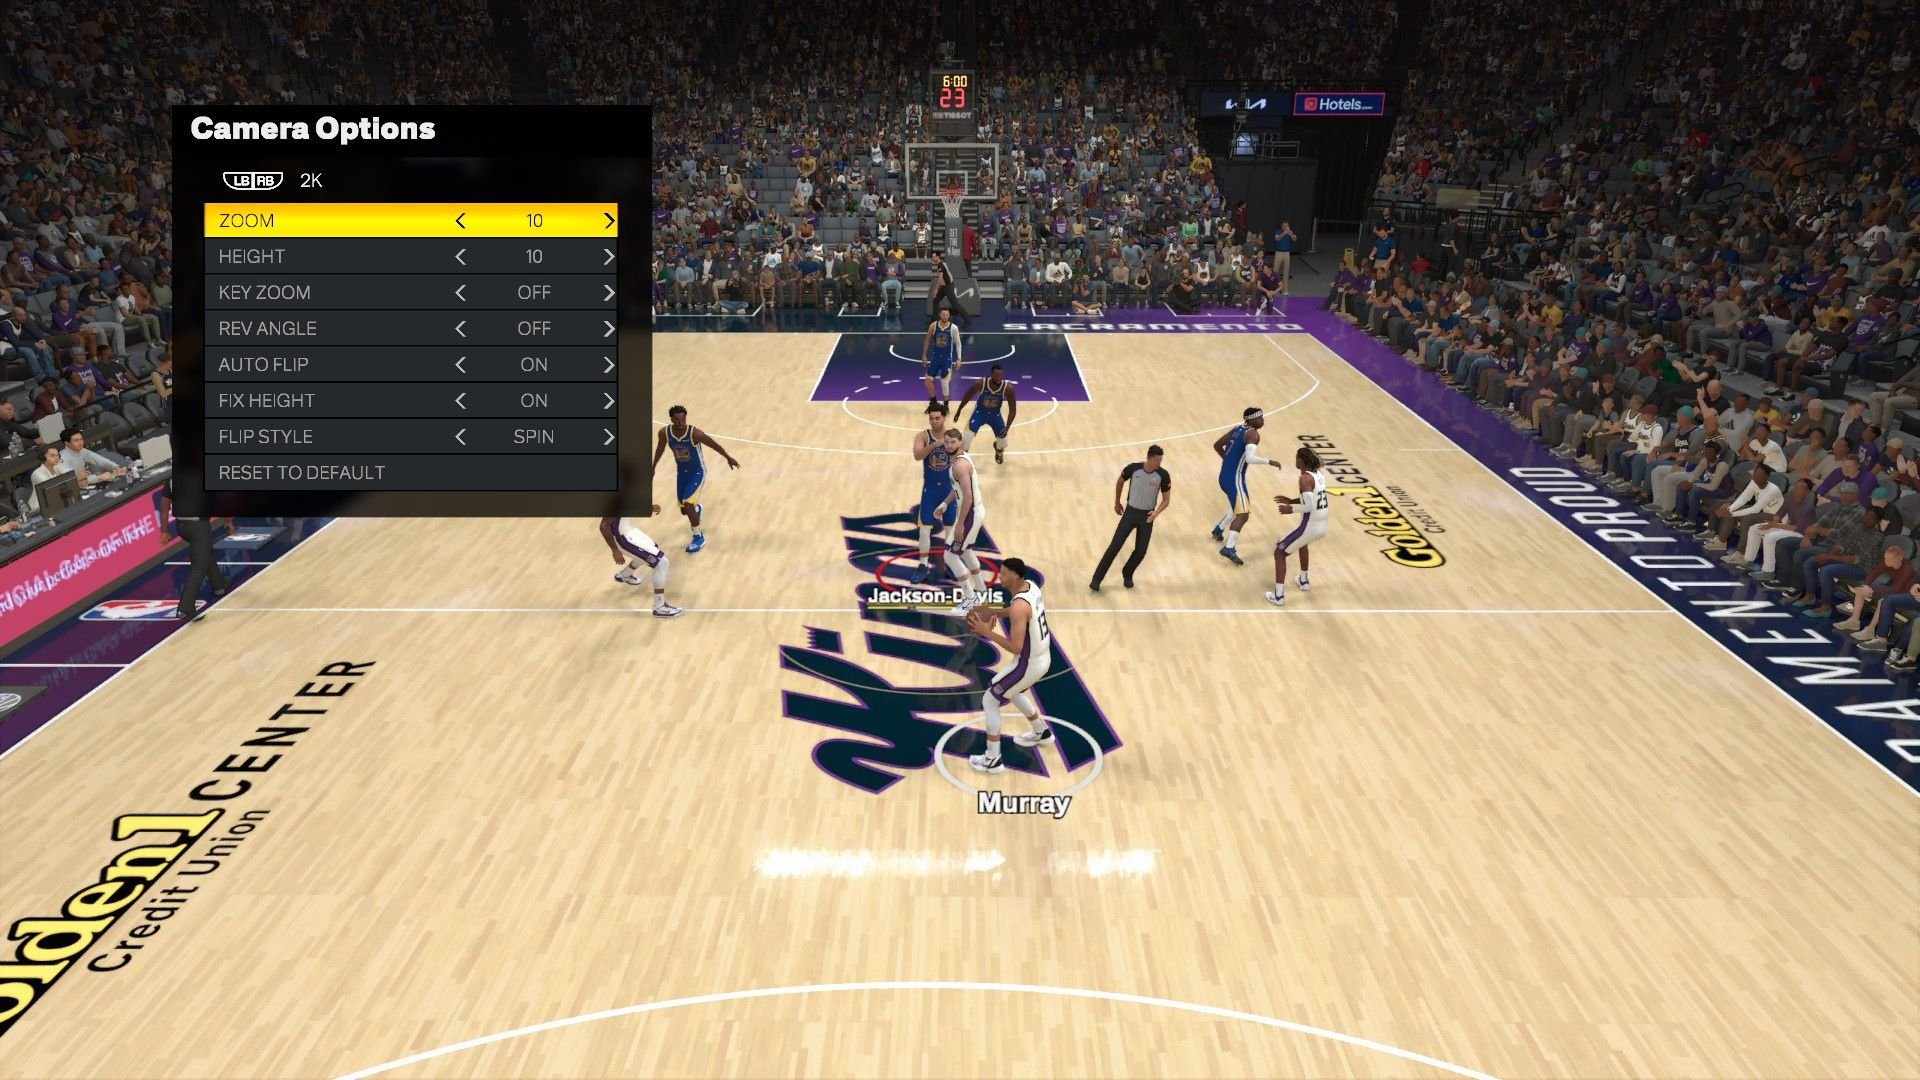
The best NBA 2K25 camera settings depend on personal preference but generally, players often adjust height, zoom, and angle for optimal court view and gameplay.
Finding the right perspective in NBA 2K25 can completely change how you play the game. The default camera angles might not suit everyone.
Experimenting with different NBA 2K25 camera settings will allow you to find the view that gives you the best chance to succeed. Tweak these settings to your liking and enjoy the game.

NBA 2K25 Camera Settings: Finding Your Perfect View
Alright, hoops fans! We all know how important it is to see the court clearly in NBA 2K25. Just like a real basketball player needs to have good vision, you need the right camera settings to play your best. Choosing the correct camera angle can be the difference between sinking a three-pointer and air-balling it. This guide will help you understand all the different camera options in NBA 2K25 and show you how to find the perfect setup for your game. Let’s dive in!
Understanding the Basic Camera Options
NBA 2K25 offers several default camera views to choose from. Each has its own way of showing the game, and they each cater to different styles of play. Let’s take a look at some of the most popular ones:
2K Camera
The 2K camera view is the standard view you see when you first start playing. It gives you a good overall view of the court, showing both your player and the action around you. It’s a good starting point for many people because it’s balanced and easy to get used to. You can see what’s happening on the court and it’s pretty easy to handle the controls in this mode. It’s a good camera for beginners who are just starting out.
Broadcast Camera
The broadcast camera tries to make it look like you are watching the game on TV. It has a more dramatic view with a lower angle, just like a broadcast camera during an NBA game. This view is great for when you want to feel immersed in the game, but can be a little harder to play with for some people. The camera sometimes cuts to different angles during action sequences and might make it a bit less consistent in comparison to the 2K view. However, if you are looking for an authentic viewing experience, try this view out.
Baseline Camera
If you prefer a side-on view of the action, the baseline camera is your pick. You are looking from the sideline and are mostly seeing the court from the side, instead of behind your player. It is useful for getting a good sense of how players are moving. But, it may not be ideal for players who rely on seeing the basket from a direct angle. This camera is preferred by people who like to play a lot of post-up style basketball.
Drive Camera
The drive camera focuses on your player and gives you a close-up view. It is mostly zoomed in, so you may not get a good view of the court as a whole. This camera is best for the players who are good at dribbling and attacking the basket. If you are someone who likes to drive to the lane and make quick moves, then this is a suitable camera for you.
MyPlayer Camera
The MyPlayer camera angle is specifically designed for the MyCareer mode. It offers a more intimate view that focuses on your created player. The view is typically closer and moves with your player, giving you a better feel for how your player is performing on the court. This camera angle works really well if you are more invested in your player and want to feel like you are really controlling the star player.
Customizing Your Camera Settings
The pre-set cameras are a great start, but sometimes you need to adjust to make them fit your specific playstyle. NBA 2K25 lets you change some camera settings. Here’s how you can fine-tune your view:
Camera Height
The camera height adjusts how high above the court your view is positioned. A lower camera height puts you closer to the action, while a higher one gives you a broader overview. If you’re having trouble seeing players over bigger defenders, try raising the camera. On the other hand, if you like feeling close to the action, lowering the height will be beneficial for you. You may need to experiment with various settings to find one that suits your taste and playstyle.
Camera Zoom
The camera zoom dictates how far in or out the camera is from the court. A closer zoom can make the game feel more intense. A further zoom helps you see more of the court, which is particularly helpful if you need a broader view. Adjust the zoom if you find it hard to react to plays on time, or if you want to feel more immersed in the game.
Many people also find that adjusting zoom can really improve the way they play and the scores they achieve in the game, so make sure to play around with the settings until you find the perfect one.
Camera Angle
The camera angle changes the perspective from which you view the court. You might want a view that’s more head-on or one that’s more from the side. Experiment with different angles to find the one that feels most natural to your eyes. Sometimes, even the smallest adjustment to the angle can help you get a much better view of the playing field.
Camera Swivel Speed
This setting determines how quickly the camera moves when you’re moving your player. A faster swivel speed makes the camera feel more responsive. But, if it’s too fast, it could also make you feel disoriented. Slower speeds can feel a bit sluggish. You should adjust this setting to be quick enough, but not so fast that it makes you lose focus.
Camera Shake
Camera shake adds a small amount of movement to the camera when the action intensifies. This effect aims to make the game feel more dynamic and realistic, and it makes the game more action-packed. Some people enjoy the extra energy, while others find it distracting. If you feel that it makes you lose focus, you can always reduce or completely remove the shake effects. Play around with the slider to see which level you like best.
Advanced Camera Tips for NBA 2K25
Once you’ve gotten the hang of the basics, here are some more tips to fine-tune your view for NBA 2K25:
Consider Your Position
The camera setting that you need depends heavily on the position that you play on the court. If you are a point guard, you probably want a high, zoomed out view so that you have a better idea about all the players on the court. This helps you to make good passes and execute plays well. On the other hand, if you play a post position or shooting guard, a camera that focuses more on your player, and slightly closer, can be more advantageous for you.
- Point Guards: Opt for a higher, zoomed-out view to see the whole court.
- Shooting Guards: A slightly closer view, with good focus on your player.
- Small Forwards: A balanced view that allows good perimeter and interior vision.
- Power Forwards/Centers: A lower view, with a focus on the paint area.
These are some generalized tips, but you can always tweak the camera settings to your particular preferences for your specific playstyle.
Experiment with Different Settings
The only real way to find out what’s best for you is to try different settings. Don’t be afraid to change things up and see what works. There are so many settings combinations, that one of them is bound to help you play better. Try out different combinations and try changing different values within these combinations to find what you need.
Ask for Advice
If you’re still not sure, try asking other players. There are many online communities where you can find tips and advice for camera settings in NBA 2K25. Join different forums, groups and discord servers and ask players for the best camera settings. Many people are happy to share the settings they use, and some might even have configurations that work well for you.
Adjust Camera Settings Based on Game Mode
You might want a different camera setting for a MyCareer game than you do for a quick play game. If you are playing a more casual mode, you might like a more exciting and dynamic view, so experiment with a faster swivel speed or higher camera shake. On the other hand, if you are playing a MyCareer game and are very invested in your player, then you may want a closer camera so that you are more engrossed in the game. Make different configurations for different modes, and try using them in different modes to see if the configuration you are using actually works.
Popular Camera Setups and Their Pros & Cons
Let’s explore some commonly used camera setups and weigh their pros and cons:
The “Competitive” Setup
Many competitive players like a high camera, zoomed-out, with no camera shake and a medium camera swivel speed. This lets them see the whole court easily, reacting to the plays much more quickly. But, some people find this set-up to be a little too detached from the action, and find the game less immersive.
- Pros: Excellent court visibility, easy to react to plays, good for playmaking.
- Cons: Can feel less immersive, not ideal for close-up action.
The “Immersive” Setup
Some people like a low view with moderate camera zoom and moderate camera shake. They prefer to view the game in a more engaging fashion. This view puts you right in the middle of the action, but sometimes, you may find that it limits your vision. Make sure that if you use these settings, you are comfortable with a lower level of view of the court.
- Pros: Exciting and engaging, good for personal plays, feels more like watching a live game.
- Cons: Reduced court visibility, can make playmaking more difficult for some.
The “Balanced” Setup
The balanced setup uses the standard 2k camera, and it changes the settings a little to be slightly further out, with a medium camera height. This set up tries to strike the right balance between the immersive and competitive view. It tries to give you a good view of the court and makes you feel like you are close to the action.
- Pros: Good mix of both visibility and immersion.
- Cons: Not as good for competitive play as the “competitive setup”, not as immersive as the “immersive setup”
How to Change Your Camera Settings
Changing the camera settings in NBA 2K25 is simple. Here is how to do it:
- Launch NBA 2K25 and go to the main menu.
- Go to the options menu.
- Find the “camera” settings.
- You’ll see options for different camera presets. You can select one of these, and then adjust it.
- You can customize settings like height, zoom, angle, swivel speed, and shake.
- Experiment with different settings, and choose the settings that suit your playstyle.
- When you find something that works for you, save the settings.
Choosing the right camera settings in NBA 2K25 can significantly help your gameplay and make the game more enjoyable. The best settings really depend on your preferences, so spend some time experimenting. Don’t be afraid to tweak the settings as you play different game modes and use different positions, so that the camera is always in accordance with your needs and what you are trying to accomplish.
Remember, what works for one person might not work for you. So be patient, try different things, and most importantly, have fun! With the right camera view, you’ll be draining those three-pointers and making the slickest assists in no time.
BEST CAMERA SETTINGS IN NBA 2K25 😳
Final Thoughts
Finding the right camera view significantly impacts your game. Experiment with different options like 2K, broadcast, or the sideline view to see what best fits your style. A custom camera can offer more granular control for precision.
Adjusting the height and zoom of your NBA 2K25 camera settings can make a huge difference. Find settings that provide you the ideal court awareness. Test various setups during practice mode to perfect your setup.
Ultimately, optimal NBA 2K25 camera settings depend on personal preference and play style. These settings improve your gameplay experience. Try varied settings until you find the one that is best for you.

