
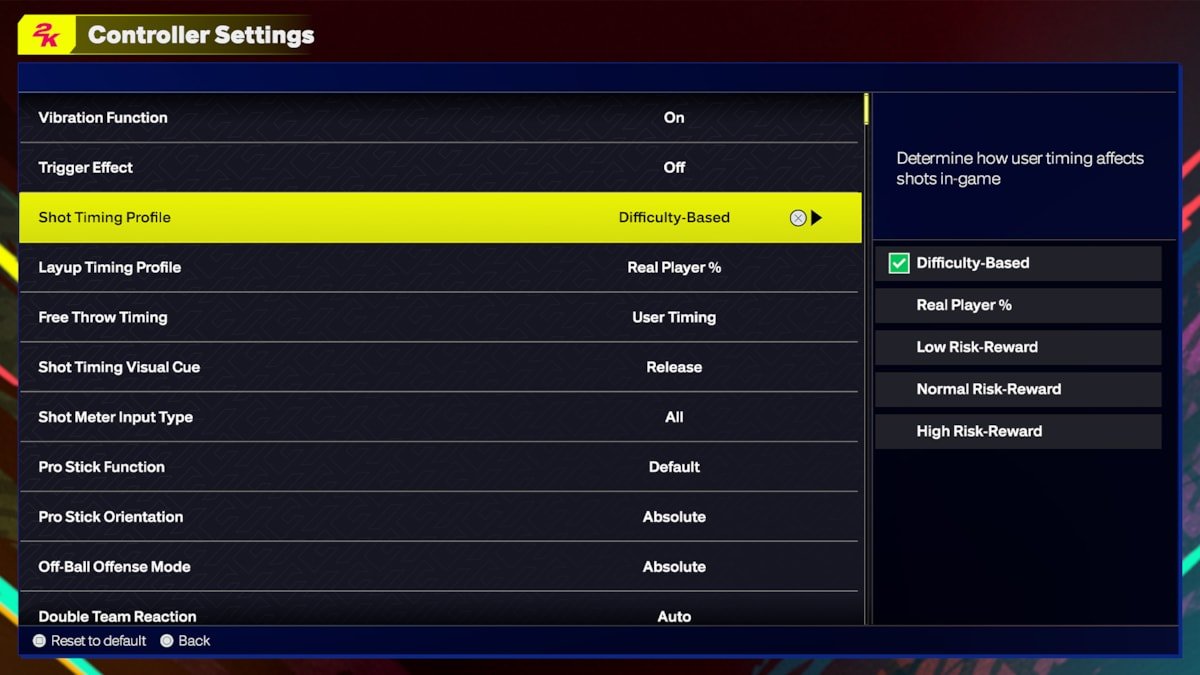
NBA 2K25 controller mappings vary slightly based on your platform (PlayStation, Xbox, PC), but generally involve triggers for shooting, buttons for dribbling, and sticks for movement.
Want to dominate the court in NBA 2K25? Understanding the controller setup is key, whether you are a seasoned pro or a rookie. Figuring out the perfect configuration for NBA 2K25 controller mappings can change how you play the game.
Knowing which button does what lets you execute the moves you want without delay. This improved control will allow you to make the big plays. Getting these mappings down will greatly benefit your game.

NBA 2K25 Controller Mappings: Your Guide to Domination
Okay, hoop fans, let’s talk about the real secret weapon in NBA 2K25: your controller. Whether you’re a seasoned pro or just starting your journey to becoming a basketball legend, understanding how your buttons work is super important. It’s not just about knowing which button makes you shoot; it’s about knowing how to control every dribble, pass, and defensive move with the perfect touch. In this guide, we’ll break down all the NBA 2K25 controller mappings, making sure you’re ready to take on any challenge the game throws your way.
Understanding the Basics: Movement and Camera
Before we dive into the fancy dribbling and shooting, let’s nail the fundamental movements. How you move your player and how you see the court are the first things you need to get right.
Left Stick: The Key to Player Movement
Think of the left stick as your player’s feet. Pushing it in any direction moves your player on the court. It’s how you run, dribble, and maneuver around opponents. Here’s a breakdown:
- Push forward: Run up the court.
- Push backward: Move down the court.
- Push left or right: Move sideways. This is great for getting around defenders.
- Push diagonally: Move in a slanted direction, which is handy for tricky moves.
Practicing smooth movement with the left stick is crucial. Don’t try to sprint everywhere. Sometimes, a controlled, slower approach is best to avoid turnovers. The left stick is also your tool for navigating the menu and making selections, so get comfortable with using it.
Right Stick: Camera Control & Player-Specific Actions
The right stick is like your eye on the court, most of the time. It’s also where some special player moves live. How it works depends on the game mode and what your player is doing.
- Camera Movement: Primarily, moving the right stick allows you to change the camera angle during gameplay. You can look around a bit, but the focus is mostly automatic.
- Pro Stick (Offense): When you’re on offense, the right stick changes into your “Pro Stick”. This lets you perform different types of shots and layups, which we will go through later.
- Defensive Moves (Defense): While on defense, the right stick might activate specific defensive actions, like hands-up defense or applying pressure.
Note that the exact functions of the right stick can change depending on the situation, which is why understanding the context is key.
Offensive Arsenal: Dribbling, Passing, and Shooting
Now that we’ve got movement down, let’s explore the fun stuff – how to score! Getting your dribbling, passing, and shooting mechanics down can really take your game to a whole other level.
Dribbling: Creating Space and Breaking Ankles
Good dribbling keeps defenders guessing and creates openings. Here are the most important dribbling controls:
- Right Trigger (RT/R2): Pressing and holding this makes your player sprint. Remember, sprinting isn’t always the answer. Too much can make you lose control.
- Left Stick & RT/R2: Combine the stick and the trigger for speed bursts, quick direction changes, and drive moves toward the basket.
- Right Stick (Pro Stick): Flicking the right stick in different directions performs specific dribbling moves. A quick flick left-right might get you a crossover, for example.
- B (Circle on PlayStation): Pressing the B button (or Circle on PlayStation) while moving will perform a behind-the-back dribble, which can help you shake defenders.
- A (X on PlayStation): Holding A while moving helps you keep the ball low. This makes it harder for defenders to steal the ball from you.
Experimenting with different dribbling moves in practice mode is great to figure out what works for you. Don’t be afraid to try different stick movements and see what results you get.
Passing: Finding the Open Teammate
Basketball is a team sport, and passing well is crucial. Here’s how to get the ball to your open teammates:
- X (Square on PlayStation): The basic pass button. Tapping it will pass to the nearest teammate.
- A (X on PlayStation): Tap this for a bounce pass, which can sometimes avoid defenders.
- Y (Triangle on PlayStation): Tap for a lob pass, which is handy for alley-oops or passes over defenders.
- Hold A, X, or Y (Square, X, Triangle on PlayStation) & use Left Stick: Holding a pass button while aiming with the left stick selects the receiver. This allows you to pass to the player of your choosing.
- LB (L1 on PlayStation): This is for icon passing. When you tap this, player icons show up. Choose the teammate you want to pass to by tapping their button icon.
- RB (R1 on PlayStation): This activates a “fake pass,” which sometimes can get a defender to move so you can drive.
Practice passing while on the move, and always look for the open man. A good pass can create a scoring chance faster than dribbling can.
Shooting: Finding the Sweet Spot
This is what the game is all about – scoring points. Here’s how to make those shots:
- Square (X on PlayStation): This is your basic shot button. Tapping it will attempt a jump shot.
- Square (X on PlayStation) with Timing: Holding the shoot button and releasing it at the right moment is key. The shot meter on screen helps you with this. Release at the peak of your player’s jump to get a “green” release for the most accurate shot.
- Right Stick (Pro Stick): The right stick, while shooting, lets you control your shot type and aim.
- Pushing up: You’ll take a traditional jump shot.
- Pushing down: Can attempt a step-back jumper or a runner.
- Pushing left or right: Can pull off hop steps or fadeaways.
- Layups: Driving to the basket and tapping the shoot button (Square or X on PlayStation) or using the right stick will perform a layup.
- Dunks: When running toward the basket, a quick press and hold of the right trigger while pushing the right stick will initiate a dunk. Different directions with the right stick will get you different dunk types.
Shooting, more than anything, needs practice. Figure out your go-to moves and get comfortable with the timing. Each player has a slightly different timing for their shot release, so learn them individually.
Defensive Strategies: Stealing, Blocking, and Rebounding
Defense wins championships, as the saying goes. Here’s how to keep your opponents from scoring:
Defensive Movement and Stance
Positioning is everything. Here’s how to move around on defense:
- Left Stick: Just like on offense, use the left stick to move your player around the court.
- Left Trigger (LT/L2): Hold this to go into a defensive stance, which helps you stay in front of the ball handler.
Staying in your stance and moving your feet quickly is important to stop your opponents’ drives.
Steals and Defensive Pressure
Stealing the ball can create fast break opportunities. Here’s how to get those steals:
- Square (X on PlayStation): Tap this when near the ball handler to attempt a steal. Be careful not to steal too much, as it can cause a foul.
- Right Stick: Can also be used to attempt a steal. This works better when timed well.
When trying to steal the ball, be patient and look for the right opportunity. Stealing when the ball is loose can make the difference.
Blocking and Rebounding
Stopping the other team’s shots and getting the rebound is vital. Here’s how to block and rebound:
- Y (Triangle on PlayStation): This is the button for blocking. Press this when an opponent shoots near you to attempt a block. Timing is everything.
- Y (Triangle on PlayStation): This button is also for rebounding. When a shot is missed, use this to try and grab the ball. Position is very important here, too.
- Left Stick and RT/R2: Move into position for the rebound while holding RT/R2 to make sure you get the best jump.
Rebounding takes practice. You should try and get in front of your player when you try to get the ball.
Advanced Controls and Techniques
Once you get the hang of the basic controls, you can start using advanced techniques. These will make you a more competitive player.
Post Moves
If you like playing down low, post moves are essential:
- Left Stick in the Post: The left stick combined with the right stick lets you make different post moves. Practice using these.
- Right Stick in the Post: The right stick also lets you hook and fade when in the post.
- B (Circle on PlayStation) while in post: This will cause you to post up, so you can attempt a move.
- A (X on PlayStation): Tap A to spin around the defender.
- Square (X on PlayStation): Tap the shoot button for a jump hook or a fadeaway in the post.
Post moves take a lot of practice. They are useful to score down low or create space for a pass.
Off-Ball Movement
Moving around when you don’t have the ball is very important:
- Left Stick: You can use the left stick to move when off-ball, trying to find a spot on the court where you can get open.
- RB (R1 on PlayStation): Tapping this button and using the left stick will allow you to cut, which is moving to the basket when off-ball.
Off-ball movement can get you easy scoring opportunities, if you learn how to use it.
Team-Specific Controls
In certain modes, you can access team-specific plays:
- D-Pad: The directional pad often allows you to call plays for your team in certain game modes.
- L1/LB (L1 on PlayStation) then D-Pad: Tapping L1 or LB and then using the D-Pad allows you to call specific plays for your team.
Team-specific controls can help you move the ball and have the opportunity to score more. Learn them to get the most of your team.
Other Important Controls
Here are some other important controls to keep in mind:
- Start/Options Button: Pauses the game and brings up the options menu.
- Back/Share Button: Can bring up the in-game menu, where you change your settings.
Knowing these controls lets you navigate the game more efficiently.
Remember that practice makes perfect. Don’t be discouraged if you don’t get it all right away. Play in practice mode, try out different moves, and you’ll be on your way to becoming an NBA 2K25 pro in no time. Learning the controller mapping is the first step to game domination!
NBA 2K25: How to Find & Change Controller Inputs (Change Controller Buttons)
Final Thoughts
Ultimately, optimizing your ‘NBA 2K25 controller mappings’ is vital for on-court success. A personalized layout can significantly improve your gameplay. Experimenting with different button assignments will help you find what works best.
Consider the way you naturally play to determine where to place crucial actions. Understanding the intricacies of control will help you gain a competitive edge. These adjustments must be done to play like a pro.

