
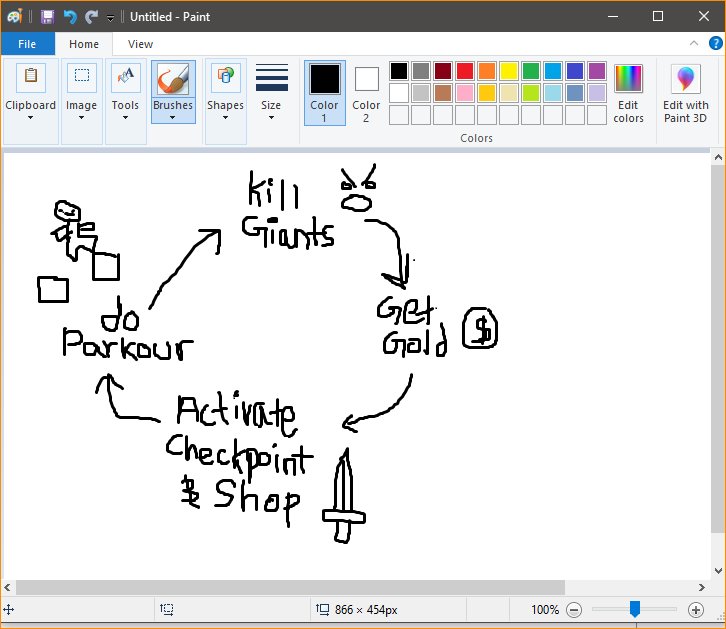
The core of Roblox game loop design revolves around a continuous cycle: processing user input, updating game state, and rendering the visual output.
Ever wonder how your favorite Roblox game keeps the action flowing so smoothly? It all comes down to the game loop, which is a fundamental concept. The magic lies in how this continuous cycle operates and dictates the experience.
Understanding roblox game loop design is key for developers. It is the very heartbeat that drives your creations forward. Getting this right is critical to a smooth and engaging player experience.

Understanding Roblox Game Loop Design
So, you want to make awesome Roblox games, huh? That’s fantastic! But before you start building giant castles or coding epic battles, let’s talk about something super important: the game loop. Think of the game loop as the heartbeat of your game. It’s what makes everything run smoothly and feel responsive. Without a good game loop, your game will feel laggy, glitchy, or just plain weird. Let’s dive deep and learn all about how to design a great game loop for your Roblox masterpiece.
What Exactly is a Game Loop?
Imagine your game as a movie. A movie is made up of many individual pictures (frames) that, when played quickly, make it look like things are moving. A game loop does something similar. It’s a cycle that constantly repeats, doing three main things:
- Input: It checks what the player is doing – are they pressing buttons, moving the mouse, or tapping their screen?
- Update: It takes that information and changes the game world. If the player presses “jump,” it makes their character jump. If they move, their character moves. It also handles things like enemy movement, projectile paths, and other game events.
- Render: It draws everything on the screen. It shows you what the game world looks like after all the changes have been made.
This cycle happens over and over again, very quickly, usually many times per second, creating the illusion of a continuously running game.
Why is Game Loop Design Important?
A well-designed game loop is the foundation of a great gaming experience. Here’s why it matters:
- Smooth Gameplay: A consistent and fast game loop makes the game feel smooth and responsive to the player’s actions. Imagine trying to play a game that stutters every second – that’s a game with a poorly designed game loop!
- Predictable Behavior: It makes sure that things happen consistently. For example, if a player clicks to shoot, the bullet travels at the same speed every single time.
- Accurate Physics: If your game has objects that move and interact with each other, a good game loop helps make sure the physics feel right and things don’t glitch out.
- Resource Management: A well-designed loop manages how your game uses computer resources, so that it runs well on different devices, especially on less powerful computers or mobile devices.
Key Components of a Roblox Game Loop
Now that we know what a game loop does, let’s look at the important parts you will need to make one in Roblox:
The RunService
The RunService is a special service in Roblox that gives you access to different events which are very helpful in creating a smooth loop. We’ll use these events to perform the three main actions of our loop: input, update, and render.
Here are the main events we will be working with:
- RunService.Heartbeat: This is our main update event. It fires every frame, which means it fires many times per second – often 60 times or more, depending on the device. This is the best time to update things in your game world, like moving characters, calculating physics, and triggering events.
- RunService.RenderStepped: This event also fires every frame, but it does so right before Roblox draws everything on the screen. This is the place where we should update anything that affects the camera. For example, if you’re making a third-person game, and the camera follows the player, this is where you would update the position of the camera, because the camera needs to be updated before the game is rendered.
- UserInputService Although not directly in the RunService, the UserInputService is also important because it handles player input. You will need this service to respond to player actions. We will discuss this in detail in input handling below.
Input Handling
The first step in the game loop is figuring out what the player is doing. In Roblox, we use the UserInputService for that. Here’s how it works:
- Listening for Actions: You can listen for specific events to check for player actions. Common events include:
- InputBegan: When a player presses a key or clicks the mouse.
- InputChanged: When a player moves the mouse or changes the state of a key.
- InputEnded: When a player releases a key or mouse button.
- Detecting Input Type: You can check if the input is from the keyboard, mouse, gamepad, or touch screen. This helps you make your game work well on different devices.
- Handling Multiple Inputs: You need to handle multiple input events at the same time. For example, a player could be moving while also trying to jump, so your input code should take care of that.
Updating Game Logic
After we take input, it’s time to use that input to update the game’s internal logic. This includes things like:
- Character Movement: Move characters based on player input. If they press the “W” key, for example, move them forward.
- Physics Calculations: If you have objects that move or collide with each other, the Heartbeat event in RunService is the place for your physics math. This makes the objects behave in a realistic way.
- Enemy AI: Make the enemies move, follow the player, attack, or make decisions based on the current game state.
- Game State Changes: This might include changing the score, health, level progress, or any other variables that keep track of the game’s state.
- Event Triggers: Check if certain conditions are met, and trigger events, like a player entering a specific area or completing a task.
Rendering the Game World
Once the game logic has been updated, it’s time to draw everything on the screen. Remember our camera? Using the RunService.RenderStepped, we will do that before we draw the world on the screen. This includes:
- Camera Updates: This could include updating the camera position to follow the player.
- User Interface Updates: Change the elements on the screen, like updating the score, displaying a health bar, or showing menus.
- Drawing the Scene: This is what Roblox does behind the scenes, using the information that you calculated in the Update phase.
Designing a Basic Game Loop
Let’s see how this all comes together. Here’s a simple example of a game loop in Roblox Lua code, and we will break this down:
local RunService = game:GetService("RunService")
local UserInputService = game:GetService("UserInputService")
local character = -- Get your character here, e.g., game.Players.LocalPlayer.Character or another character object
local speed = 10
local jumpForce = 50

local function handleInput(actionName, inputState, inputObject)
    if actionName == "MoveForward" then
        -- Move Forward Logic
        if inputState == Enum.UserInputState.Begin or inputState == Enum.UserInputState.Change then
            -- Move the character when the input has begun or changed
            character.HumanoidRootPart.AssemblyLinearVelocity = character.HumanoidRootPart.CFrame.LookVector  speed
       elseif inputState == Enum.UserInputState.End then
           character.HumanoidRootPart.AssemblyLinearVelocity = Vector3.new()
       end
    elseif actionName == "Jump" and inputState == Enum.UserInputState.Begin then
         character.Humanoid:ChangeState(Enum.HumanoidStateType.Jumping)
         character.Humanoid.JumpPower = jumpForce
        character.Humanoid:Jump()
   end
end
-- Set the ActionName, Enum.UserInputType, and the InputCode
local moveForwardAction = UserInputService:BindAction("MoveForward", handleInput, true, Enum.KeyCode.W)
local jumpAction = UserInputService:BindAction("Jump", handleInput, true, Enum.KeyCode.Space)

local function update()
     -- Update game logic, here for our example we don't have game logic to update
 end

local function render()
     -- update the camera and other ui elements here, currently not used in our example
 end

RunService.Heartbeat:Connect(update)
RunService.RenderStepped:Connect(render)
Here’s a breakdown of what this code does:
- Getting Services: The code starts by getting the RunService and UserInputService to handle the game loop and player input.
- Setting character information: We set a variable for the character that we are moving, as well as set a movement speed and jump force.
- Input Handling: The handleInput function checks for specific player actions, in our case the “W” key to move forward and the space bar to jump. If those keys are pressed the character will move, or jump if the space bar is pressed.
- Update Loop: The update function is where we would calculate game logic. In this basic example, we don’t have specific game logic to update, but this is where you would update things like enemy movements, score, etc.
- Render Loop: The render function is used for any visual changes, like updating the camera position or user interface. In this example, we do not update the visual elements of the game but this is where it would go.
- Connecting Events: The code connects the Heartbeat event to the update function and RenderStepped to the render function so that they execute every frame of the game.
Advanced Game Loop Techniques
As you get more comfortable, you can start incorporating more advanced game loop design techniques. Here are a few ideas:
Delta Time
Delta time is a fancy name for the amount of time that has passed since the last frame. The framerate of the game loop can change depending on the speed of the device. If a computer is struggling to keep up with the game calculations it will process the loop slower, resulting in a lower framerate. To prevent changes in speed when a game’s framerate changes we can use delta time.
Using delta time when calculating movement speed, and other calculations will help your game play at the same speed regardless of the frame rate of the device it is being played on. Here is how you would implement delta time:
local RunService = game:GetService("RunService")
local UserInputService = game:GetService("UserInputService")
local character = -- Get your character here
local speed = 10
local jumpForce = 50
local function handleInput(actionName, inputState, inputObject)
    if actionName == "MoveForward" then
        -- Move Forward Logic
       if inputState == Enum.UserInputState.Begin or inputState == Enum.UserInputState.Change then
           -- Move the character when the input has begun or changed
           -- delta time gets passed to the heartbeat event.
            character.HumanoidRootPart.AssemblyLinearVelocity = character.HumanoidRootPart.CFrame.LookVector  speed
       elseif inputState == Enum.UserInputState.End then
           character.HumanoidRootPart.AssemblyLinearVelocity = Vector3.new()
       end
    elseif actionName == "Jump" and inputState == Enum.UserInputState.Begin then
         character.Humanoid:ChangeState(Enum.HumanoidStateType.Jumping)
         character.Humanoid.JumpPower = jumpForce
        character.Humanoid:Jump()
   end
end
-- Set the ActionName, Enum.UserInputType, and the InputCode
local moveForwardAction = UserInputService:BindAction("MoveForward", handleInput, true, Enum.KeyCode.W)
local jumpAction = UserInputService:BindAction("Jump", handleInput, true, Enum.KeyCode.Space)


local function update(deltaTime)
    -- Move the character, use delta time to make speed consistent
    -- Update game logic, here for our example we don't have game logic to update
    local currentSpeed = speed  deltaTime
  -- Update game logic, here for our example we don't have game logic to update
 end

local function render()
    -- update the camera and other ui elements here, currently not used in our example
 end

 RunService.Heartbeat:Connect(update)
 RunService.RenderStepped:Connect(render)
Notice how the update function now accepts deltaTime as a parameter. Now we can use that in our calculations. Here’s why it’s important:
- Consistent Speed: It helps the game run the same speed no matter the device. If a player is on a slow computer the game doesn’t get processed as quickly. A slower machine processes less frames per second. Delta time will compensate for that, resulting in the same speed even if the computer is running at a lower frame rate.
- Accurate Physics: Delta time can be used to make sure that calculations, like physics, are consistent across different frame rates. Without delta time, an object will move further on a device with a faster frame rate and less on a device with a slower frame rate.
Fixed Time Step
Fixed time step is a technique that makes the game logic update at a set rate, even if the frame rate changes. This is very useful for making sure physics work consistently.
Here’s how fixed time step generally works:
- Set Time Interval: You set a time interval to update the logic at, for example, every 0.01666 seconds (which is approximately 60 times per second).
- Accumulate Time: You keep track of how much time has passed and do update multiple times if needed.
- Consistent Updates: You ensure that the physics and game logic run at a set pace, making the game world more predictable.
Optimizing Your Game Loop
A crucial part of making a good game is making sure it runs well. Here are a few ways to improve performance in your game loop:
- Avoid Doing Too Much Each Frame: Try not to do too many computations in your loop. Spread out demanding tasks over multiple frames if needed.
- Use Efficient Code: Use simple code and algorithms to perform tasks without using too many resources.
- Culling: Only render things that the player can see. This reduces the workload on the graphics card.
- Object Pooling: Avoid making new objects constantly, like bullets or enemies. Instead, reuse objects that are not currently being used.
Common Mistakes to Avoid
Here are some common pitfalls to watch out for when you’re crafting your game loop:
- Doing too much work in a single frame can cause lag and performance problems.
- Ignoring Delta Time when calculating movement, can lead to inconsistent speeds and physics.
- Not optimizing the game loop can make the game slow and unresponsive.
- Missing Input can make your game feel unresponsive.
- Inconsistent Logic Can lead to weird bugs and unexpected behavior.
By understanding and applying these game loop design principles, you will make your Roblox games smooth, responsive, and fun to play. It may seem complicated at first, but the more you practice, the easier and more intuitive it becomes. Now you are ready to start working on an awesome game!
When you publish your first Roblox game…
Final Thoughts
Effective Roblox game loop design focuses on a clear cycle of player actions and rewards. Players need consistent engagement. Prioritize simple, repetitive tasks that feel rewarding each time.
A well-designed loop keeps players motivated. Players return for that cycle of action and gain. Focus on creating this repeating cycle to keep your users enjoying the game.
Remember, roblox game loop design is fundamental.

