
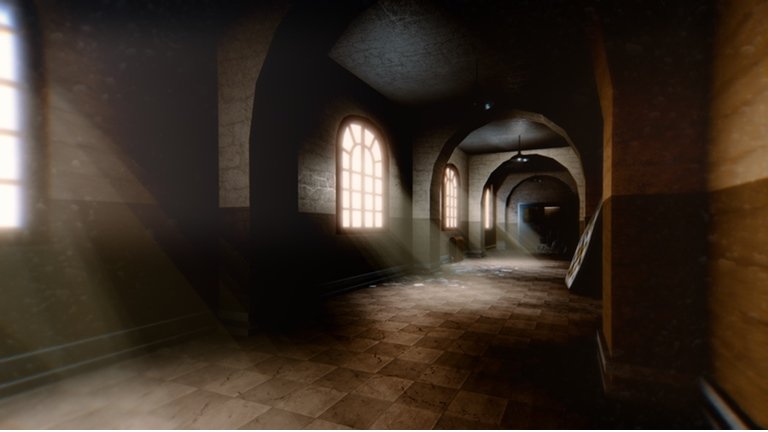
‘Roblox lighting techniques for artists involve using properties like brightness, color, and shadows to create specific moods and visual effects, employing different light sources and settings to enhance artistic creations.’
Have you ever wondered how some Roblox builds look so incredible? Often, it’s not just about the models themselves but the way they’re lit. The secret lies in understanding and applying various roblox lighting techniques for artists. You can drastically change the feel of your creation with strategic lighting.
Whether you’re aiming for a spooky atmosphere or a bright, cheerful scene, knowing how to manipulate light is essential. Effective lighting choices bring your artwork to life and draw the viewer into your world. So, let’s explore how to use light within Roblox to achieve stunning results.

Roblox Lighting Techniques for Artists
Okay, artists, let’s talk about making your Roblox creations look amazing. We all know that great lighting can take a build from “meh” to “WOW!”, right? It’s like adding the perfect sprinkles to an ice cream sundae. This isn’t just about making things bright; it’s about using light and shadows to tell a story, create mood, and make your art truly shine. Think of light as your paintbrush, and your Roblox world is the canvas.
Understanding the Basics of Light in Roblox
Before we jump into fancy techniques, let’s get familiar with the basic lighting tools in Roblox Studio. It’s kind of like learning the alphabet before writing a story. These are the core elements you’ll be playing with:
Types of Lights
Roblox gives you a few different types of lights, each with its own special job:
- PointLight: This light shines in all directions from a single point. Think of it like a light bulb hanging from the ceiling.
- SpotLight: This light shines in a cone shape. It’s like a flashlight or a stage light, focusing light in a specific area.
- SurfaceLight: This light shines from a single surface, like a screen or a glowing panel.
- Sun: This is your global light, the main light source for your game, like the sun in the sky.
Key Properties of Lights
Each light has properties that you can change. Understanding these properties is super important:
- Color: The color of the light itself. Red light, blue light, green light – you can choose anything! It can drastically change the atmosphere of your game.
- Brightness: How intense the light is. Brighter lights create strong highlights, while dimmer lights can create subtle shadows.
- Range: How far the light reaches. It’s basically the area the light covers. A small range will only light up a small space.
- Shadow: This property tells if light casts shadows. Using shadows correctly adds a lot of depth.
- Angle (for SpotLight): This changes the width of the cone light, wider or narrower.
- Face (for SurfaceLight): This determines which face of the part the light shines from.
Experiment with these properties. Don’t be shy! Change the color, change the brightness. See what happens. That’s how you learn and find out what works for you. You can use the “Properties” window in Roblox Studio to tweak these settings. And remember that all these lights are also like any normal parts which can be moved and scaled.
Basic Lighting Techniques for Beginners
Okay, so you know what the lights do. Now what? Here are a few easy tricks to start with:
The Three-Point Lighting Setup
This is a classic lighting technique used by photographers and filmmakers. It helps you to illuminate an object in a balanced way and removes any flat looking objects. It works for Roblox builds, too! Here’s the breakdown:
- Key Light: This is your main light source. It’s usually the brightest and provides the main illumination for the scene. You might use a SpotLight or Sun for this. Usually, it’s placed a bit to the side of what you’re lighting.
- Fill Light: This light is softer and less bright. It helps fill in the shadows created by the key light. A PointLight or a slightly dimmer version of your key light works great. You generally place it opposite the key light.
- Back Light: This light shines from behind the object, separating it from the background and adding a cool edge highlight. A smaller and dimmer PointLight will work well for this, and it is placed behind the object you are lighting.
This technique gives your objects more shape and dimension. Don’t worry about getting this perfect at first, the goal is to use it as a guide. Adjust things to your liking.
Using Color to Set the Mood
Color is POWERFUL! It can totally change the feel of your game. Think about it: warm colors like red and orange can make things feel cozy and inviting, while cool colors like blue and purple can create a mysterious or dramatic feel. Here are some tips:
- Warm Lighting: Use yellow or orange lights for a sunset, campfire, or a warm indoor scene.
- Cool Lighting: Use blue or purple lights for an underwater scene, a night setting, or a futuristic environment.
- Contrasting Colors: Combining warm and cool colors can create interesting visual effects. Try using a warm light on an object and a cool light on the background.
Working with Shadows
Shadows are just as important as light. They add depth, define the shape of objects, and make things look more realistic. Here’s how to use them effectively:
- Soft Shadows: Use more light with slightly less bright, larger range to create softer shadows for natural looks.
- Hard Shadows: Using single point light with bright and small range creates hard shadows, use it for dramatic effects.
- Shadow Placement: Pay attention to where shadows fall. Use shadows to enhance shapes and draw attention to certain parts of your build.
Advanced Lighting Techniques
Ready to take your lighting to the next level? Let’s explore some more advanced techniques that can really make your builds stand out. These are a bit more tricky, but the results are worth it!
Volumetric Lighting
Volumetric lighting is when you can actually see beams or rays of light, like sunbeams coming through a window, or light shining through fog. This effect can add a lot of atmosphere to your games. While Roblox doesn’t have a built-in volumetric lighting feature, there are ways to create similar effects:
- Particle Effects: Use particle emitters to create the “dust” or “fog” that the light shines through. You can make it look like light scattering through a misty forest.
- Translucent Parts: Create long, thin translucent parts and then position your light to shine through them. You can adjust the transparency and color of the part for a custom effect.
- Light Streaks: Use thin, bright parts and make them look like light streaks. You can rotate and scale them to mimic the direction of light.
These methods are more about trickery and combining different features of roblox studio to create the visual effect rather than a single button press.
Light Baking
Light baking is a technique that involves pre-rendering the lighting in your game, instead of having it calculated in real-time. This can improve the performance of your game, especially in complex scenes with many lights. It essentially freezes how the light looks, and it can’t be changed unless you rebake the lights. Also, make sure to use this technique when you are confident in the position of all your lights as it will require time to bake and rebake the lights. To “bake” light in roblox, you can take these steps:
- Set up your lights: Position all your lights as how you like them to be in the final output.
- Use the light properties: Ensure the settings like color, brightness, range and shadow settings are set correctly.
- Export/Import scene: The scene will need to be exported to a program like Blender, where the light bake function will be used. After baking the lighting, the scene needs to be re-imported back to Roblox studio.
Baking the lights in Roblox can be a more advanced approach, as it requires the usage of an external program to fully “bake” the lighting. While baking the light can help with performance issues, it reduces flexibility in your game. However, when this technique is used correctly, it can give a high-quality and realistic-looking game.
Light Groups and Layers
If you have lots of light sources, it is a good idea to group your lights into logical categories. Imagine you have a city with different districts, and each district has its own lights. In Roblox, you can use “CollectionService” to help group these lights in different layers, and then you can manipulate the lights of the layers at once, instead of individually moving or altering each light. This can help you manage your lighting easier and create more complex lighting systems. Consider the following ways of how light groups and layers can be used:
- Organize lights: Group lights for specific areas or purposes (e.g., all the streetlights together, all the lights in a building together).
- Control layers: You can turn whole layers of lights on and off, create dynamic lighting effects.
- Use scripts: Scripting will be required to be able to make the lighting layers work dynamically.
This gives you greater control and helps you make complex light setups easily manageable. This is important for any larger builds and can keep your workspace very clean and organized.
Dynamic Lighting
Dynamic lighting is lighting that changes over time. This could be flickering lights, changing colors, or lighting that reacts to player actions. Adding this type of lighting can make your game more alive. You can create dynamic lighting in Roblox by:
- Using scripts: Use scripts to change light properties over time. For example, to create flickering lights, you can script them to randomize their brightness value over time.
- Using events: Make lights react to game events, like opening a door or a player entering a certain area. This way, lighting can add to the story telling of the game
Dynamic lighting is a great way to make your game feel more responsive and alive. This also is another way to make your game a richer experience and bring depth to the overall story being told.
Environment Mapping
Environment mapping is a way to create reflections on the surfaces of your parts, making them look more realistic. While Roblox doesn’t have a full environment mapping feature, there are tricks you can use to mimic the effect:
- Skybox reflections: You can use a skybox texture to mimic reflections on certain surfaces like metals and mirrors. This way, you get to create reflective materials that reflect the sky in your game.
- Reflection probes: Place bright light sources on surface and then use that surface for reflection effects. This is a way to manipulate how lights cast on different surfaces.
These tricks allow you to give your games a high degree of realism. Remember to experiment to create the perfect reflective effect.
Tips for Improving Your Lighting
Here are some final tips to help you keep on creating beautiful lighting in your games:
Plan Your Lighting Ahead
Before you even start adding lights, think about the mood and atmosphere you want to create. Is it a dark and spooky cave? A sunny beach? A futuristic city? Having a vision in your mind will help you choose the right colors, intensities, and types of lights.
Use Reference Images
Look at real-world photos or movies for inspiration. Observe how lighting is used to create different moods and effects. Pay attention to shadows and highlights. This can help you in recreating similar feels in your game.
Test Your Lighting in Different Environments
What looks good in the editor might not look the same in the game. Make sure to test your lighting in different parts of your game, and with different times of day. You can also use test play to see what it looks like from the player’s perspective.
Less is Sometimes More
Don’t overdo it with too many lights. Sometimes, fewer, well-placed lights can have a bigger impact than lots of lights. It’s about being smart with the lights you have.
Experiment and Practice
The best way to improve your lighting skills is to experiment and practice. Try different combinations of lights, colors, and settings. Don’t be afraid to make mistakes. That’s part of the learning process!
Creating great lighting in Roblox is a skill that takes time and effort to develop. But with practice and experimentation, you can add amazing lighting effects to your games. Use the knowledge you’ve gathered here to bring your creations to life. Keep practicing, experimenting, and soon enough your Roblox lighting will really stand out!
Best Roblox Studio Plugins! #shorts
Final Thoughts
Experiment with various light sources, adjusting their properties to achieve desired moods. Consider using shadows effectively, making your builds more impactful. These elements work in tandem to shape the visual experience.
Applying different Roblox lighting techniques for artists greatly enhances creations. Practice manipulating ambient, directional, and point lights for diverse effects. Careful application of these techniques can elevate any scene.

