
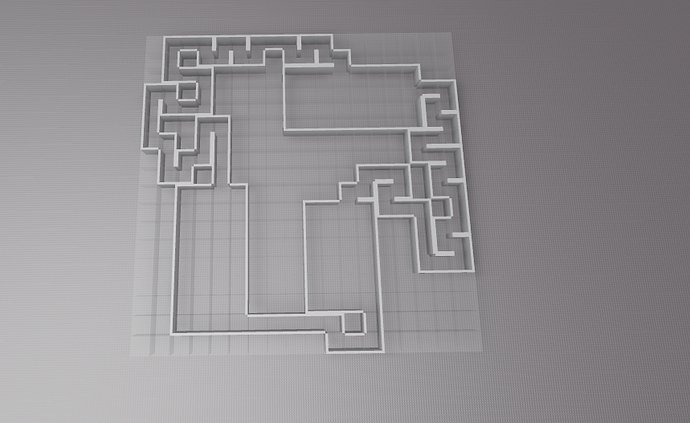
Roblox procedural generation involves using scripts to create game content like levels or items automatically, instead of designing each one manually.
Want to make your Roblox games feel endlessly fresh? A key to achieving this lies within procedural generation. This powerful technique lets you build dynamic worlds and gameplay. Forget hand-crafting every single detail; scripting does the work. A complete roblox procedural generation guide will teach you how to implement this fantastic idea.
You can use algorithms to generate levels, textures, even unique items. This method greatly expands gameplay possibilities. Think about the replayability it offers with each unique play through. It allows for an engaging experience.

Roblox Procedural Generation Guide
Okay, let’s dive into the super cool world of procedural generation in Roblox! If you’ve ever played a game where the levels or worlds are different each time, then you’ve probably seen procedural generation in action. Instead of hand-designing every single thing, developers use code to create game elements automatically. Think of it like having a robot artist that can build landscapes, towns, or even crazy mazes all by itself! It’s a powerful technique, and it’s totally within reach for you to use in your own Roblox games. We’re going to break it down into easy-to-understand pieces, so you can become a procedural generation pro!
Understanding the Basics of Procedural Generation
Before we start coding, let’s understand what makes procedural generation tick. At its core, it’s all about using algorithms, or sets of instructions, to create game content. These algorithms can be simple or complex, depending on what you want to achieve. Think of it like a recipe: you put in certain ingredients (rules and settings), and you get a final dish (a procedurally generated landscape or object). There are a few key things to remember:
- Randomness: Random numbers are very important! They introduce variation and keep things from looking the same each time. Roblox has built-in functions for generating random numbers, which we’ll be using a lot.
- Algorithms: These are the rules that dictate how things are created. For example, an algorithm could decide where trees should go, how tall mountains should be, or what kind of shapes to build for a cave system.
- Seeds: A seed is like a starting point for the random number generator. If you use the same seed, you’ll always get the same results, which is helpful for debugging and creating repeatable patterns.
- Parameters: These are adjustable values that affect the generated content. Changing parameters allows you to create different outputs with the same algorithm. For example, changing the parameter for the ‘frequency’ of mountain creation can result in larger peaks closer or further apart from each other.
So, instead of building every brick of a house by hand, we can tell the computer, “Make a house. Make it out of blocks. Make it roughly this tall. Use this color.” The computer follows those rules and builds a different house each time, but it’s always within the parameters we gave it. That’s the magic!
Simple Procedural Generation Examples in Roblox
Let’s start with some easy examples to get the hang of it. We will be using Roblox Lua scripting for all of these examples. Don’t worry if you’re not an expert coder yet – we’ll explain everything step by step.
Creating a Grid of Parts
One of the simplest ways to get started with procedural generation is creating grids of blocks. This helps understand how to use loops, positioning and random numbers to populate the game world. Here’s a basic script that creates a grid of random colored blocks:
local gridSize = 10 -- Number of blocks per side of the grid
local spacing = 4 -- Space between blocks
local partSize = Vector3.new(3, 3, 3)

for x = 1, gridSize do
    for z = 1, gridSize do
        local part = Instance.new("Part")
        part.Size = partSize
        part.Anchored = true
        part.Position = Vector3.new((x - 1)  spacing, 0, (z - 1)  spacing) -- Calculate position
        part.Parent = workspace
		part.Color = Color3.fromRGB(math.random(0,255),math.random(0,255),math.random(0,255)) -- Random Color
    end
end
Explanation:
- We use nested for loops to iterate through grid positions (x and z).
- Inside the loops, we create a new Part using Instance.new(“Part”).
- We set its Size, make it Anchored so it doesn’t fall over and we calculate the Position based on loop indices and spacing.
- We also give random Color to the part.
- Finally, we parent the part to the workspace so it appears in the game.
Try this out yourself by adding a script into the workspace and copy-pasting the code. You can adjust the variables to change size, spacing and color of the parts. That’s one example of procedural generation.
Randomly Placed Trees
Let’s try something a little more interesting. Instead of a uniform grid, we can randomly place trees in our world using a simple loop. We will be using predefined tree model.
local numberOfTrees = 50 -- Number of trees to place
local treeModel = game.ReplicatedStorage.Tree -- Replace with your tree model's path
local terrainSizeX = 100 -- Area in X where trees will spawn
local terrainSizeZ = 100 -- Area in Z where trees will spawn

for i = 1, numberOfTrees do
	local treeClone = treeModel:Clone()
	local xPos = math.random(-terrainSizeX/2,terrainSizeX/2)
	local zPos = math.random(-terrainSizeZ/2,terrainSizeZ/2)
	local yPos = 5 -- Height above the ground
	treeClone:MoveTo(Vector3.new(xPos,yPos,zPos))
	treeClone.Parent = workspace

end
Explanation:
- We specify numberOfTrees to generate.
- We assume that there is a model called Tree inside ReplicatedStorage, if you have your own model make sure you replace that path with your own.
- We define the size of our spawning area using terrainSizeX and terrainSizeZ.
- We then loop and clone our tree model, and use math.random function to calculate random position, and after that, move the model to the position and parent it in workspace.
Advanced Procedural Generation Techniques
Once you’ve got a feel for the basics, you can try more advanced techniques for creating richer and varied content. Let’s explore a few of these!
Perlin Noise for Terrain Generation
Perlin noise is a powerful tool that generates smooth, natural-looking textures and landscapes. Unlike simple random values, Perlin noise produces values that vary smoothly, creating hills, valleys, and other features that appear more organic. Roblox doesn’t have Perlin noise built in, but you can find many implementations. Here’s a simplified example using a simple algorithm:
function smoothNoise(x, y, seed)
  local n00 = math.noise(x+seed, y+seed)
  local n01 = math.noise(x+seed, y+1+seed)
  local n10 = math.noise(x+1+seed, y+seed)
  local n11 = math.noise(x+1+seed, y+1+seed)

  local xf = x - math.floor(x)
  local yf = y - math.floor(y)

  local ix0 = math.lerp(n00, n10, xf)
  local ix1 = math.lerp(n01, n11, xf)

  return math.lerp(ix0, ix1, yf)
end

function generateTerrain(width, height, scale,seed)
    local parts={}
    for x=0,width do
        for z=0,height do
            local yValue = smoothNoise(x/scale,z/scale,seed) 20
            local part = Instance.new("Part")
            part.Size = Vector3.new(2,2,2)
            part.Anchored= true
             part.Position=Vector3.new(x2,yValue,z2)
             part.Parent = workspace
            table.insert(parts,part)
         end
    end
     return parts
end


local terrainWidth = 50
local terrainHeight = 50
local scaleFactor = 10
local seedValue= 100

generateTerrain(terrainWidth, terrainHeight, scaleFactor, seedValue)
Explanation:
- The smoothNoise function calculates a smooth value using math.noise function of roblox.
- We have generateTerrain function which iterates through a grid, samples the noise function at each location and outputs parts at the height specified by the returned value of smoothNoise.
- We define parameters for terrain size, scale and seed and then we pass it in the generateTerrain function.
This creates a simple terrain, you can experiment with different scale factors and seed values to get different types of terrains. You can add different types of materials to the block according to the height value or add biomes.
Cellular Automata for Cave Generation
Cellular automata are another powerful technique for creating organic-looking structures. A common example is using cellular automata to make cave systems. This works by starting with a random grid and applying simple rules to change the cells over time. Here’s a simplified example using a basic 2D grid:
local gridWidth = 50
local gridHeight = 50
local initialChance = 0.45 -- Probability for a cell to be solid initially
local iterations = 5 -- Number of simulation steps
local smoothingSteps = 3 -- Number of smoothing steps
local wallMaterial = Enum.Material.Rock -- Change the material here
local floorMaterial = Enum.Material.Ground -- change the material here

--function to generate the initial random 2d array of cells
function initializeGrid()
  local grid = {}
  for y = 1, gridHeight do
    grid[y] = {}
    for x = 1, gridWidth do
      grid[y][x] = (math.random() < initialChance) -- Randomly set to true (solid) or false (empty)
    end
  end
  return grid
end


-- function to count number of neighbours
function countNeighbours(grid,x,y)
    local neighbours = 0
    for i=-1,1 do
        for j = -1, 1 do
            if i == 0 and j ==0 then
                --do nothing we don't want to check our own cell
            else
                local checkX = x+i
                local checkY=y+j
                if checkX > 0 and checkX<= gridWidth and checkY > 0 and checkY <= gridHeight then
                   if grid[checkY][checkX] then
                       neighbours= neighbours +1
                   end
               end
            end
        end
    end
    return neighbours
end

-- Simulation step for cellular automata
function simulateStep(grid)
  local newGrid = {}
  for y = 1, gridHeight do
    newGrid[y] = {}
    for x = 1, gridWidth do
      local neighbours = countNeighbours(grid,x,y)
      if grid[y][x] then -- if the current cell is solid
        if neighbours < 4 then -- Rules to become empty
            newGrid[y][x] = false
        else
          newGrid[y][x] = true
        end
      else -- if the cell is empty
          if neighbours > 4 then -- Rules to become solid
              newGrid[y][x] = true
          else
             newGrid[y][x] = false
          end
       end
    end
  end
  return newGrid
end

-- Function to smooth the terrain
function smoothTerrain(grid)
    for s=1,smoothingSteps do
        grid = simulateStep(grid)
    end
    return grid
end

-- Function to create parts based on 2D array
function createParts(grid)
  local parts = {}
  for y = 1, gridHeight do
    for x = 1, gridWidth do
      if grid[y][x] then -- If solid part
		local part = Instance.new("Part")
		part.Size = Vector3.new(4,4,4)
		part.Anchored = true
		part.CFrame = CFrame.new(x4,0,y4) -- Position based on array index
        part.Material = wallMaterial
		part.Parent = workspace
         table.insert(parts,part)

      else  -- Empty cell create floor
         local part = Instance.new("Part")
		part.Size = Vector3.new(4,0.5,4)
		part.Anchored = true
		part.CFrame = CFrame.new(x4,-2,y4) -- Position based on array index
       part.Material = floorMaterial
		part.Parent = workspace
      table.insert(parts,part)
      end
    end
  end
  return parts
end


-- Generate and apply the cellular automaton
local grid = initializeGrid()
for i = 1, iterations do
  grid = simulateStep(grid)
end
local smoothedGrid = smoothTerrain(grid)
createParts(smoothedGrid)
Explanation:
- initializeGrid creates a grid of randomly populated solid and empty cells based on initialChance.
- countNeighbours checks the number of neighboring solid cells for each cell.
- simulateStep applies rules based on countNeighbours to each cell to determine if it becomes solid or empty in the next iteration.
- smoothTerrain applies multiple iteration of simulateStep to smooth the rough patches generated using simulateStep.
- createParts creates parts at appropriate location based on if the cell is solid or empty. If solid, then create wall blocks and if empty, then create floor.
This example creates simple caves. You can tweak the initialChance, iterations, smoothingSteps and rules to get many types of different results.
Using Templates for Complex Structures
Sometimes, instead of creating everything from scratch, you might want to use pre-made building blocks. You could make a “prefab” or template of a house, a tower, or even a single room, and then use procedural generation to place these templates in a game world. You can make use of model prefabs saved in ReplicatedStorage to implement this. We will be using pre made houses for this example:
local numberOfHouses = 20 -- Number of houses to spawn
local houseModel = game.ReplicatedStorage.House -- Replace with your house model's path
local terrainSizeX = 200 -- Area in X where houses will spawn
local terrainSizeZ = 200 -- Area in Z where houses will spawn

for i = 1, numberOfHouses do
	local houseClone = houseModel:Clone()
	local xPos = math.random(-terrainSizeX/2,terrainSizeX/2)
	local zPos = math.random(-terrainSizeZ/2,terrainSizeZ/2)
	local yPos = 5 -- Height above the ground
	houseClone:MoveTo(Vector3.new(xPos,yPos,zPos))
	houseClone.Parent = workspace
    local rotation = math.random(1,360)
	houseClone:SetAttribute("RotationY", rotation)
    houseClone:SetAttribute("RandomColor",Color3.fromRGB(math.random(0,255),math.random(0,255),math.random(0,255)))
	for _, part in ipairs(houseClone:GetDescendants()) do
            if part:IsA("BasePart") then
			   local houseColor = houseClone:GetAttribute("RandomColor")
               part.Color = houseColor
            end
        end
end
Explanation:
- We first set the numberOfHouses to spawn and get the reference of house model from ReplicatedStorage.
- We then calculate random positions in given terrainSizeX and terrainSizeZ.
- We clone the house model and change the position to calculated position.
- We also rotate the cloned house at some random angle between 1 and 360.
- We then iterate all descendants which are base parts and give them a random color saved in the house model.
Optimizing Your Procedural Generation
When you’re creating large, procedurally generated worlds, it’s crucial to think about performance. Here are some tips to keep your game running smoothly:
- Chunking: Generate the world in smaller chunks rather than all at once. Load chunks only when the player is nearby. This can dramatically improve performance and memory usage. You can use different level of details with chunks. When the player is far, render low detail chunks, and when they are close, render high detail chunks.
- Object Pooling: If you’re creating a lot of objects (like trees or rocks), reuse old objects instead of creating new ones each time. This saves time and memory, and improves performance.
- Efficient Algorithms: Choose algorithms that are fast and don’t take up too much processing power. For example, complex Perlin noise implementations might be too slow, so try simpler solutions instead or choose a different method.
- Level of Detail (LOD): When rendering terrain or objects, use different levels of detail depending on how far away they are from the player. Far-off objects can be simplified.
- Batching: Group many small blocks into a single object. If you’re making many cubes or small pieces of rocks, try to merge them into a larger part, so roblox engine has less parts to render.
Adding Game Logic to Procedurally Generated Content
Procedural generation isn’t just about pretty pictures – it’s about creating a dynamic gameplay experience. Here are a few ways to bring your procedurally generated worlds to life:
- Spawning Items and Resources: Randomly place resources like wood, minerals, or even hidden chests in the world. You can use Perlin noise or Cellular Automata to help dictate the placement of rare items or to make specific regions more abundant in resources.
- Creating Enemy Encounters: Use procedural generation to create enemy spawn points or patrols. You can have different enemy types spawned based on location.
- Generating Quests: Have quests tied to specific locations or items in the procedurally generated world. This can give your game more structure and player objectives.
- Adjusting Game Difficulty: Change the parameters of your procedural generation to create different levels of challenge. You could make more difficult areas with larger enemy spawns or by having more complex terrain.
- Adding Secrets: Add hidden areas or unique items that are only found through exploring procedurally generated spaces. These secrets can make your game more enticing.
Remember, the key to great procedural generation is to have clear goals and to experiment. Try different algorithms, parameters, and combinations to see what you can create!
Procedural generation in Roblox can be a little confusing in the beginning, but once you get the hang of the basics, it opens the doors to create so many different experiences. It’s a fantastic way to make your games dynamic, unique and fun for all players. Start with simple examples and try to explore new and more complex approaches. Keep experimenting and remember there is no limit to what you can create. Now go forth and create some awesome procedurally generated worlds!
Procedural dungeon generation systems. Roblox studio Tutorial.
Final Thoughts
Procedural generation in Roblox offers great potential for unique game worlds. You can create varied maps, items, and challenges using code. This method reduces repetitive design work.
This Roblox procedural generation guide showed you practical techniques. Begin with simple algorithms and gradually build more complex systems. Experimenting is key to creating compelling experiences.
By understanding and using this guide, you gain the ability to create fantastic, randomized content. The “roblox procedural generation guide” empowers you to achieve new levels of creativity.

