
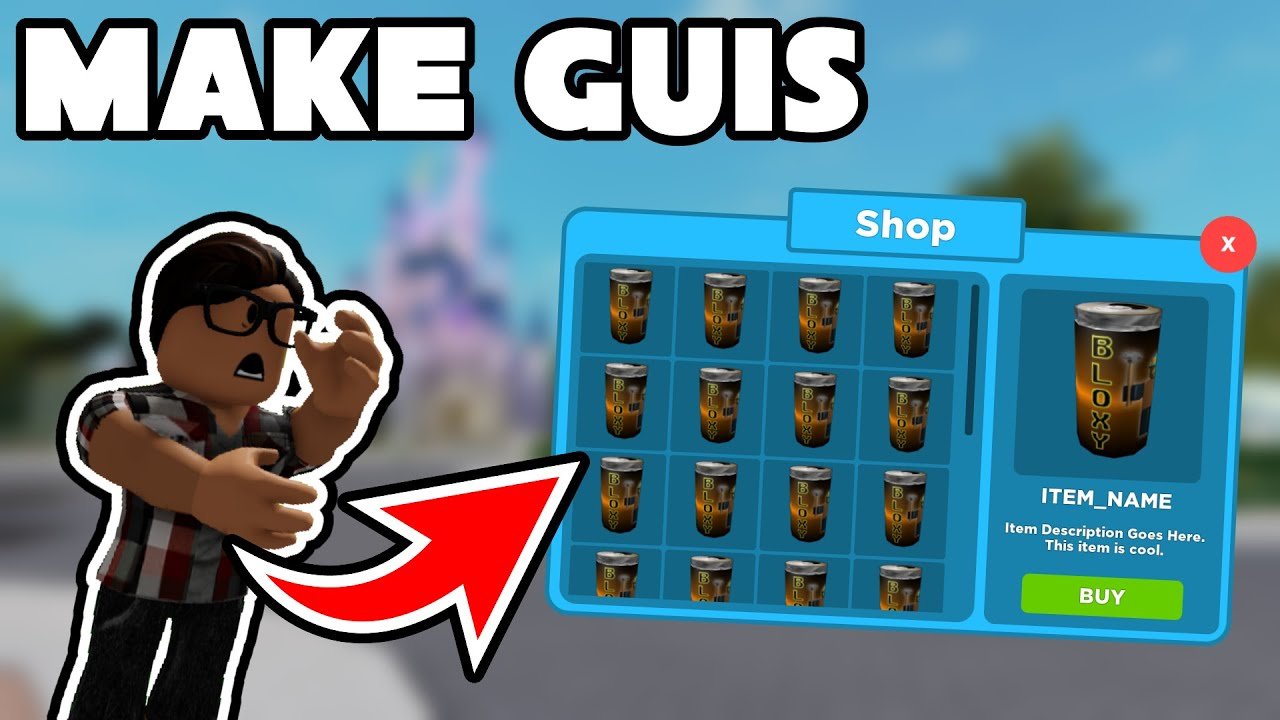
Creating custom GUI in Roblox Studio requires using instances like ScreenGuis, Frames, TextLabels, and Buttons, and scripting their behavior with Lua.
Have you ever wanted to make your Roblox game truly your own? Creating custom GUI in Roblox Studio gives you that power. You can design unique interfaces that fit your game’s style perfectly. With a few simple steps, you’ll be building personalized menus and displays.

Creating Custom GUI in Roblox Studio
Creating your own custom graphical user interface, or GUI, in Roblox Studio is like designing the dashboard of your favorite video game. It lets you make buttons, menus, and displays that show important information or allow players to interact with your game in cool new ways. Think of it as building the control panel that players use to navigate your world. Let’s dive into how you can make your own!
Understanding the Basics of GUI
Before we start building, let’s understand what makes up a GUI in Roblox. It’s like learning the parts of a car before driving. GUIs are made of different objects that work together. These objects are layered on top of each other, like a stack of papers, but they appear on the player’s screen.
ScreenGui
First, you need a ScreenGui. Think of ScreenGui as the big window where everything else appears. It’s like your canvas. This is where all your GUI elements will live. It makes sure your GUI stays in front of the player’s view, no matter where they move in the game.
Frames
Frames are like the containers of your GUI. They help group things together and organize your layout. You can put many things inside frames, like buttons and text. It’s like using folders on your computer to keep things organized.
TextLabels
TextLabels let you display words and numbers on the screen. You can use TextLabels to show scores, instructions, or player names. It’s like a sticky note where you write important messages.
TextButtons
TextButtons are what you use when you want players to click on something. Buttons are what players click to make things happen in the game, like starting a game or picking a character. They’re very important for interaction.
ImageLabels & ImageButtons
ImageLabels and ImageButtons are for showing images. ImageLabels simply display pictures, while ImageButtons let you use an image as a clickable button. This means you can make your GUI look really cool with custom artwork.
Getting Started with Your First GUI
Let’s make a simple GUI to see how it all works. First, open Roblox Studio and create a new baseplate. Now, we’ll start adding the necessary parts.
Adding a ScreenGui
To start, find the “Explorer” window in Roblox Studio. You can usually see it on the right side of the screen. Right click on “StarterGui” and select “Insert Object,” then select “ScreenGui.” A new ScreenGui should appear under StarterGui. Rename it to something you like, maybe “MyFirstGUI.”
Adding a Frame
Inside your ScreenGui, add a Frame by right-clicking on “MyFirstGUI” and then “Insert Object” and then select “Frame.” You can drag the frame around to change its position and resize it to make it fit.
Adding a TextLabel
Now, let’s add a TextLabel inside the frame. Right-click on the frame, select “Insert Object,” and then select “TextLabel.” You can change the text in the label by using the properties window. Change the “Text” property to something like “Welcome to My Game!”
Customizing Your GUI
Now that we have a basic structure, let’s make it look nice. You can change the color, size, and font of these items by using the Properties window. This window usually appears below the explorer window.
Changing Colors
Click on the frame and look for the “BackgroundColor3” property in the properties window. You can change the color of your frame here, it accepts color codes, you can find colors from web or studio’s own color picker.
Changing Fonts and Text Size
Select the text label and you can find similar properties to change the text size, text color, font and other visual elements. Experiment with different settings and see how they change the look of your GUI.
Making Your GUI Interactive with Buttons
Now, let’s make a button that does something when a player clicks it. This is where the fun begins!
Adding a TextButton
Inside the frame, right-click and select “Insert Object” and then select “TextButton”. You can change the text on the button, using same properties window. Maybe change the text to “Click Me!”
Scripting the Button
To make the button actually do something, you need a script. In TextButton, insert a new script. Right click on the TextButton, select “Insert Object” and then select “Script”. Paste the following code into the script:
lua
local button = script.Parent
button.MouseButton1Click:Connect(function()
print(“Button was clicked!”)
— Add your code here, what should happen when the button is pressed
end)
This code makes the game print “Button was clicked!” in the Output window when the button is pressed.
Making the Button Do More
You can make the button do all sorts of things. Let’s change the text on the TextLabel when the button is clicked.
Modify the script to look like this:
lua
local button = script.Parent
local frame = button.Parent
local label = frame:FindFirstChild(“TextLabel”)
button.MouseButton1Click:Connect(function()
print(“Button was clicked!”)
if label then
label.Text = “You clicked the button!”
end
end)
Now, when you click the button, the text of the label will change. This demonstrates how you can make your UI interactive.
Advanced GUI Techniques
Once you grasp the basics, you can move on to more advanced ways of creating a great user experience.
Using Anchor Points
Anchor points help you control how your GUI elements resize when the screen size changes. Imagine trying to arrange furniture in a room that changes size. Anchor points help you keep the items in correct place. When designing GUI, You can change the anchor point of the GUI element to position it in different way. Default anchor point is at the top-left corner.
Layouts
Layouts help you arrange items inside a Frame automatically. Instead of placing everything by hand, you can use layouts such as UIListLayout, UIGridLayout and others to organize elements automatically.
UIListLayout
The UIListLayout arranges elements in a list, either horizontally or vertically. Useful for menus or lists of items that appear one after the other. Imagine arranging books on a shelf.
UIGridLayout
The UIGridLayout arranges elements in a grid, like a checkerboard or a set of building blocks. Great for inventories or creating a set of buttons. Imagine arranging tiles on a floor.
Tweening GUI Elements
Tweening lets you animate the movement or size of your GUI elements. This makes your UI look more polished and professional. It adds smooth and beautiful animations to your interface.
TweenPosition
TweenPosition is used for animating the movement of GUI elements across the screen. Imagine a button sliding onto the screen.
TweenSize
TweenSize is used for animating the resizing of GUI elements. Imagine a frame growing bigger when the game starts.
Using Variables
Variables help you store information that you can use in your scripts. Think of them as containers you use to hold data that you can use in your game, like the player’s score, or how many lives they have. For example, you can change a TextLabel using the value of a variable.
Understanding Parent-Child Relationships
In Roblox, you often create a structure of elements where some things are ‘children’ of other ‘parents’. A button inside a frame is a child of that frame. When you move the parent, the child will move with it. It’s like the relationship of a wagon and a train, when train moves the wagons moves with it.
Best Practices for Creating GUIs
There are also some best practices when you create GUI for your game. These help you to keep your GUIs effective and easy to use for players.
Keep it Simple
Don’t overcomplicate your GUI with too many buttons or text. A simple design is often the most user-friendly. Make sure it is not overwhelming and easily understandable for players.
Use Clear Text
Make sure your text is easy to read. Use good fonts and choose colors that contrast well with the background. Imagine trying to read a book with tiny, hard to see letters.
Test Your GUI
Always test your GUI in different screen sizes. Make sure everything is clear and works on phones, tablets and computers. You can use the emulator tool in the Roblox Studio to test your UI on various devices.
Consider Accessibility
Design your GUI so that it’s easy to use for everyone. This includes players who may have different visual or motor needs. For example, use large and clear buttons and provide keyboard alternatives to use.
Examples of Cool GUIs
Now that you understand how GUIs are made, here are some fun examples of things you can create:
Main Menu
A main menu with buttons to start the game, options and player settings. It is the starting point of almost every game, and it gives an overview of the game.
Heads-Up Display (HUD)
A HUD that displays player health, score, and other important game information. It shows critical information to the player.
Inventory
An inventory system that allows players to manage and use in game items. Player can keep and access their items through inventory.
Chat Interface
A custom chat interface with extra features. It enhances the way the player communicate with each other.
Custom Game Settings
A settings menu that lets players adjust game options. Let the player customize their experience.
By learning how to create GUI, you are able to add a lot of important features that will make your game more playable and professional.
Creating your own custom GUI in Roblox Studio may seem tricky at first, but with a little practice, you can create amazing interfaces for your games. Remember to take it step by step, experiment with the tools, and don’t be afraid to try new things. This skill helps your game look polished and allows for better player interaction. The possibilities are endless when you combine your creativity with the power of Roblox Studio. Keep practicing, and soon you’ll be designing top-notch GUIs!
How To Make GUI | Roblox Studio
Final Thoughts
Creating custom GUI in Roblox Studio empowers developers to build unique interfaces. You can tailor the game experience by designing distinct visuals and controls.
This level of customization allows for more engaging and intuitive user interactions. Experimenting with different layouts and elements is key for an effective GUI.

