
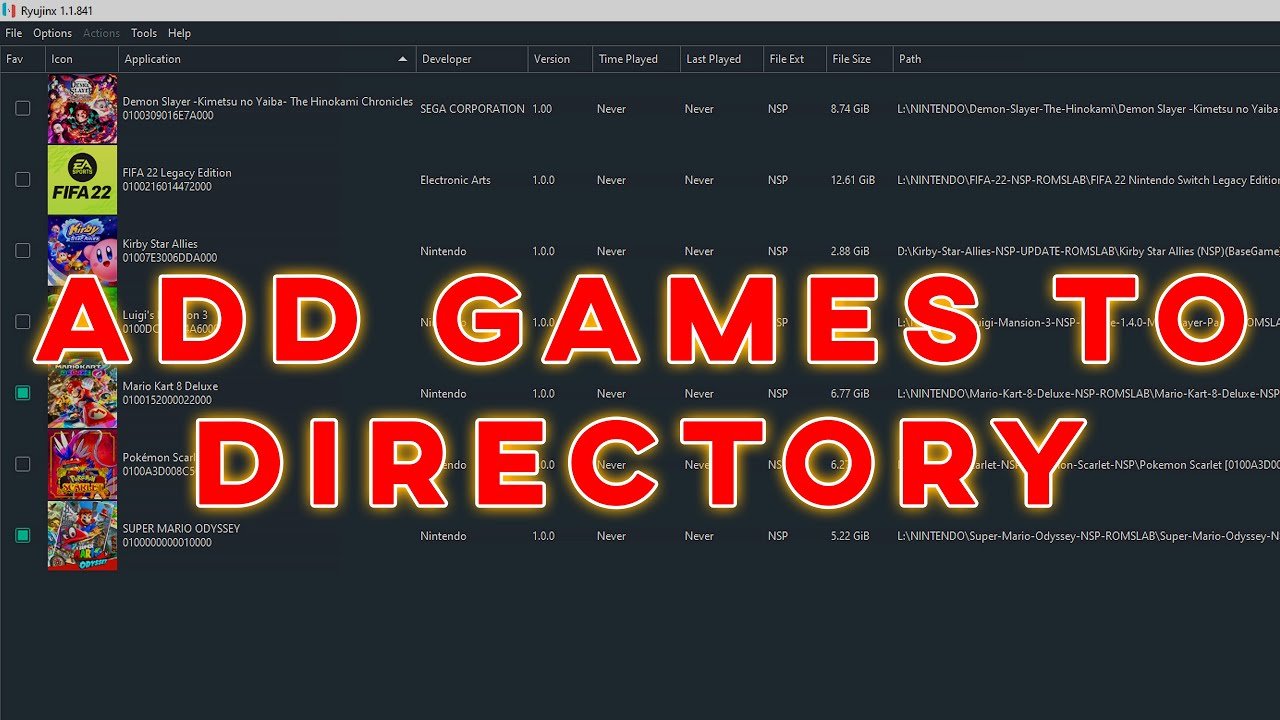
To add a game to Ryujinx, you must first obtain the game files, typically in XCI or NSP format. Then, within Ryujinx, navigate to the “File” menu and select “Load Application from File.” Finally, select your game file.
Want to play Nintendo Switch games on your PC? Ryujinx provides that ability. Many people are interested in how to add game to ryujinx, and it’s actually a fairly simple process once you know the steps. This guide will show you how quickly you can get those games running.

How to Add Games to Ryujinx: A Complete Guide
Ready to play your favorite Nintendo Switch games on your computer using Ryujinx? That’s awesome! This guide will walk you through exactly how to add games to Ryujinx, step-by-step. We’ll cover everything from getting your games to making sure Ryujinx recognizes them. Let’s get started!
Understanding Game File Formats
Before we jump into adding games, it’s important to know about the different types of game files Ryujinx can use. Think of them like different kinds of puzzle pieces – you need the right one to fit.
XCI Files
XCI files are like direct copies of your Nintendo Switch game cartridges. When you get an XCI file, it’s usually the whole game, just as if you had the original cartridge. They’re the most common way people back up their game cartridges, they can easily be loaded into Ryujinx.
NSP Files
NSP files are the digital version of a Nintendo Switch game, similar to how you’d get games from the Nintendo eShop. Think of them as the download version of a Switch game. Many people get these from custom firmware and then they are ready to load them into Ryujinx.
Choosing the Right File
Ryujinx can generally use both XCI and NSP files, however having both file types in your Ryujinx game folder would cause some issues and may not load games, It’s a good idea to have all your game files in the same format. This keeps things organized and makes it easier to manage your game collection. If you are going to have .xci, it’s better to just use that game type, or if you decide to use .nsp, it’s better to use that file type and avoid using both together in same Ryujinx game folder.
Preparing Your Game Files
Now, let’s talk about preparing your games for Ryujinx. This is like getting all your toys ready before playing. This step involves making sure your games are in the right place and ready to be found by Ryujinx.
Creating a Dedicated Game Folder
Keeping all your games in one place makes it much easier for Ryujinx to find them. This also helps you stay organized. You should create a new folder specifically for your Switch game files. I recommend a name like “Ryujinx Games” or “Switch Games”. This folder will be where you will keep all your game files. Here is how you can create a folder on windows:
- Open File Explorer.
- Go to the location where you want to create the folder (like your Documents, Downloads or a separate drive).
- Right-click in an empty space.
- Select “New” then “Folder”.
- Give your folder a name such as “Ryujinx Games”.
- Press Enter to create the folder.
Moving Your Game Files
After creating your “Ryujinx Games” folder, you need to move your game files (.xci or .nsp files) into this folder. Copy them from where they are currently stored and paste them into your new “Ryujinx Games” folder. You can do this using File Explorer on Windows, or Finder on Mac, it is also simple to move your games on Linux, in this case you need to use your file manager. Just copy or drag your game files into the folder you created.
Setting up Ryujinx to Find Your Games
Now that your games are in the correct place, you need to tell Ryujinx where to find them. This process is like telling your friend where all the toys are hidden. It’s pretty easy to do, let’s learn how.
Opening Ryujinx Settings
First, open the Ryujinx emulator. Once Ryujinx is open, look for “Options” on the menu bar at the top of the window. Click on “Options”, and then select “Settings”. This will open the settings window, where you can configure different things for the emulator. Don’t worry, we will focus on just setting the game folder for now.
Adding a Game Directory
In the settings window, you’ll see a list of options on the left. Select “Game Directories”. Click the “Add” button, next to the folder selection box. Navigate to the “Ryujinx Games” folder you created earlier using the file explorer. Select the folder and click on “Add”. Now, Ryujinx knows where to look for your games. Now click “Save” to save your settings.
Loading Your Games
Now, close the settings and go back to the main Ryujinx window. You should see all your games listed. If they don’t appear at first, try closing Ryujinx completely and open it again. If it still isn’t working correctly, then it’s possible the files are named improperly or not in the correct file format. Now that your games are listed, you’re ready to play!
Troubleshooting Common Issues
Sometimes, things don’t go as planned. Don’t worry; here are some common issues and how to fix them.
Games Not Appearing
If your games aren’t appearing in Ryujinx after you’ve added the directory, here’s what to do:
- Double-Check the Game Directory: Make sure you selected the correct folder containing your game files. Also check that your game files are inside the folder and not in a subfolder inside of the folder.
- Verify File Formats: Ensure your games are either .xci or .nsp files. If you have other file types, they won’t show up.
- Restart Ryujinx: Sometimes, closing and reopening Ryujinx can solve this issue, as the application needs to re-read game directories.
- Incorrect File Names: Some game files may be missing information from the file name or are named improperly, thus they may not load into Ryujinx correctly. Check the file names of the game files and ensure they match how the game should be named. For example, if a game is called ‘The Legend Of Zelda: Breath Of The Wild” ensure that the file name is along the same lines.
Games Not Launching
If you see your games listed but they don’t launch when you click on them, try these troubleshooting steps:
- Missing Firmware and Keys: Ryujinx requires Nintendo Switch firmware and keys to run games. Make sure you’ve added these in the Ryujinx settings. Go to “Options” then “Settings”. After that, navigate to “System” and click on the “Install Firmware” tab and provide your firmware files to Ryujinx. Also, you must provide the key files for the application.
- Hardware Requirements: Some games need more power than others. Make sure your computer meets the minimum requirements for running Ryujinx. Try closing other programs and apps that are running in the background to improve performance.
- Driver Updates: Ensure your computer has the latest graphics card drivers installed. You can generally obtain graphics drivers from Nvidia or AMD websites.
Game Crashing
Game crashes while playing on Ryujinx can be annoying. Here are some fixes you can try:
- Lower Graphics Settings: Go to the graphics settings for Ryujinx, and lower the graphics quality. This may help the games run more smoothly and reduce crashing.
- Check your drivers: Outdated graphics drivers can often lead to instability in games. Make sure you update the graphics drivers from the corresponding websites.
- Make sure you are running the latest Ryujinx version: Older versions of Ryujinx may have more bugs than newer versions, so you should always download the latest version of the emulator from the official Ryujinx website.
Advanced Tips for Game Management
Once you’ve got the basics down, there are a few extra tips to make your gaming experience even better.
Organizing Game Folders
If you have a lot of games, organizing them into subfolders can help. For example, you could create folders inside your “Ryujinx Games” folder for different game genres or series. You will need to add each folder in Ryujinx settings for the emulator to be able to see them though.
Using Game Patches and Mods
Ryujinx can use game patches and mods, which can enhance your gaming experience. Patches can fix bugs, while mods can change the way the game looks or plays. Look for these on gaming forums and communities. Please note, that you will need to do some research on how to install mods and patches, there are a variety of methods and ways that can be used for each game, so make sure you follow a guide to the game in which you are trying to install a mod. Be sure to get patches and mods from trusted sources.
Keeping Ryujinx Updated
Always make sure you are running the latest version of Ryujinx from the official website. The developers regularly release updates that add new features, fix bugs and improve performance. Make sure to visit their site often to get the latest version. Using the latest version will improve your gaming experience.
Adding games to Ryujinx is simple when you follow these steps. Once you have the hang of it, you’ll be ready to enjoy many fantastic Switch games on your computer. Remember to use the game files that you already own, and always follow the terms of use when obtaining game files. Have fun playing your games on Ryujinx!
How to add games to directory in ryujinx
Final Thoughts
To summarize, you place your game files (XCI or NSP) in a designated folder. Then, within Ryujinx, navigate to “File” and select “Load Application from File”. Find and choose your game file. Remember proper setup and keys are must for games to run.
This simple process will let you play your favorite games on the emulator. Essentially that’s how to add game to ryujinx.

