Adding Nexus Mods to Steam games typically requires downloading mods from the Nexus Mods website and then manually placing them into the game’s designated mod folder, usually found within the Steam installation directory.
Ever felt your favorite Steam game could be more? Many players seek to personalize their games through modifications, and Nexus Mods provides a vast library of them. This guide will show you how to add Nexus Mods to Steam games, letting you customize your gameplay experience.
It involves a simple process of downloading files and putting them in the correct game folder. We’ll walk through the steps to get you modding quickly and safely.

How to Add Nexus Mods to Steam Games
So, you’ve got a cool Steam game and you’ve heard about mods from Nexus Mods. That’s awesome! Mods are like extra toys for your games. They can change how things look, add new stuff, and even make the game play totally different. But how do you actually get these mods working with your Steam game? It might seem tricky, but it’s really not that bad. Let’s break it down step-by-step, so you can start enjoying all those cool creations.
Understanding Nexus Mods and Steam
First things first, it’s important to know what we’re working with. Steam is like a big store for video games. You buy and download games there. Nexus Mods is a website where people share mods they have made for different games. It’s like a giant library of game add-ons. Steam games themselves don’t usually come with built-in mod support. That means you need to do a little bit of extra work to use mods from Nexus Mods with your games. The good news is many games are compatible with mods. We’ll look at the specifics on how to do it.
Checking Mod Compatibility
Before you go downloading a bunch of mods, let’s make sure they’ll actually work with your game. This is super important! Not every mod works with every game and even with every version of that game. Here is what you need to check:
Game Version
The very first thing is to match the mod and your game version. Games sometimes get updates. A mod made for an older version of a game might not work with a newer version, and can lead to game crashes or other problems. Look for the game version in the mod description or on the Nexus Mods page. Then check your Steam game. You can usually find the game version number when you launch the game or in the game’s menu. Make sure the version matches for smooth and issue free modding.
Mod Compatibility Lists
Some mods have special compatibility lists. These lists will tell you if the mod works well with other mods. If two mods change the same thing in the game, they might not work well together, and they can crash the game, for the instance, both the mods change the same textures. Always read the mod description pages and also the comments of other users to see what they report about the mods, regarding compatibility. This will help to avoid a lot of issues in the future.
Mod Requirements
Many mods need you to install other mods to work, this is often referred as mod requirement. They can require an extra plugin or another mod as the base requirement. Mod descriptions on Nexus Mods will tell you if you need other files for a mod to work correctly. Pay close attention and download the additional needed files from nexus mods or sometimes they are available on other websites. If you don’t, the mod just won’t work or might cause the game to glitch or crash.
Downloading Mods From Nexus Mods
Now that you’ve checked compatibility, let’s download some mods! Here’s how:
Creating a Nexus Mods Account
You will need a Nexus Mods account before you can start downloading. Go to the Nexus Mods website and sign up for a free account. This is very easy, and will only take a few minutes. Having an account is a must to download files. After creating your account, log in to the website.
Finding the Right Mods
Find the game you have mod, on the nexus mods website. Use the website search bar to find your game. After clicking on the game, it will take you to the game page that has all the mods for that specific game. From here, you can browse through the available mods. You can search by category, or by rating or the number of downloads. Read the descriptions carefully to find ones you’ll like. Remember to check the compatibility section discussed above.
- Search by Category: Nexus Mods lets you find mods based on what they do, such as new weapons, characters, or map changes.
- Sort by Popularity: You can sort mods by downloads, to see what is most downloaded. This can be helpful to know the commonly used and working mods.
- Read User Reviews and comments: Before downloading, read the comments from other players about how the mod works.
Downloading the Mod Files
After finding a mod, you will find a button for manual download. Always click on this button. Click the button and download the mod file. These files often come in compressed form, so they appear as a .zip or .rar file. Some large mods may have a few files, download all of them. Some nexus mods use the mod manager, so it may ask you to download the manager instead of the mod. For now, we are focusing on the manual installation so, use the manual download option. Save the downloaded file to a folder on your computer. Use a folder you will remember. This folder will be your “mod storage” folder. I prefer a folder called “Mods” in my Documents folder.
Installing Mods Manually
Now for the most important part – getting those mods into your game. For manual mod installations, always start by reading the instructions provided by the mod creator. Usually, these instructions will be on the mod’s page on Nexus Mods. Usually mod creators provide easy to understand instructions. If a mod’s documentation is lacking, look for comments on the download page. Other users sometimes provide instructions or help there. Here is the general way for the manual mod installation:
Unzipping the Mod Files
The files you downloaded are likely compressed into a .zip or .rar file. You need to “unzip” them to access the mod files. If you have Windows, you can just right-click on the file and choose “Extract All.” On other operating systems, you may need an extra program like 7-Zip. After unzipping, you will see a folder or files that were inside the zip.
Finding Your Steam Game’s Install Folder
Next, you need to find the folder where your Steam game is installed. This is where we will copy the mod files into. Here’s how to find it:
- Open your Steam app.
- Go to your Library.
- Right-click the game you want to mod.
- Hover over “Manage” and then click on “Browse local files”.
- A file explorer will appear that shows you where your game is installed on your computer.
Copying Mod Files to the Game Folder
Now it’s time to copy the mod files you extracted into the game folder. This process can vary a little depending on the mod but here’s the most common method:
- Open the folder where you unzipped your mod files.
- Open the game install folder you found earlier in the file explorer.
- Look at the mod instructions again. Usually, it will tell you where to put which files. Sometimes, mod files go into a specific folder, like a “Data” folder inside the game folder. Sometimes, files must be directly put inside the game’s root directory.
- Copy the mod files from the mod folder to the correct locations in your game folder. Make sure you are copying the actual files or folders.
- If Windows asks you to replace files, do so only if the mod instructions specify. Sometimes mods will overwrite existing files. This is necessary sometimes.
For instance, a simple mod might ask you to copy a folder with the name of “textures” and place it in the game folder.
Running the Game and Testing the Mod
After copying the files, start your game through Steam. If the game does not show any crashes, you did everything correctly. If you did not copy the mod files to the right location or if there are any conflicts between mods, it can lead to crashes or other unexpected behaviors. The in game mod appearance will depend on what the mod was designed to do. For example, If the mod changes character appearances, you will see new character looks. If the mod adds new weapons, you will see new weapons in game. If you mod adds new items, you will see them in game. Sometimes, the game requires you to start a new game for the mods to take effect.
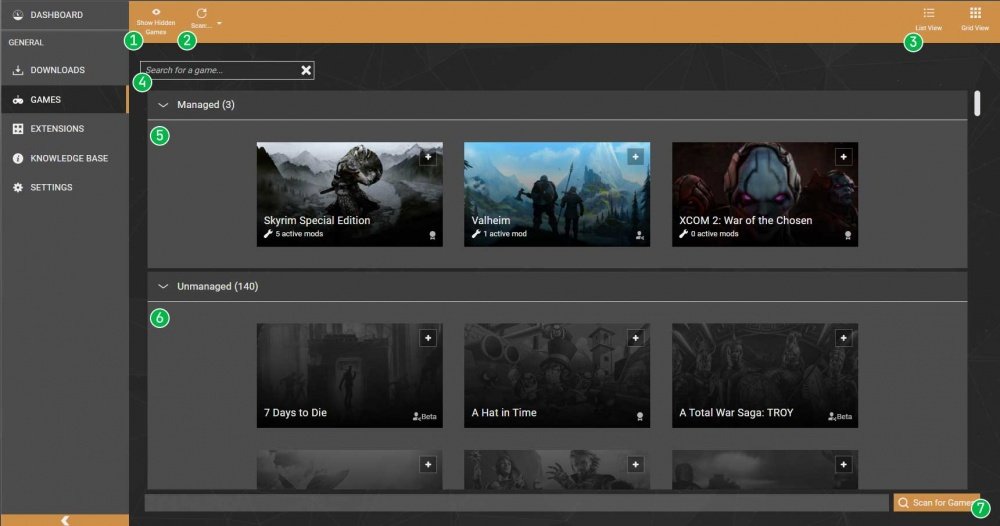
Using Mod Managers
Manually installing mods can be a little tedious, especially if you have a lot of mods. Luckily, there are tools called mod managers that can help. A mod manager does many things like automatically installing mods, removing mods, handling conflicts, organizing your mods, and more. It can help make modding your Steam game much easier. Here are two of the most popular mod managers:
Vortex
Vortex is a mod manager created by Nexus Mods. It’s designed to work with all of the games that are available on Nexus Mods. Vortex can help you download mods, install them automatically, and handle any mod conflicts. To use Vortex, you need to download and install it from the Nexus Mods website. After installing, it will automatically detect all of the games you have on Steam, and you can start using it. It can download mods straight from Nexus Mods with just one click and automatically install it to the correct game folder. Vortex will also detect all conflicts and help you in resolution.
Mod Organizer 2
Mod Organizer 2 is another great mod manager. It is very popular, especially for games like Skyrim and Fallout. Mod Organizer 2 doesn’t directly change your game files. Instead, it stores mods in a separate location and then adds the changes to the game when it runs. This feature helps keep your base game files clean. It also helps with debugging mods and installing and uninstalling mods. Mod Organizer 2 is more complex than Vortex, but many people like the way it handles mods. Its a little more difficult to understand, but the end result is worth it.
Troubleshooting Common Issues
Modding is usually fun, but sometimes things go wrong. Here are a few common problems and how to fix them:
Game Crashes
If your game crashes after installing a mod, there could be a few things wrong. Here is what you should do to fix it:
- Check mod compatibility: Make sure the mod is compatible with your game version.
- Check for mod conflicts: Other mods might be conflicting with the new one. Try turning off other mods to see if that fixes the problem.
- Verify game files: Sometimes the base game files can have issues and cause a crash. Use the “Verify integrity of game files” option in Steam by right clicking the game, hovering over Manage, and clicking Properties. Then find the install files and verify them. This will find any missing or corrupted files in the base game.
- Reinstall the mod: Sometimes the mod file can have some issues from the download. Redownload and reinstall.
Mods Not Appearing in Game
If a mod is not showing up in your game, here’s what to do:
- Check the installation path: Make sure you put the mod files in the right place, especially if manually installing.
- Check for missing requirements: Make sure you installed all the requirements mods for that mod to work.
- Try starting a new game: Some mods don’t work with old save files.
Mod Conflicts
If multiple mods change the same part of the game, they might conflict with one another. If you are using a mod manager like Vortex or Mod Organizer 2, then they will help in resolving mod conflicts. Manually resolve these by turning off some mods and retesting until you find the ones conflicting with each other.
Modding can sometimes be a bit of a trial-and-error process. Don’t get discouraged if you have problems. Many players go through the same thing. The most important things are that you read the instructions, make sure the mod is compatible with the game, and also be patient. With the right steps and tools, you can get it working.
Now you know how to add mods from Nexus Mods to your Steam games! So go and try it. Modding is a great way to make your games even more fun.
how to download mods from Nexusmods (EASY) 2021 🔥🔥
Final Thoughts
Adding Nexus mods to Steam games involves downloading the mod files from Nexus Mods. Then, locate your game’s installation folder and extract the mod files into the correct location. Finally, launch the game, and the mods should be active.
This process of adding Nexus mods to Steam games varies slightly depending on the game. Always read the mod’s installation instructions carefully. Follow the directions to avoid game issues.

