To clean a DS game cartridge, gently wipe the metal contacts with a cotton swab lightly dampened with isopropyl alcohol. Allow it to dry completely before inserting it into your device.
Dust, grime, and even accidental spills happen, and sometimes your trusty DS game cartridge might stop working because of it. You’re probably wondering how to clean ds game cartridge effectively without damaging it. Well, it’s simpler than you might think!
This short guide will help you get your games back up and running smoothly. With just a few household items, you can quickly and safely clean your DS game. Let’s jump right in and get those cartridges shining!

How to Clean a DS Game Cartridge
So, you’ve got a Nintendo DS or 3DS, and you’re ready for some gaming fun. But then, disaster strikes! Your favorite game cartridge won’t work. The screen might show a blank space, or the game might freeze up. Often, the problem isn’t a broken game – it’s just a dirty cartridge. Dust, grime, and even tiny bits of food can get into the cartridge’s connection points, preventing it from working properly. But don’t worry! Cleaning your DS game cartridge is usually easy, and it can often bring your games back to life. This guide will walk you through safe and effective ways to clean your DS game cartridges and get you back to playing.
Understanding the Problem: Why Do DS Games Get Dirty?
Before we get to the cleaning process, let’s talk about why these tiny game cartridges get so dirty in the first place. It’s not usually your fault! Think about where your games spend their time: in backpacks, pockets, drawers, and sometimes, even under the sofa. These places can be full of tiny particles that easily find their way onto the game’s connection pins.
- Dust: Everyday dust floats around and settles on everything, including your game cartridges.
- Fingerprints and Oils: When you handle your game cartridges, your fingers leave behind oils and smudges. These can attract even more dust and dirt.
- Lint: The fabric in your pockets or bags often sheds tiny fibers. These can get stuck in the small gaps of the game cartridge.
- Food Particles: Snack time while gaming is common, but crumbs and tiny bits of food can find their way onto your game cartridges.
- Moisture: Even a little bit of moisture from sweaty hands or a humid environment can cause dirt to stick and possibly cause corrosion on the pins.
These things build up over time, creating a barrier between the game cartridge and your DS console. This barrier prevents the console from reading the game properly. So, cleaning your cartridge isn’t just about making it look nice; it’s about making sure it works correctly!
What You’ll Need: Gathering Your Cleaning Supplies
Before you start cleaning, it’s important to have the right tools on hand. Using the wrong things could damage your game cartridge. Luckily, most of what you need can probably be found around your house. Here’s a list of what you’ll need:
- Cotton Swabs (Q-tips): These are great for getting into small spaces and gentle cleaning.
- Rubbing Alcohol (Isopropyl Alcohol): This is used to safely clean the electrical contacts. You’ll want 70% or 90% isopropyl alcohol. You can find it at most pharmacies or supermarkets.
- A Clean, Soft Cloth or Microfiber Cloth: These are perfect for wiping off dirt without scratching the plastic.
- A Can of Compressed Air (Optional): If you have it, compressed air can help remove dust and particles from hard-to-reach areas.
- Distilled Water (Optional): If you don’t have rubbing alcohol, distilled water will work, but it’s not as effective as rubbing alcohol.
Important Note: Never use tap water because it contains minerals that could damage your game cartridge pins. Also, avoid using abrasive cleaners or paper towels, as these can scratch the plastic and potentially damage the electronic components inside the cartridge.
Step-by-Step Guide: Cleaning Your DS Game Cartridge
Now that you’ve gathered your cleaning supplies, let’s get to the actual cleaning process. Follow these steps carefully to make sure you clean your game cartridge effectively and safely.
Step 1: Initial Inspection
Before you start cleaning, take a good look at your game cartridge. See where the dirtiest spots are. This will help you focus your cleaning efforts.
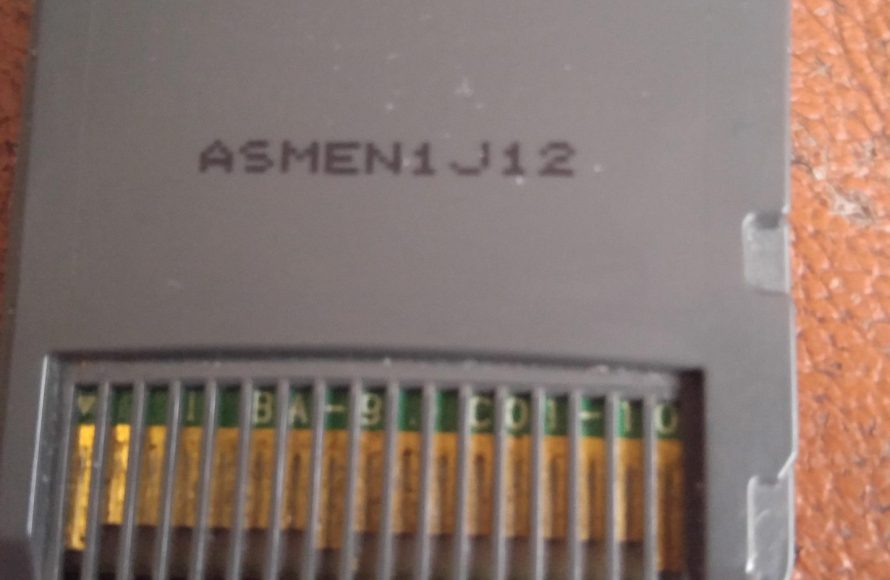
- Check the gold or copper colored connection pins on the bottom edge of the cartridge. Look for any visible dirt, dust, or grime.
- Inspect the outer plastic casing for any sticky spots, smudges, or visible dirt.
Step 2: Removing Loose Debris
The first step is to remove any loose dirt and dust. You can do this with a few methods:
- Compressed Air (Optional): If you have compressed air, use short bursts to blow away loose dust and particles. Hold the can upright and a few inches away from the cartridge. Avoid spraying too close as it might blow out water from can.
- Soft, Dry Cloth: If you don’t have compressed air, use a clean, soft, dry cloth to gently wipe away loose dust and debris from the cartridge’s outer casing and the area around the pins.
Step 3: Cleaning the Connection Pins
The most important part of cleaning a game cartridge is cleaning the gold/copper-colored pins. This is where the connection happens, and it’s usually the source of the problem. Do this carefully because these pins are sensitive.
- Prepare the Cleaning Solution: Pour a small amount of rubbing alcohol (isopropyl alcohol) onto a cotton swab. Don’t soak the cotton swab – you want it just damp, not dripping wet. Too much alcohol could seep into the cartridge and damage it.
- Gently Clean the Pins: Carefully rub the damp cotton swab back and forth across the metal connection pins. Don’t press too hard; use a gentle, sweeping motion. You may notice some grime coming off on the cotton swab. It’s okay if you need to use several cotton swabs to fully clean the pins.
- Repeat If Necessary: If the pins are still dirty, take a new cotton swab, dampen it with rubbing alcohol, and repeat the cleaning process. Keep going until the pins look clean and shiny.
- Let It Dry: Allow the game cartridge to air dry completely. Wait for a few minutes before inserting it back into your DS console. Don’t be tempted to blow on it or try to dry it with a cloth, as this could introduce moisture or lint back into the cartridge.
Alternative Method (if you don’t have rubbing alcohol)
If you don’t have rubbing alcohol, you can use distilled water, but rubbing alcohol is much more effective at dissolving grime and moisture. If you’re using distilled water, use a similar approach like described above, applying a tiny bit on the cotton swab and making sure that you let it dry completely before trying to play.
Step 4: Cleaning the Outer Casing
While the pins are the most important part, it’s also a good idea to clean the outer plastic casing of the game cartridge.
- Damp Cloth: Take a clean, soft cloth and dampen it lightly with a little bit of rubbing alcohol (or distilled water). Don’t soak the cloth.
- Wipe the Casing: Gently wipe the outer casing of the game cartridge, paying attention to any sticky spots or smudges.
- Dry the Casing: Use a dry part of the cloth to dry the casing completely. Don’t put the cartridge back into the console if it is wet or still damp.
Step 5: Testing Your Game
After you’ve cleaned everything and allowed it to dry completely, it’s time to test your game. Insert the cartridge into your DS or 3DS console and power it on. If you cleaned it properly, your game should load up and work correctly.
If the game still doesn’t work, you might need to repeat the cleaning process, paying extra attention to the connection pins. Sometimes, it takes more than one cleaning session to get a very dirty game cartridge to work.
Troubleshooting: What If the Game Still Doesn’t Work?
If you have followed all the steps, and your game still isn’t working, there may be other issues causing the problem. Here are a few things you can check:
- Try a Different Game: If possible, try another game cartridge to make sure it’s not your DS system that is having a problem. If other games work fine, then it’s still likely the problem with the original game cartridge.
- Check for Damage: Carefully inspect the game cartridge for any signs of physical damage, such as cracks, chips, or bent connection pins. If you see any damage, you will not be able to fix this. You may need to buy a new game.
- Repeat the Cleaning: Sometimes, you need to clean the game cartridge multiple times before it will work. Be patient and try the cleaning process again, making sure you get the pins really clean.
- Contact a Repair Professional (If Necessary): If none of the above works, there may be an internal problem with the game cartridge itself. In that case, you could consider looking for a repair professional.
Preventing Future Problems: Keeping Your Game Cartridges Clean
Cleaning your game cartridges is one thing, but keeping them clean is even better. A few easy habits can make sure you have to clean your cartridges less often. Here are some tips:
- Store your games in a case: Store your game cartridges in cases or containers when you are not playing with them. This protects them from dust, dirt, and accidental damage.
- Wash your hands before handling: Washing your hands before handling your game cartridges helps prevent transferring oils and dirt from your fingers to the game.
- Avoid eating and drinking while gaming: Spills and crumbs can damage your game cartridges, so it’s best to keep food and drinks away from your gaming area.
- Keep the DS in a case or bag: When your DS isn’t in use, store it in a case or bag to keep the game cartridge slot clean.
These simple steps will help you keep your game cartridges clean and extend the life of both your games and console. Remember, a little care goes a long way in ensuring a smooth gaming experience!
By following these easy steps and taking care of your game cartridges, you will not have to face the frustration of a non-working game. So grab your cotton swabs, get your rubbing alcohol, and get ready to keep your games running smoothly. Happy gaming!
How to Clean/Fix A Nintendo Ds/3ds Cartridge
Final Thoughts
In short, use a dry cotton swab to gently wipe the metal contacts. If needed, use a bit of isopropyl alcohol on the swab, ensuring it’s almost dry. Avoid using water.
After cleaning, let the cartridge completely air dry before inserting it into your DS. This helps prevent any potential issues. The main keyword is vital when thinking about how to clean ds game cartridge safely and effectively.

