
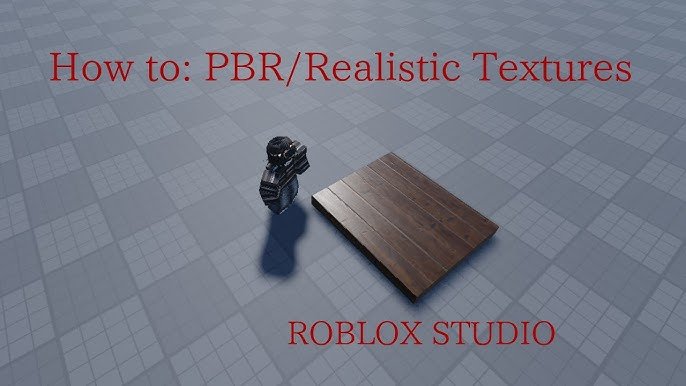
Creating custom textures in Roblox involves designing images using external software, then importing these images as decals or textures and applying them to the desired parts of your Roblox creations.
Ever wondered how those incredible, unique builds in Roblox get their stunning surfaces? The secret lies in knowing how to create custom textures in Roblox. It’s a process that allows you to move beyond basic materials and truly make your creations stand out.
This opens the door for detailed brickwork, realistic wood, or even futuristic panels, all designed by you. You will be able to give your projects your own unique style.

How to Create Custom Textures in Roblox
Have you ever looked at your Roblox game and thought, “This needs more pizzazz!”? Maybe you want a brick wall that looks exactly like the one in your backyard, or a spaceship panel with a super cool design. Good news! You can make your own textures in Roblox. This guide will show you how, step-by-step.
Understanding Textures
Before we dive into making textures, let’s talk about what they actually are. Think of a texture like a sticker for your 3D models. It’s an image that gets wrapped around the surface of an object, changing how it looks.
What Makes a Good Texture?
A good texture makes your builds look better and more realistic. It helps to make your game interesting. A few key things make a texture look good:
- Sharpness: You want clear details, not blurry ones.
- Seamlessness: A seamless texture can repeat without showing a hard edge. This is great for large surfaces like floors or walls.
- Appropriate Design: The design should fit the object it’s going on. A wooden texture doesn’t belong on a metal spaceship.
- File Format: Roblox prefers using .png or .jpg files for textures.
Getting Started: Tools You’ll Need
To start creating custom textures, you’ll need a few basic things. Don’t worry, they’re not too hard to find. They also are free to use.
Image Editing Software
You’ll need software that lets you make and edit images. Here are a couple of free options:
- GIMP: It’s a free open-source program, like Photoshop but free! You can get it from gimp.org. It has lots of great tools.
- Paint.NET: Another free option that is easier to learn than GIMP. You can find it at getpaint.net. It’s also very good for making basic texture changes.
Roblox Studio
Of course, you’ll need Roblox Studio itself. It’s where you’ll actually apply your textures to the objects in your game. You can download it from the Roblox website. Once you have Roblox Studio, you are set to begin using custom texture.
Creating Your First Texture: Step by Step
Let’s walk through the process of creating a basic texture. We’ll start with making a simple brick texture.
Step 1: Finding Inspiration
Before you start drawing, think about what you want your texture to look like. Do you want a simple brick or a fancy pattern? It can be helpful to look at real life objects for inspiration. For example, you can take a picture of a real brick wall for reference.
Step 2: Making the Basic Shape
Open your image editor. Start by creating a new image file. You should start with a square picture, such as 512×512 pixels. This helps you make sure the texture wraps evenly on your model. Now, draw a rectangle that will be your basic brick. You can use the rectangle tool in your image software.
Step 3: Adding Detail
Now make the brick look more realistic. Add some lighter and darker parts to make it look 3D. Use darker colors on the bottom and lighter on the top. You can use the brush or pencil tool for this.
Step 4: Creating the Grout
The lines between the bricks are called grout. Use a thin, darker line to create these. Draw horizontal lines and vertical lines to separate each brick in your texture. It’s okay if it’s not perfect, real brick isn’t perfect either!
Step 5: Making it Seamless
This step is important, especially if you want to cover a large surface without lines. The edges of a seamless texture line up. This means it can repeat seamlessly without a line showing. Use your image editing software’s “offset” function or a similar tool to achieve seamlessness. A helpful trick is to move half the image to the opposite side. Now, any changes to the center will affect both edges. After this you can fill the gaps in the middle.
Step 6: Saving Your Texture
When you’re happy with your texture, save it as either a .png or .jpg file. Make sure to choose a spot on your computer where you’ll easily find it. Use a name that helps you remember what the texture looks like such as “red_brick.png”.
Importing Your Texture into Roblox
Now that you have your texture saved, it’s time to bring it into Roblox Studio.
Step 1: Uploading the Texture
Open Roblox Studio and go to the “View” tab. Then click on “Asset Manager.” Click the plus button next to “Images” in the Asset Manager. Select your texture image file. Then, upload it to Roblox. This will make it available to use in your game.
Step 2: Applying the Texture
In your game, select the part that you want to have your new texture. Go to the properties tab. Find the “Texture” property. Click on the folder icon and choose your texture from the Asset Manager. You will see your texture now on the object!
Advanced Texture Techniques
Once you get the hang of the basics, you can explore some more advanced techniques. These will take your textures to the next level.
Using Normal Maps
Normal maps add an illusion of depth to your textures. They create the look of bumps and grooves without needing tons of triangles on your model. Normal maps use different colors to show where light should bounce off. You can create normal maps using special tools, sometimes even within your image editor using plugins. It gives the object a 3D look without extra polygons.
Making Metallic Textures
Want to make your object look like shiny metal? You can use a metallic effect on your textures. This involves playing with lighter colors and reflections on the texture. You will create an image that imitates a metallic material. In Roblox Studio, you will want to adjust the metalness property of the texture.
Creating Transparent Textures
Sometimes you’ll need textures that are partly see-through. For example, like a window. To do this, you will use the transparency features of your image editing software. Use a transparent background and then add the details to your texture. Save the image as a .png file, this saves the transparency. In Roblox Studio, apply it like normal and adjust the “Transparency” setting on the part.
Tips for Great Custom Textures
Making great textures takes practice. Here are a few tips to help you get better.
- Start Simple: Don’t try to make super complicated textures right away. Start with simple patterns or plain colors. This will help you learn the basics.
- Use References: Look at real-world objects when creating a texture. This will help you make realistic looking textures.
- Experiment: Try out different colors and techniques. Experiment with different settings in your editing software. Don’t be afraid to make mistakes, it is part of the learning process.
- Be Consistent: When making multiple textures for a game, aim for a consistent style. This helps to make your game look professional.
- Test Often: Check how your textures look in Roblox Studio regularly. This helps you know what you want to change.
Common Issues and How to Solve Them
Sometimes, you might run into some problems. Here’s how to fix some common ones.
Texture is Blurry
If your texture looks blurry, it might be because the resolution of your image is too low. Try making your image bigger in your editing software (512×512 or higher). Make sure you save your textures with the best quality setting available. The picture quality will make a big difference.
Texture Doesn’t Fit
If your texture doesn’t fit the object the way you wanted, check that it is a square shape. Also, you might want to adjust the texture offset and rotation settings in Roblox Studio. These adjustments can make the texture look right on the object.
Colors Look Different
Sometimes the colors you see in your image editor might look different in Roblox. This can be due to differences in how monitors show colors. Try testing your textures in Roblox Studio as you work. This will help you pick the right colors. You can always go back to your image editor to change color or shading.
Advanced Texturing using Scripting
While basic texturing is done through the properties panel, scripting offers some really cool possibilities. You can use code to dynamically change the texture on objects in real time. This opens many doors in terms of game mechanics. For instance, you can make an object change its texture when a player interacts with it or when a certain condition is met in your game.
Changing Textures via Script
You will be using Lua scripts in order to change the textures. This script can change the “Texture” property of a part. For instance, when you want the player to touch a door. And you want it to change to a new texture. You can make a script that will change the door from a normal wood texture. And then change to one that looks like an open door. You can find these scripts in the internet or create your own. These scripts will make your game look better.
Animating Textures
You can animate textures. By cycling through a sequence of images on an object, you can create animated effects. Imagine a screen that shows a moving waveform or a water surface that looks like it’s rippling. This opens the door to really impressive visual experiences within your Roblox game. You will need to create all of the separate frames in your image editor. You will also need to use a script to switch between these frames in Roblox. It makes a big difference to your game.
Texturing and Optimization
It’s important to make sure your textures do not slow down your game. Using too many high-resolution textures will make your game run slowly, especially for players with weaker computers or mobile devices. You need to know how to keep your game running well.
Texture Resolution
If you are making an important object, you can use a higher resolution texture. However, use smaller textures for parts of the game that are not in focus. You can even use tiling to use only one small texture but it covers a big area. This keeps your game smooth.
Texture Compression
When you save your textures, sometimes you can compress them. Compression can help to make the image file size smaller. However, this can sometime come at a cost of image quality. Try to strike a balance when you are making your textures. You need to be able to make your game look great but also run fast.
Number of Textures
Try to reuse the same texture where possible. Try to use one texture for many different objects. This will help to make your game faster and easier to load. You can always tweak the color to differentiate them.
Creating custom textures in Roblox is a great way to make your game truly unique and exciting. By taking the time to learn and practice, you can create amazing visuals that will make your game stand out from the crowd. So start playing around with your image editor, and let your imagination run wild!
If Your a Builder You NEED This Plugin! Easy Textures
Final Thoughts
Creating custom textures in Roblox involves using image editing software and uploading them. You then apply these textures to your game’s parts.
Remember to properly format images and consider file sizes for optimal game performance. This process lets you customize your game’s visuals.
Ultimately, learning how to create custom textures in roblox greatly enhances your game design.

