Overclocking specific games requires adjusting your GPU and CPU clock speeds, often using software provided by your hardware manufacturer or third-party applications, to push performance beyond factory settings for that particular game.
Want better frame rates in your favorite titles? It’s frustrating when games don’t run as smoothly as you’d expect. That’s where knowing how to overclocking specific games can really help. By carefully tweaking your hardware, you can get improved performance.
This isn’t a one-size-fits-all situation; you must tailor the overclock to the game and your system. We’ll explore the process of how to overclocking specific games, covering safety and some of the common steps. Remember, proceed with caution and research before making these changes.

How to Overclock Specific Games
Okay, let’s talk about making your games run faster! Sometimes, even with a good computer, games can feel a little slow. Overclocking is like giving your computer a little extra push to help games run more smoothly. It’s not magic, but it does involve tweaking some settings in your computer. Think of it like this: your computer has a speed limit, and overclocking lets you carefully raise that speed limit a bit. This guide will show you how to do it for specific games. It’s a bit like adjusting the volume on your favorite music, but for your computer’s power.
Understanding the Basics of Overclocking
Before we dive into overclocking specific games, it’s important to understand the basic idea. Your computer’s brain, or CPU (Central Processing Unit), and its graphics helper, or GPU (Graphics Processing Unit), have a set speed they usually run at. This speed is measured in Hertz (Hz). Overclocking involves increasing this speed. When you increase the speed, your CPU and GPU can process more information in the same amount of time. This means games can run at higher frame rates (more pictures per second), which makes them look and feel smoother. But it’s important to be careful, because going too fast can make your computer too hot or unstable.
What You Need to Know Before You Start
Before you start pushing your hardware, there are a few important things you need to know. It is better to be safe and prepared! Here is a checklist:
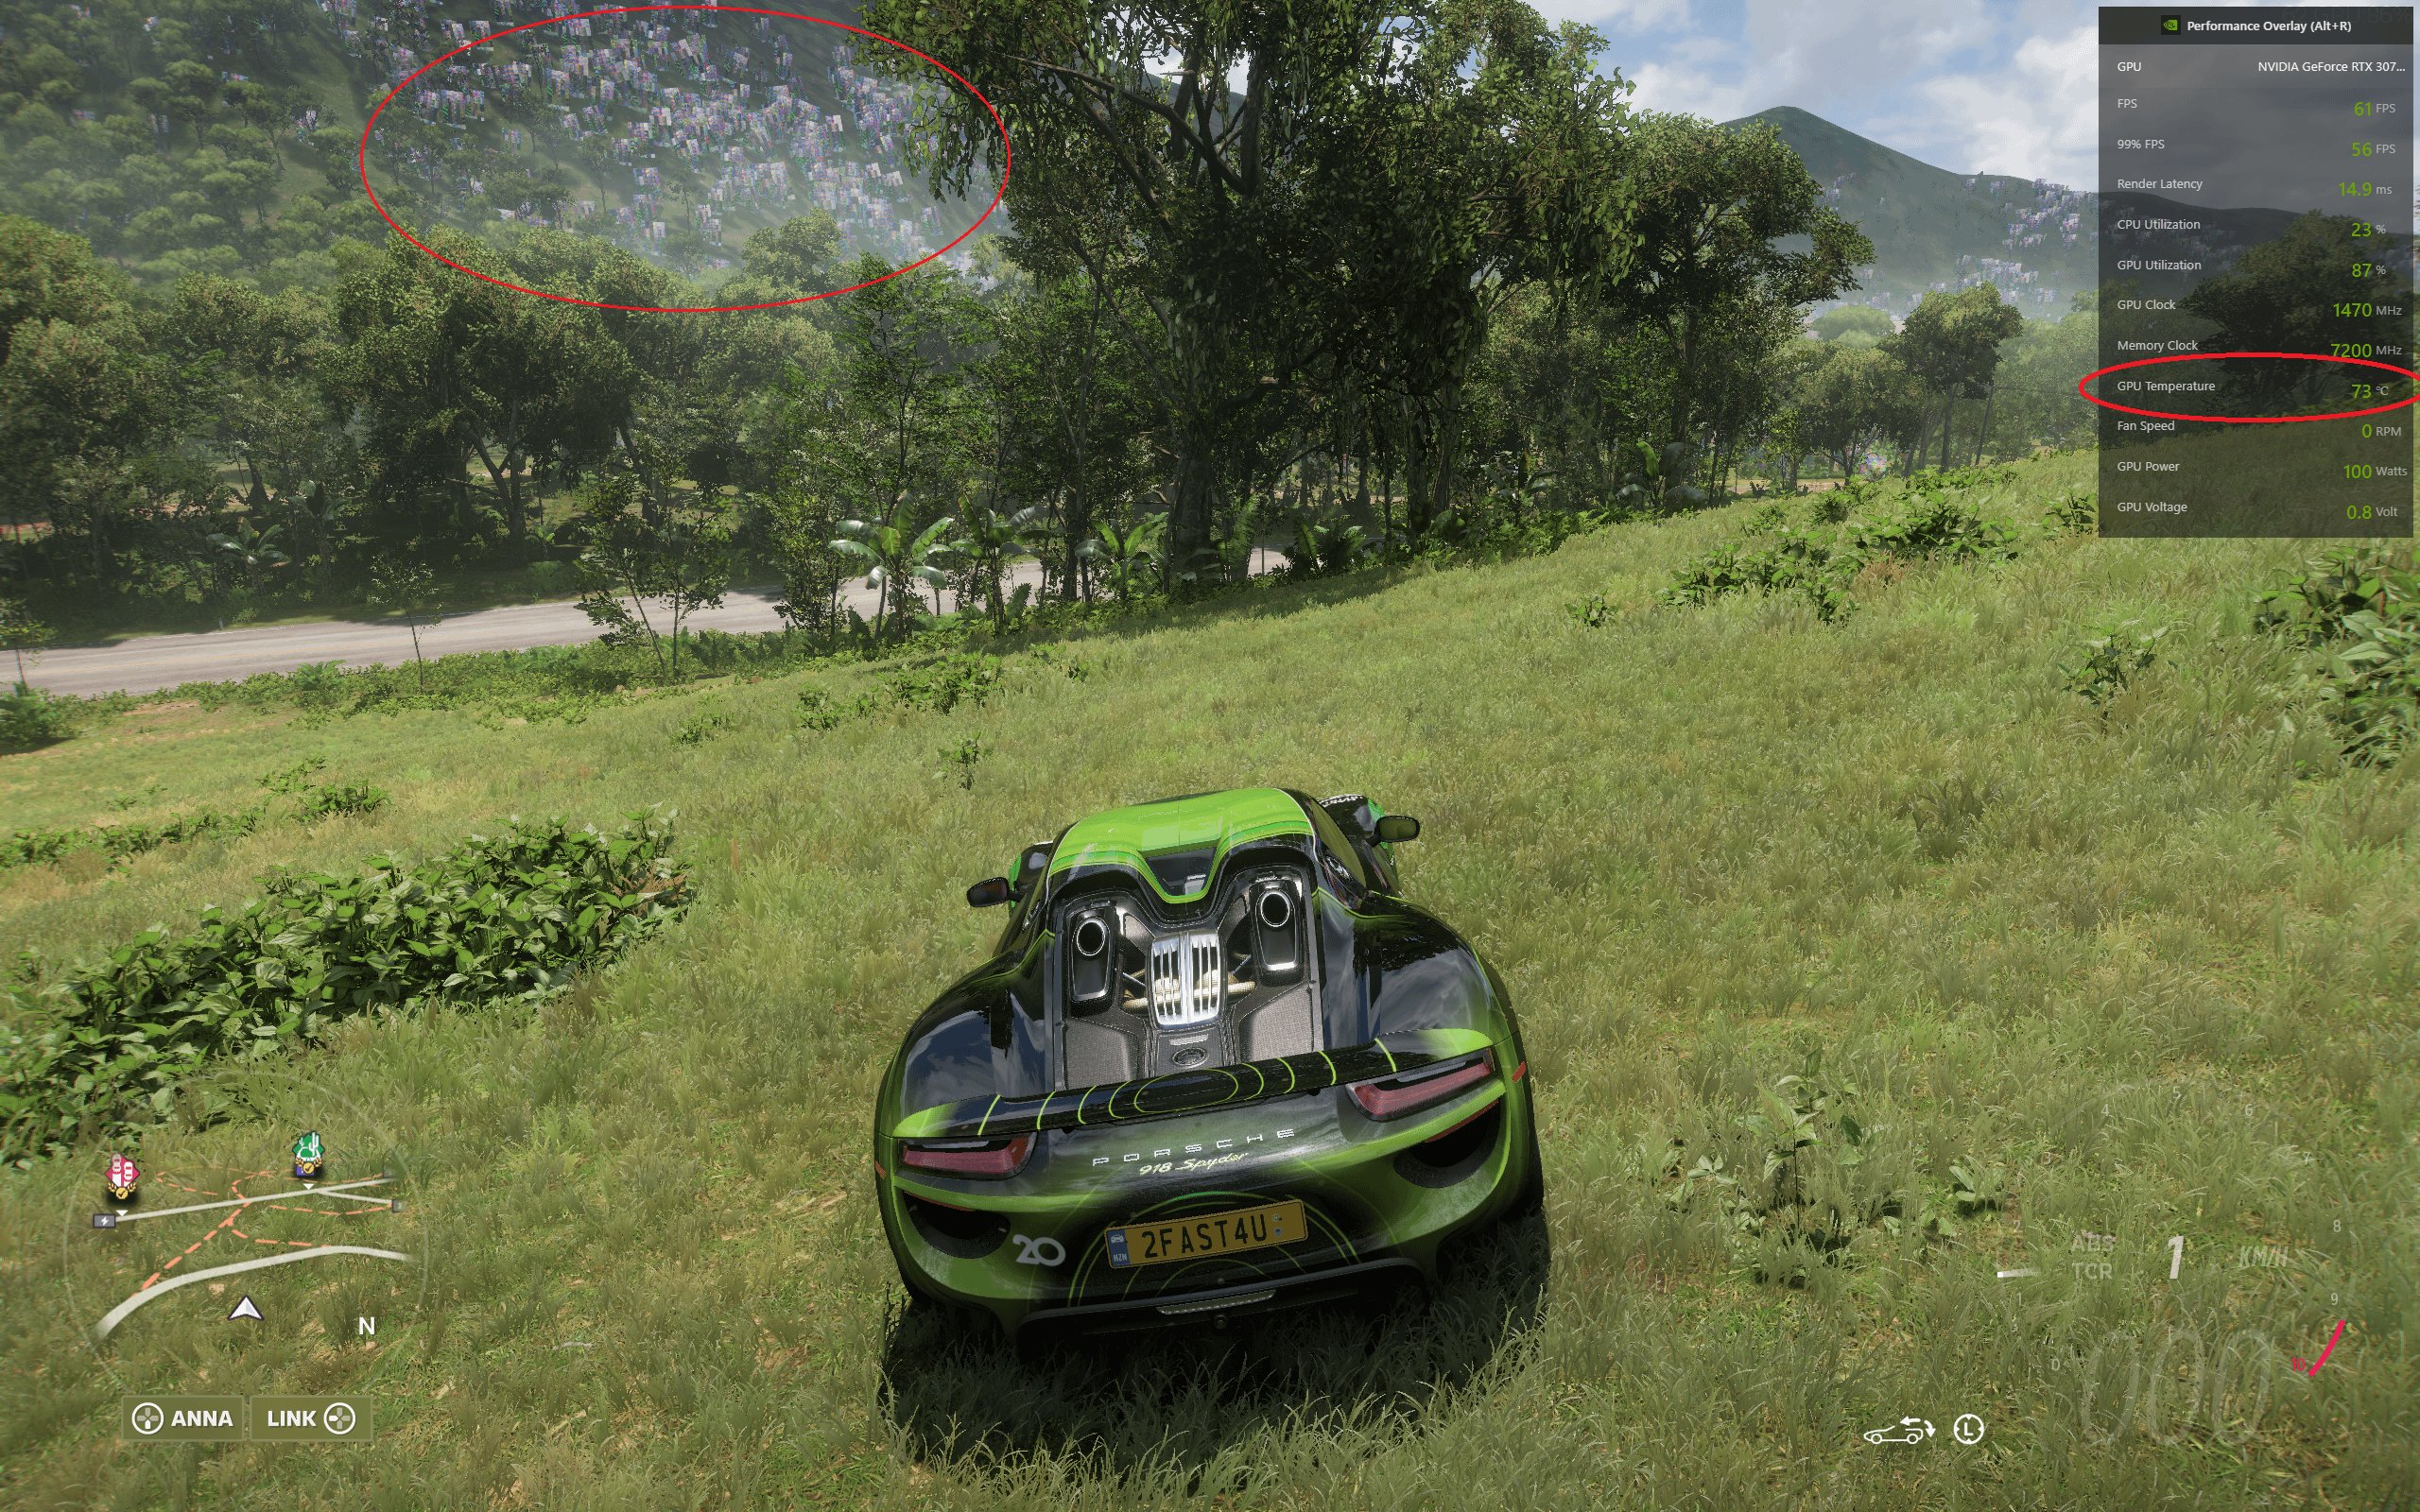
- Monitoring Software: You will need software that shows you the temperature of your CPU and GPU. Things like MSI Afterburner or HWMonitor are good options. This helps make sure things don’t get too hot. You need to keep an eye on them to make sure your PC is handling the increased speed and not overheating.
- A Stable System: Your computer should be running well before you even think about overclocking. If your system is crashing even with normal settings, overclocking is not a good idea. Ensure your drivers for both CPU and GPU are updated to the latest versions. Outdated drivers can cause issues.
- A Good Cooling System: Your computer needs a way to get rid of the extra heat created when you overclock. A good CPU cooler and plenty of fans in your computer case are important, also try to apply some good thermal paste on your CPU. If possible, use water-cooling solutions as they are more efficient at keeping temperatures down.
- Patience: Overclocking takes time and testing. You should be ready to take things step by step. Do not rush and try to change a lot at once.
- Read Your Hardware Manuals: It’s always a good idea to know what your hardware specifications are. Check the maximum supported speeds and temperature of your CPU and GPU.
Overclocking Your CPU for Gaming
Your CPU is a core part of your computer, and you can overclock it to help with games. Here’s how:
Accessing Your BIOS/UEFI
The first step to overclock your CPU is to get into your computer’s BIOS (Basic Input/Output System) or UEFI (Unified Extensible Firmware Interface). This is where you can make changes to the settings of your hardware. How you get to the BIOS/UEFI depends on your computer manufacturer, but usually it involves pressing a key like Delete, F2, F10, or F12 while your computer is starting up. Keep your eyes peeled when you turn on your computer and watch for a message at the start screen and press the appropriate key to enter the BIOS/UEFI settings.
Finding the Overclocking Settings
Once you are in the BIOS/UEFI, you need to find the overclocking settings. It might be called something like “CPU Frequency,” “CPU Ratio,” or “CPU Multiplier.” Each BIOS is different, but usually, you can find these settings under sections like “Advanced Settings,” “Performance,” or “Overclocking.” Be careful, you do not want to change things that are not related to overclocking!
Adjusting the CPU Multiplier
The main thing you will be changing is the CPU multiplier. The multiplier is what increases your CPU speed. Start by increasing the multiplier by a small amount, maybe by 1 or 2. For instance, if your multiplier is 35, increase it to 36 or 37. Save the changes in the BIOS/UEFI and restart your computer.
Testing for Stability
After restarting your computer, test your CPU with something like Prime95 or Cinebench. These tools push your CPU to its limit and can help you see if it is stable. If your computer crashes or has errors, it is not stable. You should lower your multiplier in the BIOS/UEFI. On the other hand, if everything looks good, then you can try increasing the multiplier further. Small steps are key here!
Overclocking Your GPU for Gaming
Now, let’s move to overclocking your GPU. This is another area where increasing speed will help your games.
Using Overclocking Software
Unlike CPU overclocking, you don’t need to enter the BIOS for your GPU. There is a specialized software like MSI Afterburner, which is the most common software used for overclocking your GPU. Download and install it. This software is very easy to use. The software lets you change the clock speeds and fan settings of your GPU, and monitor the GPU temperature. Also, it shows the current FPS in real time which makes monitoring the results easy!
Adjusting the Core Clock
In the software, you will see a slider for the core clock. This is the main speed at which your GPU runs. Increase this slider by a small amount, like 25-50 MHz. Then, press “Apply” and test your game.
Adjusting the Memory Clock
Next, you will see a slider for the memory clock. This is the speed of the GPU’s memory. Again, increase this by a small amount, like 50-100 MHz. Apply this change and test your game.
Testing for Artifacts and Stability
When testing your game after any changes to the core or memory clock speeds, watch for artifacts. These are strange visual errors like lines or dots on the screen. If you see any of those, lower the clock speeds. You also need to test for stability. You can use software like Unigine Heaven Benchmark for testing. If your game or test crashes, then you need to reduce the clock speeds. It is normal to experience crashes when overclocking!
Overclocking Specific Games: Practical Examples
Now, let’s talk about how you can use overclocking specifically for different types of games. Different games can require more from the CPU or the GPU.
Overclocking for CPU-Intensive Games
Games like strategy games (Civilization, StarCraft), simulation games, and some open world titles are often more CPU intensive. This means the game puts more work on the CPU than on the GPU. For these games, your priority is the CPU overclock. Focus on increasing the CPU multiplier and testing stability, as we talked about earlier.
Example:
- Game: Civilization VI
- Focus: CPU
- Steps:
- Increase CPU multiplier gradually by 1 or 2 in BIOS
- Test with a lengthy play session
- Repeat the above steps as long as the PC is stable.
- If you experience a crash, lower the multiplier by 1-2
Overclocking for GPU-Intensive Games
Games like first-person shooters, racing games, and many modern AAA titles are usually GPU-intensive. This means they put more load on the GPU. For these, your main focus should be the GPU overclock. Adjust the core and memory clock speeds and test carefully, as described before.
Example:
- Game: Cyberpunk 2077
- Focus: GPU
- Steps:
- Increase GPU Core clock in 25-50 MHz steps using MSI Afterburner. Test for artifacts or crashing.
- Increase GPU Memory Clock in 50-100 MHz steps. Test again.
- If crashes or artifacts occur, revert to earlier settings.
Overclocking for Balanced Games
Some games are balanced between CPU and GPU usage. For these types of games, you should overclock both your CPU and GPU. The order does not matter here. Just follow the procedures that were discussed above. Test every step of your overclock, as a balanced approach is important for these kinds of games.
Example:
- Game: Grand Theft Auto V
- Focus: Both CPU and GPU
- Steps:
- Overclock the CPU gradually, testing stability with gaming.
- Overclock the GPU core and memory in small increments and test for artifacts and crashing.
- Test after every single step, even for small changes.
Practical Tips for Successful Overclocking
Here are some useful tips and good practices that you should follow to have a smoother and a better overclocking experience:
- Small Increments: Never make large changes all at once. Overclock in small steps. This will help you avoid instability and make it easier to find the point where your system is stable. Small steps will also save a lot of time in the long run.
- Monitoring: Always monitor your CPU and GPU temperatures. Keep them below the maximum safe temperature as specified in the hardware manuals. Use your software to track the temperatures and be mindful of them, as this is crucial to your system’s safety.
- Test Thoroughly: Spend time testing after making changes. Don’t just play for a couple of minutes. Play a longer session of your games and also use testing software. A quick 5 minutes game test is not enough, always spend time testing and push the PC.
- Don’t Push Too Hard: Every chip is different. Don’t push for the highest numbers you see online. Focus on a stable overclock that gives you noticeable improvement without making your system crash. Your goal should be to make the games more enjoyable, not to win a prize by pushing your PC’s limits.
- Document Your Changes: Write down each step you take and the results. This makes it easier to go back if something does not work and helps you track your progress.
- Keep Things Cool: As your hardware works faster, it produces more heat. Make sure that your cooling solutions are working at their best. Clean your PC of any dust regularly. Good ventilation in your PC is important for good overclocking.
When to Avoid Overclocking
While overclocking can improve game performance, it’s not always the best idea. Here are situations where you should not overclock:
- Old Hardware: If your hardware is already old, overclocking might not give you much benefit and could damage it. Older hardware will have trouble with the heat and the process, so it might not be a good idea to push it.
- Poor Cooling: If you don’t have good cooling, don’t try overclocking. The heat buildup will damage your hardware. Good cooling is not optional, if you are overclocking your PC!
- Unstable System: If your system is not already stable on stock settings, then overclocking is not a good idea. Try fixing the problems first.
- Warranty Issues: Overclocking can sometimes void the warranty of your parts. Keep in mind that pushing your components past the intended limits has a risk to it.
Overclocking can be a really great way to get more speed out of your computer and make games run more smoothly. But, it takes patience and should be done carefully. You need to understand your system well and test every single step. Start with small changes and make sure your PC is stable at every step. It is not a sprint, but rather a marathon. If you follow the guidance of this article, you will be able to overclock for improved gaming.
Overclocking My GPU For More FPS #gamingperformance #pctips #pctipsandtricks #pc #tech #techtok
Final Thoughts
Overclocking specific games often requires a tailored approach. First, test your system’s stability using benchmarks. Then, increase your GPU or CPU clock speeds gradually, checking for performance gains in the desired game. This method lets you optimize each game.
It’s important to note that not all games react the same way. Some may benefit greatly from increased clock speeds while others barely show a difference. The process of how to overclocking specific games may vary slightly, always monitor temps.

