You can uninstall Game Bar through Windows Settings, by navigating to the “Gaming” section, then “Xbox Game Bar,” and toggling it off. Then, use PowerShell to remove it completely.
Is that pesky Game Bar popping up when you’re in the middle of an intense game session or simply trying to focus? Many users find it an unwelcome interruption. Knowing how to uninstall game bar can improve your computer experience significantly, clearing away the clutter.
The steps are fairly easy once you know the exact process. We will guide you through the process of removing it so you can get rid of this function permanently. Let’s proceed with how you can reclaim your screen and your focus.

How to Uninstall Game Bar
Okay, so you’re ready to say goodbye to the Game Bar? Maybe it’s popping up when you don’t want it, or perhaps you just don’t use it at all. Whatever the reason, it’s totally fine to get rid of it! The Game Bar is a feature in Windows that lets you record gameplay, take screenshots, and chat with friends. It’s really handy for some, but if it’s not your cup of tea, you can certainly uninstall it. Let’s walk through the different ways you can remove it from your computer.
Understanding the Game Bar
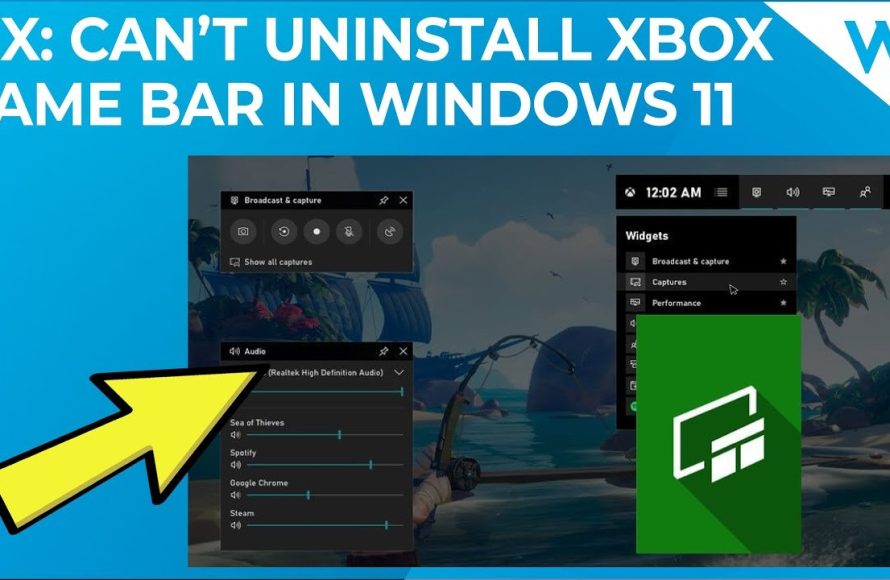
Before we dive into how to uninstall it, let’s quickly touch on what the Game Bar actually is. Think of it as a little toolbox for gamers built right into Windows 10 and Windows 11. It allows you to capture your amazing gaming moments, share them with others, and even keep an eye on your computer’s performance. You can access it by pressing the Windows key + G on your keyboard. When you press those buttons, a little window pops up with all sorts of cool options, like:
- Recording your gameplay
- Taking screenshots
- Broadcasting live to Twitch or Mixer
- Talking to friends using Xbox social features
- Monitoring your computer’s CPU, GPU, and RAM usage
It’s a pretty helpful tool if you are a gamer, but if you’re not using these features, it’s just using resources in the background. Sometimes, it might even cause some minor problems or conflicts with other applications. So it’s completely understandable why you’d want to remove it.
Why Uninstall Game Bar?
You might be wondering, “Why would someone want to get rid of something that seems so useful?” Well, there are several reasons why people decide to uninstall the Game Bar:
- Performance Issues: For some older computers or machines with limited resources, the Game Bar can cause a slight performance slowdown, particularly during gaming. It might not be much, but it can be noticeable for some users.
- Unwanted Overlays: Sometimes the Game Bar can pop up unexpectedly, especially if you press the Windows key + G by accident. These random pop-ups can be distracting, especially if they happen in the middle of something important.
- Not Used: Many people simply don’t need or use any of the Game Bar features. If you don’t play games, or if you prefer to use other software for recording or communicating, then the Game Bar is just taking up space and resources.
- Conflict with Other Software: In rare cases, the Game Bar can conflict with other applications or games, leading to crashes or other problems. Getting rid of it may help with the stability of your computer.
These are some of the key reasons why people decide to uninstall Game Bar. If any of this sound familiar, then you’re in the right place to learn how to do it.
Method 1: Uninstalling Game Bar via Settings
The easiest way to uninstall the Game Bar is by using the Windows Settings app. This is where you can control all kinds of features and apps on your computer, including the Game Bar. Here’s how to do it:
Step 1: Open the Settings App
First, you’ll need to open the Settings app. You can do this in a few different ways:
- Click on the Start button (the Windows logo in the bottom-left corner of your screen). Then, click on the little gear icon, which is the Settings icon.
- You can also press the Windows key + I on your keyboard, and the Settings app will open directly.
Step 2: Navigate to the Gaming Settings
Once you have the Settings app open, you’ll need to find the gaming section. Follow these steps:
- Click on “Gaming.” It should be somewhere near the middle of the options in the Settings app.
- On the left side of the Gaming window, you’ll see a list of gaming related options. Click on the “Game bar” option from that list.
Step 3: Disable the Game Bar
Now you’re on the Game Bar settings page. You’ll see a switch labeled “Open Xbox Game Bar.” All you need to do here is:
- Click the switch to the “Off” position. This will prevent the Game Bar from popping up.
Disabling the toggle will prevent the Game Bar from being shown in most cases, but it does not completely uninstall or remove the Game Bar from your computer. You will need to use additional methods from below in order to fully uninstall the app.
Extra Step (If Needed): You might want to look at other options, too, like the “Captures” and “Game Mode” settings which are also in this Gaming settings section. If you have other capture or game mode options enabled that you are also looking to disable, you can disable them here.
Step 4: Uninstall Xbox App
The next step would be to uninstall the Xbox app. While the Xbox app and the Game Bar are separate things, the Xbox app does have some influence over game bar functionality, particularly in the recording and social aspects. You can remove it by following these steps:
- Press the Windows Key on the keyboard and type ‘Xbox’. The first item that appears should be the ‘Xbox’ app.
- Right click on the Xbox app, and choose ‘Uninstall’.
- A small pop-up will appear asking you to confirm the uninstall. Click ‘Uninstall’.
After following these steps the Xbox app will be uninstalled. But the Game Bar still might be available in certain situations.
Step 5: Restart Your Computer
After you’ve made the changes, it’s a good idea to restart your computer. This ensures the changes are fully applied and the Game Bar is no longer active.
That’s it for disabling the Game Bar through Settings. It’s a straightforward way to keep it from bothering you. However, as we saw, this process does not fully uninstall the Game Bar. For that, we’ll need to move on to another method.
Method 2: Uninstalling Game Bar Using PowerShell
For a more complete removal of the Game Bar, we can use PowerShell, which is a powerful tool for managing your computer. This method is a little more advanced than using Settings, but don’t worry, we’ll break it down step by step. We will remove the app package itself with this method.
Step 1: Open PowerShell as Administrator
First things first, you’ll need to open PowerShell with administrator rights. Here’s how:
- Click on the Start button (the Windows logo).
- Type “PowerShell”.
- Right-click on “Windows PowerShell” (or PowerShell) and select “Run as administrator”.
- A pop-up might ask you to confirm you want to run it as an administrator. Click “Yes.”
Running PowerShell as an administrator is important because you need the extra permissions to uninstall certain system apps like the Game Bar.
Step 2: Find the Game Bar Package Name
Now that you’re in PowerShell, you’ll need to find the specific name of the Game Bar package. To do this, type the following command and press Enter:
Get-AppxPackage xboxgamebar | Select Name, PackageFullNameThis command tells PowerShell to look for any app packages that contain the word “xboxgamebar” in their name. It will show you two pieces of information: the name and the full name. Look for the line that contains the words “Microsoft.XboxGamingOverlay”. Copy the “PackageFullName” which will look something like “Microsoft.XboxGamingOverlay_1.234.5678.0_x64__8wekyb3d8bbwe” for example.
Step 3: Uninstall the Game Bar
Now that you have the full package name, you can use it to uninstall the Game Bar. Use the following command, but replace the YOUR_PACKAGE_FULLNAME placeholder with the package name you copied in the previous step:
Get-AppxPackage YOUR_PACKAGE_FULLNAME | Remove-AppxPackageFor example, if your package name was “Microsoft.XboxGamingOverlay_1.234.5678.0_x64__8wekyb3d8bbwe”, your full command would look like this:
Get-AppxPackage Microsoft.XboxGamingOverlay_1.234.5678.0_x64__8wekyb3d8bbwe | Remove-AppxPackageOnce you type in this command and press “Enter,” the Game Bar will be uninstalled from your computer. This might take a few seconds.
Step 4: Verify the Uninstallation
After the command is run, you can verify the uninstallation by running the package name command again:
Get-AppxPackage xboxgamebar | Select Name, PackageFullNameIf the game bar is uninstalled, no entries will be shown.
Step 5: Close PowerShell
Once you’ve uninstalled the Game Bar, you can close the PowerShell window. You don’t need to restart your computer, but if you were having performance issues, restarting might help ensure things are running smoothly.
Using PowerShell is a bit more direct and will remove the Game Bar app more completely than just turning it off in the Settings. If you are still experiencing issues with the Game Bar, then you may want to try this method for removal.
Method 3: Using Third-Party Uninstaller Software
While the methods mentioned above are usually enough to remove Game Bar, there is an alternative way, which uses third party software. Some people prefer to use third-party uninstallers, which can often remove even more files and traces of the Game Bar than using the system tools. These apps are designed to do a more thorough job of cleaning up after an uninstallation. Examples of these types of programs are:
- Revo Uninstaller
- IObit Uninstaller
- Geek Uninstaller
If you choose to use a third party uninstaller, you should first research its reputation and make sure that it is safe to use and from a reputable developer. Here are some general steps for using these apps:
Step 1: Download and Install
First, you need to download and install a third-party uninstaller that you trust. You can do so by:
- Going to a reputable website.
- Locating the download button for the uninstaller software that you chose.
- Following the installation instructions as prompted.
Step 2: Run the Uninstaller
Once installed, run the uninstaller tool. It will likely scan your computer for a list of all your installed programs. This process might take a few minutes to complete.
Step 3: Find and Uninstall Game Bar
Once the scan is finished:
- Look for the Game Bar app in the list. It might be listed as “Xbox Game Bar” or something similar.
- Select the Game Bar, and click the “Uninstall” button.
- The uninstaller will guide you through the removal process, often including additional steps to remove leftovers.
Step 4: Follow Prompts and Confirm
The uninstaller might ask for confirmation. Follow the on-screen instructions and allow it to remove all related files and registry entries.
Step 5: Restart your PC
Just like with other methods, it might help to restart your PC after uninstalling the app with a third party uninstaller.
This is an alternative method for removing the Game Bar app, but keep in mind that you might not need to go this far if the first two methods work for you.
Final Considerations
Before you uninstall the Game Bar, consider whether you might want to use it in the future. If you think you might change your mind, you can always disable it, rather than fully uninstalling. Disabling can be done through settings, as described in the first method, and it would be much easier to turn back on than reinstalling.
Also, be aware that after uninstalling, you may not be able to easily re-install the Game Bar. If you ever want to use the Game Bar again, you might need to look at some of the methods for re-installing system apps, and you might find it easiest to just use the Windows ‘Reset this PC’ function which will essentially restore your computer to its original settings.
Removing the Game Bar, whether through settings, PowerShell, or a third-party app, is not a difficult task. The right method for you really depends on your preferences, so go with the method that you think you’d be most comfortable doing. Just make sure to follow all the steps carefully and you will be able to remove the Game Bar from your computer.
How to Remove the XBox Game Bar on Windows 11
Final Thoughts
You can disable or uninstall the Game Bar through Settings. Navigate to the Gaming section and select Game Bar. You will find options to turn it off. Alternatively, you can remove it completely via the Apps section.
Within the Apps settings, locate “Xbox Game Bar” and select uninstall. This process will remove the application. This directly answers how to uninstall game bar, providing simple steps.

