Optimal NBA 2K25 simulation settings generally involve adjusting sliders to control game speed, shooting percentages, and CPU AI difficulty, allowing for a realistic and challenging experience.
Want to fine-tune your virtual basketball experience? Many players seek the perfect balance, aiming for games that feel authentic. We often debate what makes the ideal digital matchup. Figuring out the right configuration is crucial for getting that satisfying gameplay.
Specifically, adjusting your NBA 2K25 simulation settings can make a world of difference. Finding that sweet spot that mimics real-life basketball is key to enjoying the game. It’s all about making every game feel fresh.

NBA 2K25 Simulation Settings: Your Guide to Realistic Gameplay
Okay, so you’re ready to dive deep into NBA 2K25, huh? But not just any gameplay – you want it to feel real, like you’re actually watching a game on TV. That’s where simulation settings come in! These settings let you change how the game plays, making it more like a true NBA experience. Think of it like being the coach, you decide how your team acts and reacts. This is where we go from fun arcade action to something that feels incredibly authentic. Let’s explore all the options and see how you can become a simulation settings expert!
Understanding the Basics of Simulation Settings
Before we get into the nitty-gritty, let’s talk about the main idea behind simulation settings. Unlike arcade settings, which are all about fast-paced, high-scoring action, simulation aims for realism. This means:
- Slower Pace: Games tend to move more slowly, like real NBA games.
- Realistic Stats: Players’ stats actually matter. A guy who’s not a good shooter will miss more shots.
- Strategy is Key: You need to think about your plays, just like a real coach.
- Fewer Glitches: The game is less about crazy moves and more about smart basketball.
So, if you’re tired of seeing guys fly through the air and make impossible shots every time, simulation settings are for you.
The Core Simulation Sliders: What They Do
The heart of simulation settings is the slider menu. It might look a little intimidating at first, but we’ll break it down. Sliders are like volume controls for different parts of the game. You can make certain things happen more or less often by adjusting each slider.
Offensive Sliders
These sliders change how your team scores and moves the ball:
- Inside Shot Success: How often layups and close shots go in. Lower this for more challenging finishes at the rim.
- Close Shot Success: How frequently slightly longer shots around the basket go in, this effects shots such as floaters.
- Mid-Range Shot Success: This affects how often mid-range shots are made, lowering will make it harder to hit shots outside of the key.
- 3-Point Shot Success: The key to shooting from long range. Lower for a more realistic experience.
- Layup Success: This effects the success of layups.
- Dunk Success: How often a dunk animation is completed.
- Shot Timing Impact: How much your shot timing matters. If you want less of a green-light situation you can lower this to make it harder to hit every shot.
- Post Shot Success: Post moves in the paint. Lower this if post scorers are too powerful.
- Ball Handling: How easily players can dribble and control the ball. Lower for a less arcade feel.
- Passing Accuracy: This is how accurately passes will go to your intended target.
- Alley-oop Success: How often an alley-oop pass is caught for a dunk or layup.
Defensive Sliders
These sliders control how well your players defend and prevent the other team from scoring.
- Steal Success: How easy it is to steal the ball. Lower it for fewer cheap steals.
- Block Success: How often a player blocks a shot.
- Reach-In Fouls: How often you get a foul when trying to steal.
- Help Defense Strength: How well your teammates help each other on defense.
- On-Ball Defense Strength: How well a player stays in front of the person with the ball.
Attributes Sliders
Attributes sliders help determine how players’ stats affect gameplay.
- Speed with Ball: How fast players move when they’re dribbling.
- Speed Without Ball: How fast players run when they don’t have the ball.
- Acceleration: How quickly players speed up and change direction.
- Vertical: Affects how high players jump for rebounds and blocks.
- Strength: This impacts how well players fight through contact.
- Stamina: How quickly players get tired during the game.
- Durability: This affects how quickly players get injured.
Tendencies
These sliders control what your team likes to do on offense and defense.
- Drive Tendency: How often players like to drive to the basket.
- Shoot 3-Pointer Tendency: How often players like to shoot three-pointers.
- Shot Mid Range Tendency: How often players like to shoot mid-range shots.
- Post Up Tendency: How often players like to post-up near the basket.
- Use Pick and Roll Tendency: How often players try to run a pick and roll.
- Attempt Dunks Tendency: How often a player tries to dunk the ball.
- Attempt Layups Tendency: How often a player attempts a layup.
Other Sliders
These sliders don’t fit into the main groups but still matter for simulation.
- Offensive Rebound: How well teams go after missed shots on offense.
- Defensive Rebound: How well teams go after missed shots on defense.
- Fouls: How often fouls happen.
- Game Speed: How fast the overall game moves. Lower for a slower game.
Important Settings Beyond Sliders
Sliders aren’t everything, though! There are other settings that play a big role in how the game feels. Let’s check them out:
Game Style Settings
These change the overall feel of the game, with presets for different kinds of basketball.
- Simulation: This is the most realistic mode, the starting point for what we are aiming for, with less arcade-like and with an emphasis on realism.
- Casual: A more relaxed game mode that is easier to play, good for beginners or if you just want a quick fun game.
- Custom: You can modify and use your custom sliders in this setting.
Controller Settings
How your controller functions and how its settings effect the game.
- Shot Meter: Whether you see the shot meter or not. In simulation, many players turn this off for realism.
- Shot Timing: Can select “real-player %” or “user timing”. Real-player timing is based on the players’ attributes, user timing requires the user to time the shot perfect.
- Vibration: Controls if the controller vibrates.
Game Rules
You can adjust how the game plays by modifying the game rules.
- Quarter Length: Change how long each quarter is. Usually longer is better for stats.
- Game Speed: This is how quickly the game moves.
- Fatigue: How fast players get tired during the game.
- Injuries: How often players get hurt.
Finding Your Perfect Simulation Settings: A Step-by-Step Guide
Now, let’s talk about how to actually set these things up to get the best experience. It’s not as simple as copying someone else’s settings because everyone has different tastes. Here’s how to find your sweet spot:
- Start with Default Simulation: Play a few games using the game’s default simulation settings. See what you like and dislike. Take notes.
- Identify Issues: Is scoring too easy? Are steals too common? Do players get tired too fast? Identify what areas feel off.
- Tweak One Slider at a Time: Change one slider by a little bit and play another game. See if it fixed your problem, and if not, change it back and try another slider.
- Test with Different Teams: Don’t just use one team. Different teams play differently. Try out a few.
- Be Patient: It takes time to find the perfect balance. Don’t get frustrated if it doesn’t happen right away. Keep adjusting.
- Use the Practice Mode: Practice mode is your friend. It lets you test your settings without playing a whole game.
- Research Online: Look at what other sim players are using. You might get ideas to try out.
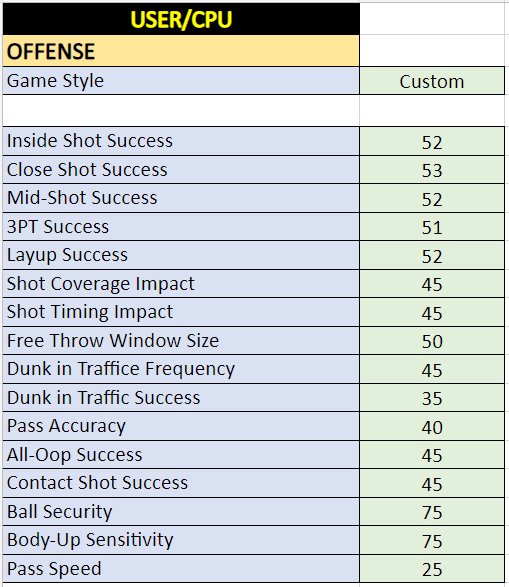
Example Simulation Settings and Why They Work
Alright, let’s look at some example settings and the reasons behind them. Remember, these are starting points. You will need to change them to fit your needs.
| Slider | Setting | Why? |
|---|---|---|
| Inside Shot Success | 48 | Makes it more challenging to score at the rim without being too difficult |
| Close Shot Success | 46 | Makes close-range shots harder and prevents excessive scoring in the paint |
| Mid-Range Shot Success | 47 | Makes mid-range shots a viable option without being overpowered |
| 3-Point Shot Success | 48 | Makes three-point shots balanced between being hard and being a good option |
| Layup Success | 47 | Makes layups more balanced between scoring and missing. |
| Dunk Success | 50 | Ensures dunking is powerful without being overly common |
| Shot Timing Impact | 45 | Timing matters but it doesn’t allow all shots to go in with perfect timing, this also prevents green light shots. |
| Post Shot Success | 44 | Makes post play harder to score in. |
| Ball Handling | 46 | Makes ball control a bit more difficult, promoting better basketball. |
| Passing Accuracy | 52 | Reduces inaccurate passes without removing the risk of turnovers. |
| Steal Success | 45 | Makes it harder to just spam steals and get the ball. |
| Block Success | 50 | Makes blocks challenging but possible. |
| Reach-In Fouls | 55 | Encourages less reckless defense by penalizing spamming steal. |
| Help Defense Strength | 50 | Makes help defense not too good, but not bad. |
| On-Ball Defense Strength | 48 | Encourages smart play while not making it too easy to defend. |
| Speed with Ball | 49 | Allows players to move with the ball without being too fast. |
| Speed without Ball | 47 | Makes running off ball balanced and realistic. |
| Acceleration | 48 | Ensures that quick acceleration is still useful without being too overpowered. |
| Vertical | 50 | Provides a fair balance for rebounding and blocking. |
| Strength | 49 | Strength matters but does not overshadow other skills. |
| Stamina | 52 | Allows the game to have stamina, but not to the point of always being tired. |
| Durability | 50 | Realistic injuries while not having too many. |
| Drive Tendency | 50 | Allows drives to the rim, while not having a high frequency of it. |
| Shoot 3-Pointer Tendency | 50 | Allows three-point shots, while not having a high frequency of it. |
| Shot Mid Range Tendency | 50 | Allows mid-range shots, while not having a high frequency of it. |
| Post Up Tendency | 50 | Allows post play, while not having a high frequency of it. |
| Use Pick and Roll Tendency | 50 | Allows use of pick and roll, while not having a high frequency of it. |
| Attempt Dunks Tendency | 50 | Allows dunks, while not having a high frequency of it. |
| Attempt Layups Tendency | 50 | Allows layups, while not having a high frequency of it. |
| Offensive Rebound | 50 | Balanced offensive rebounding to create second chances. |
| Defensive Rebound | 50 | Balanced defensive rebounding to prevent second chances. |
| Fouls | 52 | Allows realistic fouls without being excessive. |
| Game Speed | 48 | A bit slower pace to make it more realistic. |
Note: These settings are just an example, you will need to adjust them to fit your preference. Some areas may need to be increased, or decreased to make the game perfect for you.
Tips for Simulating the Real NBA Experience
Okay, so you’ve got your settings dialed in. What else can you do to make it feel like you’re watching a real game?
- Play Slower Offense: Don’t just run at the basket all the time. Work the ball around, find open shots, and move without the ball.
- Use Plays: Use set plays on offense. Real NBA teams don’t just run around randomly.
- Be Patient on Defense: Stay in front of your man, avoid over-committing on steals, and challenge shots properly.
- Look for Mismatches: If you have a small defender on your big man, post him up. If you have a fast guard against a slow defender, drive.
- Rotate Defensively: If you switch on a screen, be ready to rotate on defense.
- Manage Fatigue: Don’t run your starters for the whole game. Sub players in and out to keep them from getting too tired.
Advanced Strategies
Ready to take things up a notch? Here are a few more advanced things you can do with your simulation settings:
- Player-Specific Settings: If you know a player is good at something, adjust the slider that applies to that skill. If a player is bad at something, lower that slider.
- Team-Specific Settings: If a team is known for shooting a lot of three-pointers, try to simulate this in the settings to give you a more real feel.
- Adjusting to Game Flow: If you start playing against a team that is running wild, you might need to tweak the defensive settings to try and stop that team.
- Community Feedback: Join online communities and forums to get feedback on your settings from other players.
Experiment, see what works for you, and have fun making the game your own.
Finding the best simulation settings for NBA 2K25 can make the game much more immersive and enjoyable. Remember it takes time and practice to figure out the perfect settings for you. Adjusting the sliders based on your personal preference, and the play style you want will allow you to create the ultimate NBA experience. Enjoy the realistic world of basketball you’ve created.
5 SECRET Settings That You NEED To Use In NBA 2K25
Final Thoughts
Tweaking NBA 2K25 simulation settings is crucial for a realistic and engaging game experience. Adjusting sliders directly impacts gameplay, affecting everything from shot percentages to player movement. Experimenting with different configurations lets you tailor the game.
Finding your ideal setup requires patience and testing. Small changes often make a big impact. It will take time to find settings that match your preferences but it’s worth it.
Ultimately, fine-tuning your NBA 2K25 simulation settings allows you to create a game that feels authentic and fun. Remember to share your favorite adjustments with other players.

