
Effective Roblox level design best practices involve creating intuitive layouts, using consistent themes, employing clear visual cues, and optimizing for smooth gameplay.
Creating engaging experiences in Roblox relies heavily on thoughtful level design. Good environments guide players naturally and keep them interested. We’ll explore some key ideas for making your game spaces better. Applying roblox level design best practices is crucial to attract and retain players.
These practices include things like using repeating patterns, careful placement of objects, and choosing the right lighting. Consider how you want players to feel as they move through your game world. With these simple tips, your game levels will improve.

Roblox Level Design Best Practices
Making a cool Roblox game isn’t just about having a great idea; it’s also about how you build the world where players will spend their time. This is where level design comes in! It’s like being an architect for a video game. You decide where the paths go, where the obstacles are, and how the environment looks. Good level design can make a game super fun, while bad level design can make it frustrating. Let’s dive into some key best practices to help you craft awesome Roblox levels.
Planning Your Level: The Blueprint
Before you start moving bricks around in Roblox Studio, it’s smart to have a plan. Think of it like building a house – you wouldn’t just start throwing bricks without a blueprint, would you?
Understanding Your Game’s Genre
The first step is figuring out what kind of game you’re making. Is it a fast-paced obstacle course, a spooky horror game, a relaxed role-playing experience, or an exciting adventure? Different game genres have different needs. For example:
- Obby (Obstacle Course): Needs clear paths, challenging obstacles, and a sense of progression.
- Horror: Requires a dark, atmospheric environment, tight spaces, and surprising elements.
- RPG (Role-Playing Game): Demands lots of different places to explore, interactive elements, and clear quest locations.
- Adventure: Should have varied environments, hidden pathways, and interesting landmarks.
Sketching It Out
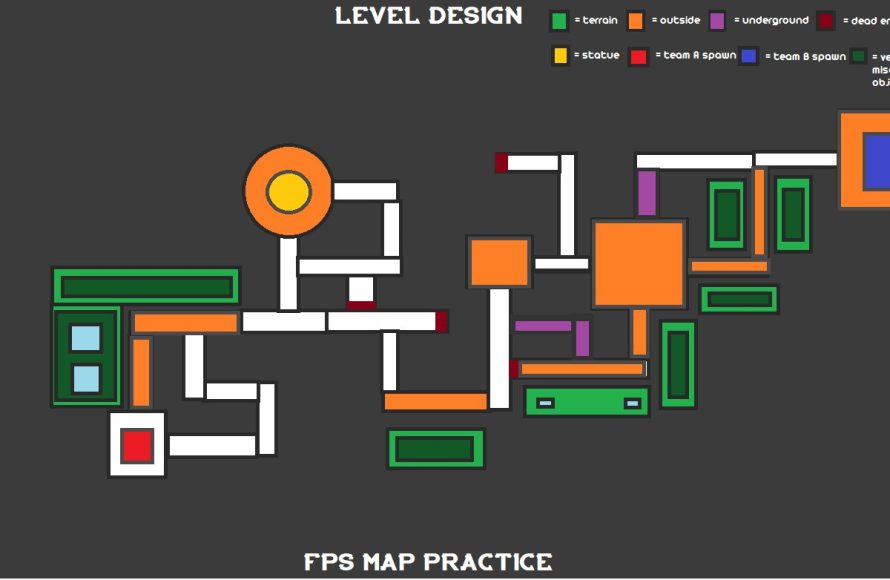
Grab a piece of paper and start sketching! It doesn’t have to be a work of art. The idea is to visualize the layout of your level. Think about where players will start, where they will go next, and what interesting things they’ll find along the way. This could involve drawing simple maps with key areas marked, or just doodling shapes that might be interesting areas in your game. You could also consider using online tools to create simple maps, such as using a drawing software or mind mapping application. Think of drawing your map as sketching ideas before building them in roblox studio. Don’t worry if it looks messy; it’s just for you and your team to understand your initial concept.
Defining Core Gameplay Loops
What will players do repeatedly in your level? The core loop is the action that players perform throughout the level. For an obby, the core loop is jumping through obstacles, whereas an RPG is completing quests and exploring different places. Having this in mind before you start building helps you design the level to support that loop. You should design the level to promote the gameplay loop you have chosen.
Building the World: Practical Tips
Okay, now that you have a plan, let’s talk about putting it together in Roblox Studio.
Scale and Proportion
Scale is crucial. Everything needs to feel right-sized for the player character. If a door is too small, or a building is too large, the player will feel like they don’t fit in the world. Always use the player model as a reference. You can add a dummy player model to help make sure your doorways, paths, and other objects feel right in size.
Creating Interesting Spaces
No one likes a level that’s just a long, straight corridor. Make it interesting! Try these ideas:
- Varying Heights: Don’t build everything on one flat plane. Add hills, platforms, and multi-story buildings to make the level feel dynamic.
- Changing Scenery: Break up long stretches of the same thing with different materials, colors, and details.
- Use of Natural Elements: Trees, rocks, and water bodies can make the world feel more real.
- Open and Closed Spaces: Use tight spaces to create tension, then open into bigger areas to allow the player to relax.
A game world that has constant changes between small and big spaces is far more interesting to explore. It will help to create a more memorable gaming experience.
Using Color and Lighting
Color and lighting are powerful tools. Use them to set the mood of your level.
- Warm Colors: Reds, oranges, and yellows can make areas feel inviting and vibrant.
- Cool Colors: Blues, greens, and purples can give a place a calming or even spooky feel.
- Lighting: Using shadows can add depth and a bit of mystery to your levels. Dark areas, when done correctly, can add suspense to a game, while well-lit areas can create a safe and welcoming atmosphere.
Try experimenting with different colors and light settings to see how they change the way the level feels. Remember that good use of lights will help your levels stand out.
The Power of Details
Small details make a big difference! Adding things like furniture, decorations, and even small props can make your world feel more alive and real. Try to think of what kind of details would fit the setting of the level you’re creating. For example, if it’s a spooky forest, consider adding small details like cobwebs, gravestones, and flickering lights.
Gameplay Considerations
Level design is not just about how a level looks; it’s also how it plays. Here are a few things to keep in mind:
Guiding the Player
Players need to know where to go. Avoid having them wander aimlessly. Clear paths help the player easily navigate the level. You can use these techniques:
- Visual Guides: Use paths, color contrasts, and light to steer the player in the right direction.
- Landmarks: Place unique and noticeable objects that players can use to orient themselves.
- Subtle Cues: Use the way the level is built to encourage the player to go where you want them to go. For example, a slightly wider path suggests the main route.
You want the player to feel like they’re exploring, not getting lost and frustrated.
Pacing and Flow
Pacing is about controlling the speed at which the game progresses. For example, you might want a slower, more exploratory area before you throw the player into a fast-paced segment of the game. Think of a movie; there are always highs and lows to keep it interesting.
Difficulty Curve
The difficulty should gradually increase as players progress. A level design best practice is not to overwhelm players with impossible challenges right away. Start with simple tasks and then add more difficult sections slowly. This will help keep the player engaged, without getting too discouraged.
Playtesting and Feedback
Finally, and very importantly, playtest your level! Get your friends or other players to try it out and give you feedback. Ask them questions like: Was it fun? Was it easy to understand what to do? Did they feel lost? Use their feedback to improve your design.
Here is a list of questions you can ask yourself, your team, or testers:
- Was the level easy to navigate?
- Was the difficulty appropriate?
- Was the pacing of the level good?
- What were the most enjoyable parts of the level?
- Were there any frustrating parts of the level?
Advanced Techniques
Utilizing Roblox Tools and Features
Roblox studio offers a ton of really useful tools and features. Some of these can help with your level design. Some great areas to consider:
- Terrain Editor: Use the terrain editor to create realistic landscapes easily. Experiment with different terrain types like grass, rock, and water.
- Part Properties: Get comfortable with part properties such as transparency, color, and reflectivity. These simple features can drastically change how your level looks.
- Scripting: Add more advanced logic and interactions with scripts. Think about using scripts to create custom moving platforms or interactive doors.
Optimizing Performance
Large levels with many detailed objects can slow down the game, especially for players with lower-end computers. Try to keep these in mind to optimize your games and keep them running smooth:
- Use Fewer Parts: Try to build using fewer parts. You can use the mesh feature in Roblox studio to make multiple parts one.
- Optimize Textures: Use smaller texture files. Large files can slow down the game.
- Level of Detail (LOD): Use LOD techniques that load less detail on objects further from the player to improve the game’s performance.
Level design is a skill that develops with practice and patience. There’s always something new to try and ways to make your levels even better. Use these tips, keep learning, and most importantly, have fun building!
So You Want to be a Level Designer – An Introduction to Level Design in Video Games – Extra Credits
Final Thoughts
Implementing strong level flow, clear visual cues, and playtesting are crucial. These practices help players understand the environment and navigate effectively. Furthermore, varying the gameplay and creating interesting spaces keeps players engaged.
Following these roblox level design best practices, you can create enjoyable and compelling experiences. Remember to prioritize player feedback and iterate on your designs to achieve optimal results. Your level design should always aim for clarity and fun.

