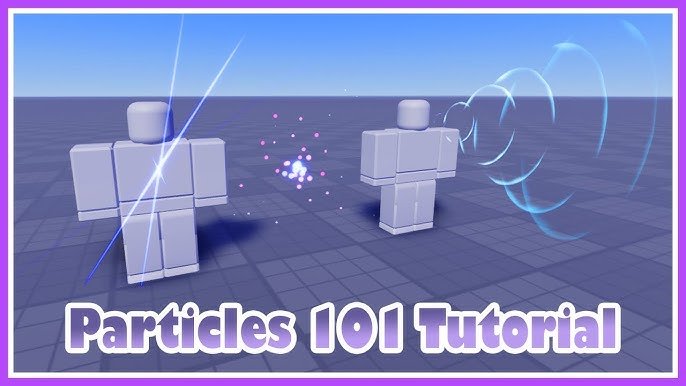
Using Roblox’s particle emitter, you can create various visual effects by adjusting properties like size, color, speed, and texture.
Ever wanted to add some flair to your Roblox game? Creating cool visual effects adds a professional touch to any experience. This roblox particle effects guide will help you get started with the basics.
We will explore the particle emitter, a powerful tool. You can modify many settings to make fire, smoke, or magical auras. Understanding these properties leads to amazing results.

Roblox Particle Effects Guide
Alright, future Roblox creators! Let’s dive deep into the exciting world of particle effects. If you’ve ever seen a cool explosion, a magical shimmer, or a puff of smoke in a Roblox game, chances are that was done using particle effects. These are the tiny little bits of visual goodness that can really bring your game to life. This guide will walk you through all the basics, and even some advanced tricks, so you can start adding amazing effects to your own creations.
What Are Roblox Particle Effects?
Imagine you’re drawing with lots and lots of tiny dots. That’s kind of what particle effects are in Roblox! Instead of drawing dots, Roblox lets you create tiny images or shapes, called particles, and then make them move around in different ways. Think of it like a digital swarm of tiny objects that, when viewed together, can create all sorts of cool visual treats. These particles can represent fire, water, magic, dust, you name it! They’re a super way to make your games more interesting and immersive. You don’t need to be a coding expert to use them either! Roblox Studio comes with a built-in particle editor, making it easy to get started.
The Power of Visuals
Particle effects are a key ingredient in making games visually appealing. Think about a game without them – no shimmering portals, no sparkling coins, no trails of fire behind fast cars! It would look pretty bland. These effects help make the gameplay more engaging, and sometimes even give important information to players, like a health indicator around a character or the area of effect of a special ability. Good visual effects communicate feelings and actions in a way simple geometry cannot.
Getting Started with Particle Emitters
The foundation of all particle effects is the ParticleEmitter object. This is like the main control panel for your effect. To get started, you’ll need to insert a ParticleEmitter into any object in your Roblox game. This object could be anything: a part, a model, a tool, even an attachment in a model. Let’s break this down:
- Insert a Part: First, make a new part in your game, maybe just a simple brick. You can do this by clicking the “Part” button in the Roblox Studio toolbar.
- Add a Particle Emitter: Select the part you just made, go to the “Explorer” window, and find the “Plus (+)” button next to your part’s name. Click it, and type “ParticleEmitter” in the search bar. Click on the ParticleEmitter to add it to your part.
- Look in Properties: Now select your ParticleEmitter in the Explorer and look in the “Properties” window. This is where you’ll change all the settings to make your effect look just right.
Now, you’ll start to see tiny dots appear from your part! It’s time to make that cool. Let’s see what the properties are.
Important Particle Emitter Properties
Here are some of the most important settings you will find in the ParticleEmitter Properties window:
- Enabled: This is like the on/off switch for your effect. If it’s checked, your particles will show, if it’s not, they won’t.
- Texture: This is the image that makes up each particle. You can upload your own images, or use some of the default Roblox textures. For starters, try using the default “spark” texture.
- Color: Set the starting color and the ending color of your particles. The emitter will smoothly shift the color of the particles based on its life. You can also use a ColorSequence to create rainbow-like color changes.
- Size: The size of each individual particle, set from the start and to the end. You can make them big at the beginning and smaller as they fade or the reverse. This uses a NumberSequence which allows for smooth sizing changes over time.
- Speed: How fast the particles will fly away from the emitter.
- Lifetime: How long each particle exists before fading away.
- Rate: How many particles spawn every second. Higher numbers mean more particles.
- SpreadAngle: This is how much the particles spread out as they are emitted.
- Rotation: You can specify how the particles rotate. This is great for things like leaves falling or smoke clouds.
- Drag: The amount of air resistance on each particle.
- Acceleration: You can have the particles accelerate over time.
Playing with these settings is the key to creating all sorts of different particle effects! The best way to learn is to just experiment and see what happens!
Creating Different Effects: Examples
Now let’s look at some common and fun effects and how to achieve them:
Sparkling Effects
Let’s start with something simple, a sparkle effect. This can be used for magical items, special abilities, or even just to make things look pretty.
- Texture: Use the default “spark” texture, or download a star-shaped texture online. You can find many free textures on websites for creative resources.
- Color: Use a light color like white or yellow. You might also set a fading color sequence to transition from bright yellow to a transparent white.
- Size: Set a small starting and ending size. You can use a NumberSequence to have the sparkle start small and then get larger before disappearing.
- Speed: Give the sparkles a very low speed so they seem to just pop into existence
- Lifetime: Keep the lifetime short, say around 0.2 to 0.5 seconds.
- Rate: Set the rate to something like 20-50, depending on how dense you want the sparkles to be.
- SpreadAngle: Set it relatively small or zero to create a concentrated effect.
Fire Effects
Fire is another common and useful effect. To make fire:
- Texture: Upload a fire texture that you like or use the default fire sprite.
- Color: Use a ColorSequence that starts with a bright yellow, transitions to orange, and ends with red, maybe even darkening to black for the very end.
- Size: Start bigger and get smaller over time. A NumberSequence from 1 to 0.1 works well.
- Speed: The fire should rise a little bit, so give it a small upward speed.
- Lifetime: Something between 0.8 and 1.5 seconds.
- Rate: Set the rate based on the intensity of the fire you want. A rate of 40-80 can create a nice flame.
- SpreadAngle: Set the vertical spread to be low. Make it larger on the horizontal to create a wider, more convincing flame.
Try combining different textures for the fire too. For example, add small smoke trails on top.
Smoke Effects
Smoke can give you great effects, whether it’s from an explosion or a simple chimney.
- Texture: Find a good cloud-like or smoke-like texture. Many free resources are available online.
- Color: Start with a light gray or white, and fade to a slightly darker gray or even transparent white.
- Size: The smoke particles should be small at the beginning and get larger as they rise.
- Speed: Set a moderate speed and set an upward direction, this causes the smoke to rise up.
- Lifetime: Set a lifetime of around 1 to 2 seconds.
- Rate: A higher rate is needed for a thick smoke cloud, something between 50 and 100.
- SpreadAngle: Make the spread fairly high in all directions, to get a fluffy smoke effect.
Water Effects
Creating water is a bit different than fire or smoke. You may want to make splashes, waterfalls, or even underwater bubbles.
- Texture: Find a clear droplet-like texture. Many resources are available for download on creative resource websites.
- Color: Use a light blue or transparent white for a realistic look.
- Size: Small at the beginning, and larger as they fall from a spout. Small droplets for splash effects.
- Speed: This really depends on the effect. For a fountain, they would need an upwards speed and fall downwards with time. Splashes require a high initial speed.
- Lifetime: For splashes set a short lifetime, for a fountain set a medium to long lifetime.
- Rate: High for water splashes and more moderate for flowing water.
- SpreadAngle: For water fountains, use a small angle and for splashes set a larger angle.
Advanced Techniques
Once you’re comfortable with the basics, you can start experimenting with some advanced methods to make your effects more interesting.
Using Attractors
Attractors pull the particles to them or repel them away. An Attractor allows you to create vortexes, sucking particles into a point or creating a radial explosion of particles. It’s a very useful property and works great for making fun effects. You will find this on the right hand side of the ParticleEmitter Properties window.
Scripting Particle Effects
Sometimes you may want to control your effects dynamically based on what’s happening in your game. This is where scripting comes in. You can use scripts to change properties of the emitter, like the color, rate, or speed based on user interactions. For example, you can use a script to start an explosion particle effect when a player clicks on a button.
Here’s a very simple example script for a fire effect that changes color:
lua
— Assuming the ParticleEmitter is a child of the part this script is inside
local part = script.Parent
local emitter = part:FindFirstChild(“ParticleEmitter”)
if emitter then
local originalColorSequence = emitter.Color
while true do
emitter.Color = ColorSequence.new({
ColorSequenceKeypoint.new(0,Color3.fromRGB(255,0,0)), — Red start
ColorSequenceKeypoint.new(0.5,Color3.fromRGB(255,255,0)), — Yellow middle
ColorSequenceKeypoint.new(1,Color3.fromRGB(255,0,255)) — Purple end
})
task.wait(2)
emitter.Color = originalColorSequence
task.wait(2)
end
end
This script looks for the ParticleEmitter in the part and changes its color over time from red, to yellow, to purple, then changes back to the original color. This is a basic example, but using scripts lets you dynamically update properties of the particles.
Using Particle Emitters with Animations
Particle emitters can be added to animations in Roblox. This adds visual flair to any animations you create. For example, you can add a trail of sparks to a sword swing animation or a magical glow around a spell cast animation. You could also have smoke appear at a character’s feet while they are walking.
Tips for Optimizing Particle Effects
While particle effects are awesome, too many of them or poorly set up effects can cause lag in your game. Here are a few tips to optimize your effects:
- Use Fewer Particles: Reduce the number of particles if your effect is causing lag, or lower the rate of particle generation.
- Use Simple Textures: Complex textures can take more processing power, stick to simple textures if you are having issues.
- Set Appropriate Lifetimes: Don’t keep particles alive longer than they need to be.
- Hide Emitters When Not Needed: Make sure to enable the emitters when you need them and disable them when you don’t. This saves processing power.
Creative Uses of Particle Effects
The possibilities with particle effects are limitless. Here are a few creative ideas to inspire you:
- Ambient Effects: Create rain, snow, or dust storms to give your game a unique atmosphere.
- Interactive Elements: Use particles to show where players can interact or where they need to go.
- Character Abilities: Make character abilities look super cool with amazing visual effects.
- UI Feedback: Particles can be used in your UI to add visual feedback to your menus.
- World Building: Add effects to plants, rivers, and other parts of your world.
So there you have it, a detailed look into the wonderful world of Roblox particle effects. Start small, experiment, and most importantly, have fun. Before you know it, you’ll be adding amazing visual flair to all of your games, making them more engaging for all of your players. There is much more to learn, but hopefully this guide will set you on the path to success. Remember, the best way to learn is to experiment yourself.
Everything You NEED to Make PARTICLES!
Final Thoughts
This Roblox particle effects guide provides a solid starting point. You now have knowledge on creating, customizing, and using these visual enhancements. Experimentation remains key to developing unique and impressive effects.
Remember to carefully consider performance when using many particles.
Through practice, you can effectively implement particle effects in your Roblox games. This particle effects guide helps improve the visual appeal of your creations.

