
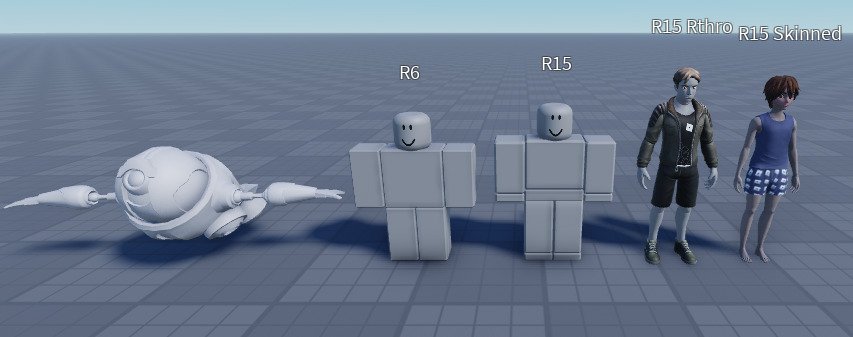
Rigging a character in Roblox involves creating a skeletal structure, attaching it to the mesh, and then using that structure for animation.
Ever wanted to make your Roblox characters move fluidly and realistically? You’ve come to the right place. This guide will explain the fundamentals of animation. Let’s dive into the essential process of the roblox rigging guide for characters. This will give you the foundations to build a great movement experience for your game.

Roblox Rigging Guide for Characters
So, you’ve got a cool character design in mind for your Roblox game, but they’re just standing there like a statue, right? That’s where rigging comes in! Rigging is like giving your character a skeleton and joints so it can move, bend, and dance! It can seem a little tricky at first, but we’re here to break it down step-by-step, so you can get your characters moving and grooving in no time. We’ll go over the key ideas behind character rigging, how to prepare your 3D models, and the important tools for success. So grab your creativity cap, and let’s get started.
Understanding the Basics of Rigging
Before we jump into the nitty-gritty, let’s understand what rigging actually means. Think of your character like a puppet. It’s made of different parts, and those parts need a way to connect and move. Rigging is the process of creating a structure inside your 3D model that allows you to control how it moves. This structure is made up of “bones,” “joints,” and controls that you’ll manipulate to make your character come alive.
What are Bones and Joints?
Bones, also known as joints, are not actual bones like in your body. Instead, these are virtual elements inside the model. They act as the foundation for movement. Joints are where the “bones” are connected, allowing parts of your character to rotate or bend. For example, you’ll have a joint at the elbow so the arm can bend, and a joint at the shoulder, so the arm can swing around. These bones and joints work together to create lifelike movements.
- Bones: These invisible structures define the framework for your character’s movement.
- Joints: Connection points between bones, enabling rotation and bending.
Why is Rigging Important in Roblox?
Rigging is essential for making your game characters more interactive and engaging. A character that only stands still isn’t very interesting! By rigging, you can make characters:
- Walk, run, and jump
- Wave, dance, and do other animations
- Interact with objects and the environment in a realistic way
- Look and feel more alive and interesting to your players.
Think about your favorite Roblox games, the characters are always moving and doing things. That’s thanks to rigging!
Preparing Your 3D Model for Rigging
Before you start rigging, you need to prepare your 3D model properly. This involves ensuring your model is in a suitable state and is ready to receive the bones and joints. A well-prepared model can make the rigging process much easier and more efficient. Here’s what you should pay attention to:
Model Cleanliness
A clean model is essential. This means that your model should:
- Be free of overlapping faces or extra vertices: These can create problems when you start adding the skeleton. Think of it like making sure your drawing is neat before you add colors; messy lines will make the colors look bad.
- Have good topology: This refers to how the faces or polygons are organized. Clean topology ensures smooth deformation and reduces oddities in movement. Think of it as having the different body parts designed properly, like if a leg looks like a leg and an arm looks like an arm.
- Have distinct parts: Make sure the different parts of your character (head, arms, legs, etc.) are separate meshes. These separate pieces will allow us to control each one independently. Imagine a toy that has separate arms and legs; each part moves on its own.
Naming Conventions
This might seem minor, but proper naming of parts will save you a lot of headaches down the line. Give each part of your model a clear and logical name. For example:
- Instead of “part1,” name it “Head.”
- Instead of “Cube003,” name it “RightArm.”
- Instead of “mesh5”, name it “LeftLeg”
By using understandable names, you can easily select each piece when rigging without confusion. It’s like putting labels on your toys, so you know which is which.
The Importance of a T-Pose
Always start with your character in a T-Pose or A-Pose. This is a position where the arms are stretched out to the sides, looking like a capital T or slightly angled as an A. This is the preferred pose because:
- It makes it easier to place bones and joints accurately.
- It prevents weird deformations or twisting when you start animating.
- It’s also a standard pose used across many animation programs.
Think of it like a starting point, the base from which all other movements will start. Imagine it’s the foundation on which you build all the different animations.
Essential Rigging Tools in Roblox Studio
Roblox Studio has a fantastic plugin system, and a couple of tools really stand out for rigging. These plugins are designed to make the rigging process easier and quicker. Let’s look at some of the most popular and helpful ones.
The Rig Builder Plugin
One of the most useful tools for creating and modifying character rigs in Roblox is the Rig Builder plugin. This tool simplifies the process, making it easier even for beginners.
Key Features of the Rig Builder Plugin
- Creating New Rigs: The Rig Builder plugin allows you to generate a basic rig structure using pre-made templates. This can be a humanoid rig, an object rig, or even custom rigs. You don’t have to start completely from scratch.
- Adjusting Existing Rigs: You can easily modify existing rigs, reposition joints, and add or remove bones if you need to. This helps you to refine your rig’s structure, so that it fits perfectly with your model.
- Weight Painting tools: The plugin helps to weight paint the model, which helps to determine how much of the model is affected by a bone or joint. this is a very important process for natural looking movements.
- Fast and efficient: It simplifies complex rigging operations and provides visual aids, making the whole process more straightforward.
The Rig Builder plugin is a great resource for all levels of rigger, due to its user-friendly interface, and will save a great deal of time and effort.
The Animation Editor Plugin
While not strictly for rigging, the Animation Editor is crucial after you’ve rigged your character. This plugin allows you to create and edit animations, which will bring your rigged character to life. It lets you see how your character will move when animated and helps you to fine tune those movements.
Key Features of the Animation Editor Plugin
- Keyframe Animation: The animation editor allows you to set up keyframes, which are positions of the bones at different times. The plugin will automatically calculate the movement between each position.
- Previewing Animations: The plugin has the ability to show you how your animations will look in real-time. This is essential for making sure your animations are smooth and fluid.
- Saving and Exporting Animations: You can easily save and export your animations and use it within your games. It helps to implement the animations in your game.
The Animation Editor Plugin is a necessary tool for any game developer looking to implement animated characters and dynamic movement.
Step-by-Step Rigging Process
Let’s dive into the actual process of rigging your character. It might seem a little complex at first, but by following these steps, you’ll get the hang of it. Remember, patience is key!
Importing Your Model
The first step is to import your 3D model into Roblox Studio. There are multiple ways to do this, but here’s one popular method:
- Open Roblox Studio and start a new project or open an existing one.
- Click on “View” in the menu bar, then select “Explorer” and “Properties.” This will open two important windows.
- In the Explorer window, click the “+” button, and then insert a “Part.” This will serve as a basis for your character.
- Import the mesh by right clicking the part you just created in the explorer and click ‘insert meshpart’.
- In the properties window, under “Mesh,” select the 3D file of your character.
Your model will now appear in the Roblox Studio, and now it’s ready for rigging.
Creating the Bone Structure
Now it’s time to create the bone structure for your character. This involves adding “bones” or joints to your model. You can do this manually, or use the Rig Builder plugin.
Manual Bone Creation
While the Rig Builder plugin is faster, manual bone creation gives you fine control.
- Insert a “Bone” object into your character by clicking the “+” symbol, and selecting the object.
- Place the first bone at the base of your character like around the hips or waist.
- Add more bones to your character. Create a bone for each part that you want to control, like the legs, arms, torso, neck, and head.
- Use the move tool to position each bone accurately.
Using the Rig Builder Plugin
Using the Rig Builder is a lot faster and easier, especially for beginners.
- Install the Rig Builder Plugin.
- Select your model.
- Open the plugin, you’ll see options to generate a rig based on the characters structure.
- Select the most appropriate template for your model, and it will create the bone structure for you.
- Adjust the position of the bones if you need to.
Weight Painting
Weight painting is a very important step in the rigging process. This step defines how much influence each bone has on the model. It ensures the model will bend or move correctly without strange deformations.
How to do weight painting
- Start the weight paint tool by selecting “weight paint mode” in the Rig builder plugin.
- Select one of the bones and paint the model, this will determine how much the mesh will move based on the bone that is being selected.
- Use red, orange, yellow, or green depending on the influence you want. Red means 100% influence, and the blue means 0 influence.
- Adjust the weight paint accordingly, until the model bends and deforms properly.
Weight painting can be a bit tricky at first, so take some time to practice and refine your painting skills.
Testing your Rig
After you’ve finished rigging and weight painting, it’s important to test the rig. Try moving the bones around and observing how the character model reacts. Look out for any issues:
- Deformations: Check if the model deforms properly. Is the arm bending smoothly or does it have weird kinks?
- Twisting: Look out for any unwanted twists in the mesh when you rotate the joints.
- Smoothness: Make sure all the movements of the model are smooth, without any weird and jerky movements.
If you find any of these problems, go back to weight painting and adjust the influence of the bones. Test again until it looks correct.
Common Rigging Mistakes to Avoid
Rigging can be challenging, and it’s easy to make some common mistakes, especially when you’re just starting out. Let’s look at a few of these mistakes so you can steer clear of them.
Incorrect Bone Placement
Placing your bones incorrectly can lead to very weird results. If your bones are not aligned properly with your character’s joints, your character will not move realistically. It is essential to place your bones in correct position according to your model’s anatomy.
Poor Weight Painting
Poor weight painting is a common problem. If the weights are not painted correctly, your model may have strange deformities. It can create unwanted stretching, twisting, or squashing of the mesh. It’s very important to take your time and ensure all the vertices are correctly assigned with the correct weights for smooth movement.
Overly Complex Rigs
A rig that is too complex can be very hard to manage and animate, especially if you’re a beginner. Start with a simple setup, learn the basics, and gradually add more features when you’re comfortable with them. Keep it simple, and then you can upgrade later on.
Ignoring Naming Conventions
As previously mentioned, neglecting the importance of naming conventions can lead to a lot of confusion, especially as your rig gets more complex. Using clear and meaningful names for every part of the rig and your model is very crucial, as it will simplify the editing process of your rig.
Tips for Better Rigging
As you get more experienced with rigging, you can use some tips to improve your characters’ motion and improve your workflow. These will help you create more professional-looking rigs.
Start Simple
Don’t try to build a super complex rig from the beginning. Begin with a simple rig with the basic bones. Start with a simple rig structure to get the basics down. Once you have a simple rig that works well, you can always add more bones and controls later on.
Practice Regularly
Like any skill, rigging needs practice to improve. Practice with different character models and keep experimenting with various rigging methods and tools. The more you do it, the better you will get at it.
Study Other Rigs
Take some time to study other character rigs. Look at how the bones are placed and how the models are weighted. Try to understand the reasons behind the placement and the settings. Studying existing rigs can give you many great ideas and help you to develop your own style. There are countless resources online to learn from, tutorials and blog articles that cover this.
Join the Community
There are many online communities for Roblox developers. Join these communities and share your work, get feedback, and learn from others. Don’t be afraid to ask questions, as many people are willing to help. Learning and helping are essential for any learning process.
Rigging is an essential skill for anyone looking to create awesome games. By taking the time to learn the basics, using the right tools, and avoiding common mistakes, you’ll be creating amazing, fully animated characters in no time. With a little patience and practice, you can make your characters come to life!
How to Rig Models on Roblox Studio [2022, still works in 2024][Simple 4-Minute Tutorial, sorta]
Final Thoughts
In short, proper rigging is crucial for character animation in Roblox. A well-rigged model moves realistically and responds to your controls as expected. Understanding the basics improves your creation workflow.
This Roblox rigging guide for characters provides a solid foundation. It’s essential to practice these techniques to refine your skills. With time, you will create complex and highly detailed character animations.

