
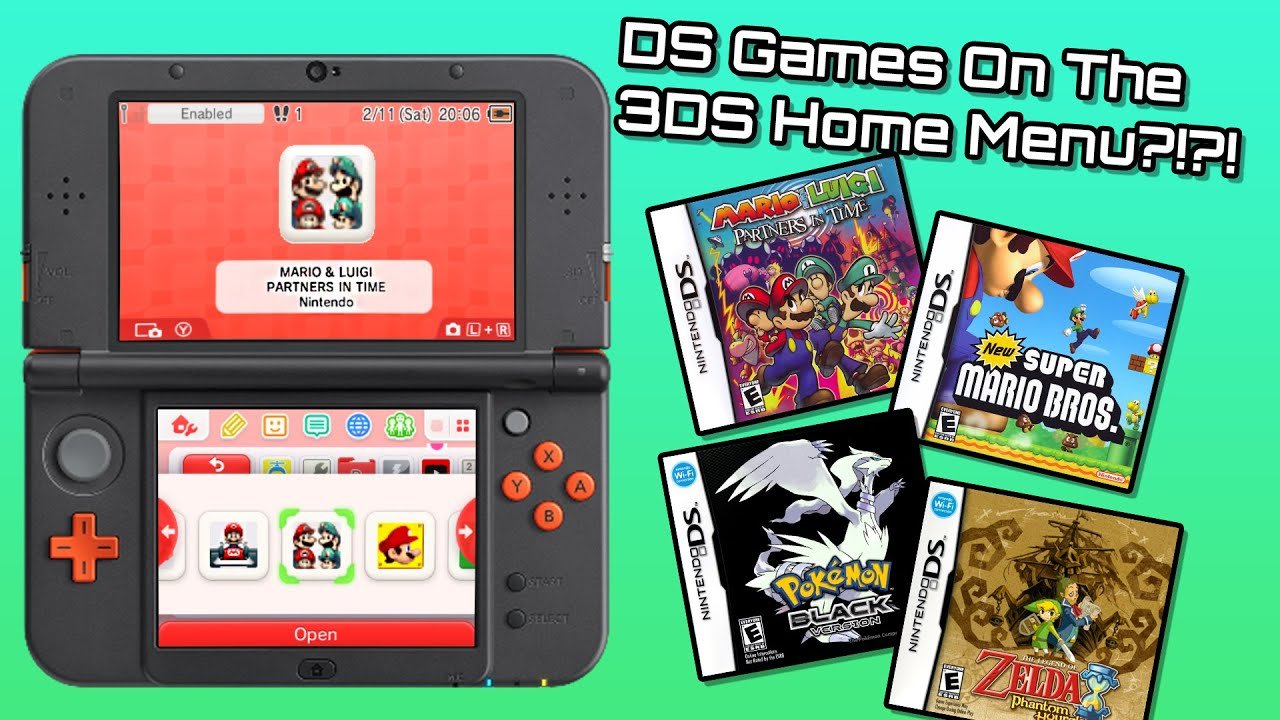
To play DS games on your 3DS via homebrew, you’ll need to install custom firmware (CFW) on your 3DS, and then use a compatible emulator or forwarder application.
Want to revisit classic DS titles on your 3DS? Many people wonder how to get ds games on 3ds homebrew, and it’s actually quite achievable. The process involves a few steps, but it’s not as daunting as it might first appear. You’ll first modify your 3DS by installing custom firmware.
This custom firmware opens up the 3DS to running homebrew software. Then, specific applications are installed, enabling you to play those beloved DS games. It will bring a whole library of games to your handheld.

How to Get DS Games on 3DS Homebrew
So, you have a Nintendo 3DS and a yearning to play some of your favorite old Nintendo DS games. That’s awesome! The good news is, it’s totally possible to play DS games on your 3DS using something called “homebrew.” Now, homebrew might sound a bit complicated, but we are here to make it easy to understand. Think of homebrew like special software that lets your 3DS do things it wasn’t originally meant to do. One of those things is playing DS games you already own, but maybe in a digital format. This article is your guide to understanding exactly how it works and how you can do it safely and responsibly. It involves a few steps and some careful preparations, but we will walk through it all. Let’s dive in!
Understanding the Basics: What is Homebrew and Why Use It?
Before we jump into the “how,” let’s talk about the “what” and the “why.” Homebrew, in the context of the 3DS, means custom software or applications made by people outside of Nintendo. These applications are not normally allowed on the system, and you need a special way to install them. This process involves modifying your 3DS, but it’s very safe if you follow the instructions correctly.
Why bother with homebrew for DS games when you can just use a DS cartridge? Well, there are a few great reasons:
- Convenience: You don’t have to carry around a bunch of game cartridges. Your games are all stored on your 3DS’s SD card.
- Backup: It lets you back up your games, so you can still play even if your original cartridge breaks or gets lost.
- Customization: Once your 3DS has homebrew capabilities, you can do all sorts of fun things, beyond just playing DS games, like using special themes, play retro games, or even create your own programs.
It’s important to note that this process is meant for playing games that you already own. Pirating games, or getting them illegally, is wrong, and we don’t encourage that at all. This guide is just for you to use your purchased games in a digital format on your 3DS.
Preparing Your 3DS for Homebrew
Before installing homebrew, there are a few things you need to check and prepare. These steps are crucial, and you must do them all before we go to next level.
Checking Your 3DS Firmware Version
Your 3DS has its own system software called firmware, just like your phone or computer. You need to know your 3DS’s firmware version to make sure the homebrew process works correctly. Here’s how to find it:
- Turn on your 3DS.
- Go to “System Settings” (the wrench icon on the home screen).
- Tap “Other Settings.”
- Go to the bottom right corner of the top screen. You’ll see the firmware version there. It should look like a number like “11.16.0-48U”.
The firmware version is very important because the installation process can change based on it. You will need this information for the next steps. If you find that you have a really old version of the 3DS software, it might be better to update your console. Updating can usually bring new features and improved stability.
Gathering Necessary Materials
Now that we have the firmware version, we should prepare all the materials which we will require for the process of getting homebrew on 3DS.
- A Nintendo 3DS or 2DS Console: This seems like obvious, but just making it clear.
- A MicroSD Card: At least 4GB is recommended, but 8GB or 16GB is better for storing a lot of games. If you are planning to download lots of games, you may need even more space.
- A Computer: You’ll need this to transfer files to your SD card.
- An SD Card Reader/Adapter: Most computers have this already, but if you need it you’ll need to purchase it to connect your microSD card to your computer.
- Software for Homebrewing: We’ll discuss this later, but you’ll need to download special files.
Formatting Your MicroSD Card
A clean, correctly formatted SD card is crucial for homebrew. If it is not formatted correctly, then you may face issues and it will not work. Formatting an SD card for 3DS is simple, just follow the following instructions
- Insert your microSD card into your computer using the adapter.
- Open your file manager (like File Explorer on Windows or Finder on Mac).
- Find your SD card listed under the devices.
- Right-click on your SD card and select “Format.”
- Make sure the “File system” is set to FAT32.
- Press “Start” and wait for the formatting process to finish.
Remember to back up any important data on the SD card before formatting, as this will erase everything.
The Homebrew Installation Process: Step-by-Step Guide
Now that your 3DS is ready, it’s time for the actual homebrew process. This section will get a bit more technical, but we will break it down step-by-step. This part involves using a method called “custom firmware” (CFW) which basically removes the Nintendo’s limitations and allows you to use homebrew.
Downloading Necessary Homebrew Files
Before beginning the installation of custom firmware, we will need to get special homebrew files that we will use in the process. Here are the most common and reliable ones:
- Luma3DS: This is the custom firmware we’ll be using. Luma3DS allows your 3DS to run modified code and custom apps like game installers.
- Boot9Strap: This is the method we use to boot our modified 3DS firmware.
- GodMode9: This is a file explorer, which allows you to install all kinds of files to your 3DS, and also can be used to backup files and restore firmware.
- Homebrew Launcher: This is a menu to find and launch your homebrew apps.
You can find these files on very popular 3DS modding guides, usually on GitHub, or you can search for “3ds homebrew guide” or the names of these applications to easily find official download links.
It is very important that you get the files from a reputable and secure source. Make sure you download the most current version of the homebrew app or program as the older versions may not work on latest firmware.
Transferring Files to Your SD Card
After downloading all the files, it is time to transfer them to SD card. You can do that by following these simple steps:
- Connect your SD card to your computer.
- Open the zip files for the homebrew software you downloaded earlier, and extract all the files to SD card.
- Make sure the folders are in the correct place on the SD card, as they are usually specified in the download guides. Usually, the “.3dsx” files go to the “3ds” folder, and the “.firm” files go to the root of the SD card.
- Once files are copied, safely remove the SD card from your computer.
Installing Custom Firmware (CFW) with Boot9Strap
Now we come to the most complex, but exciting part. We are going to install Custom Firmware using Boot9strap method. If you follow all the steps correctly you should have no problems installing CFW on your 3DS.
Disclaimer: This process can be risky if not followed correctly. Please carefully read all instructions and only start the process once you completely understand everything. If you have any doubts it is better to seek out more assistance from an expert on this topic.
- Insert your SD card into your 3DS.
- Turn on your 3DS.
- Now, we need to boot into the homebrew menu. The way you do this depends on the specific setup. You may need to install one of the common exploits, like using “SoundHax,” which uses the 3DS sound player, or another suitable exploit for your firmware version. This is a bit complex, so you’ll need to consult the guide that matches your specific firmware version to find the method to boot into the homebrew menu.
- Once in the homebrew menu, launch GodMode9.
- Follow the on-screen instructions provided by GodMode9 to install Boot9Strap. This process is very specific, and it varies depending on your current firmware version, so follow instructions provided by GodMode9 on the 3DS screen very carefully, usually it involves pressing some specific buttons at right moments.
- After installing Boot9Strap, turn off your 3DS.
- Hold the Start button while turning on your 3DS to launch Luma3DS configuration menu.
- You will see a menu on your screen, and you can navigate it by using the D-Pad and A button. Press A to select all the options that are available. Once you are done, press “Start” to reboot your device.
- Your 3DS will now boot with Luma3DS CFW installed.
This was the most difficult and time consuming part. If you were successful in all of the steps, your 3DS should now boot with a custom firmware. If you get an error, you may need to start the process all over again to make sure you did not make any mistakes. The first time installing CFW on a 3DS can be challenging, but you will get better at it.
Installing DS Games on Your 3DS
Okay, with CFW installed, you are now ready to play DS games on your 3DS. Here is how you can accomplish that.
Obtaining DS Game ROMs (Responsibly)
Before we begin, again, we need to mention that you should only install the games that you have purchased in physical format previously. You may need to use special software on your computer to create a ROM file from your cartridge.
Once you have ROMs of your purchased DS games, you can proceed with the installation process.
Using TWiLight Menu++ to Run DS Games
TWiLight Menu++ is a homebrew application that lets you play DS games on your 3DS. It’s easy to use once you have CFW installed. Here’s how you can use it:
- Download TWiLight Menu++ from a trusted source. Search for “TWiLight Menu++” on the internet to get the latest official download.
- Extract the files to the “_nds” folder on your SD card. If this folder does not exist on your SD card, you can create it.
- Copy your DS game ROMs to the “_nds” folder on your SD card as well.
- Insert your SD card into your 3DS.
- Turn on your 3DS and launch the Homebrew Launcher using your chosen method.
- Find TWiLight Menu++ in the list of homebrew applications and launch it.
- TWiLight Menu++ will show you a menu where you can find your DS games. You will see a list of all your DS game ROMs.
- Select a game, press the “A” button to launch it.
- The game will now start and you can now play DS games on your 3DS without the use of cartridges.
Troubleshooting Common Issues
Sometimes things don’t go perfectly smoothly. Here are a few common issues you might encounter and how to fix them:
3DS Not Turning On After Installing CFW
If your 3DS doesn’t turn on after installing CFW, you may have made a mistake in the installation process. Make sure your SD card is fully inserted, also make sure you copied all the correct files to your SD card. Try to re-do the process again, or seek out help from the community.
Games Not Launching in TWiLight Menu++
If games are not launching in TWiLight Menu++, double-check if you have placed the game files in the correct folder, which should be “_nds”. Ensure that ROM files are not corrupt, try downloading another version of your game and try again. Also make sure that your TWiLight Menu++ software is updated to the latest version.
SD Card Not Recognized
If your 3DS is not reading SD Card, you might have an issue with the SD card reader. Try another SD card, or another SD Card adapter, if you are using one. Also, make sure that your SD Card is formatted to FAT32 file system. If the SD Card is corrupted, it might not read in your system.
By following this guide, you should be able to install homebrew on your 3DS and start playing your favorite DS games. Remember to be patient, follow the instructions carefully, and most importantly, be safe and responsible while doing it. This guide is for educational purposes, and we do not encourage piracy. If you need extra help, don’t hesitate to look for help from online communities.
Now you know how to get DS games on 3DS homebrew, and you can begin your journey of playing your purchased games on your system without relying on the game cartridges.
How to Play DS Games on 3DS Homebrew
Final Thoughts
To get DS games on 3DS homebrew, you need a modified 3DS and specific homebrew software. First, install custom firmware on your console. Then, utilize a compatible emulator or loader app. This setup lets you play DS games.
Finally, place your DS game ROM files in the designated location on your 3DS SD card. This process shows you how to get ds games on 3ds homebrew, allowing access to a vast library.

