
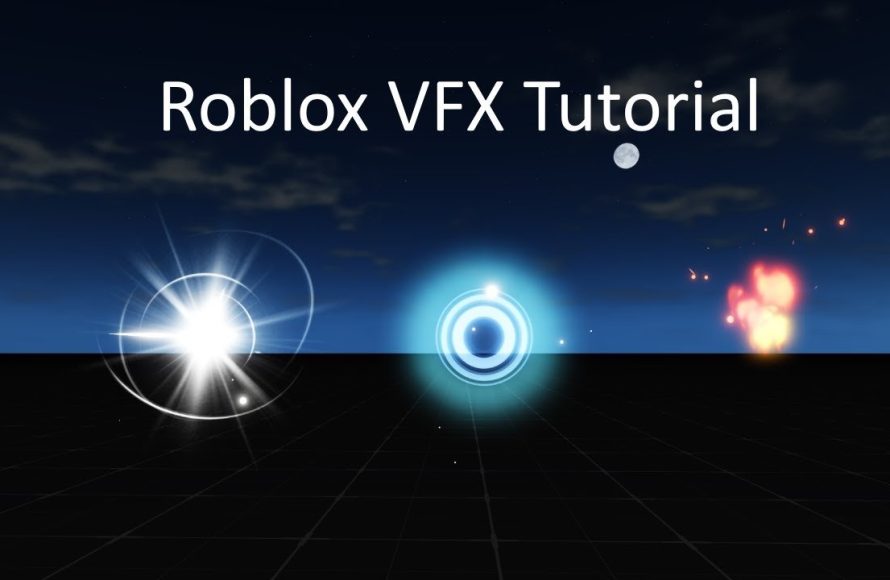
Creating visual effects in Roblox involves using particle emitters, scripting, and manipulating properties of objects to achieve desired animations and appearances.
Want to add some sparkle to your Roblox game? A Roblox visual effects tutorial can guide you through creating dynamic elements. You can learn to make explosions, trails, and shimmering effects.
This guide provides simple steps to get you started. You’ll work with Roblox Studio, exploring its features for creating unique visual flair. Practice with some basic effects, and your game will soon have a whole new feel.

Roblox Visual Effects Tutorial
Okay, let’s dive into making your Roblox games look awesome! Visual effects, or VFX, are like the special sprinkles on a cake. They can make your game feel more exciting, magical, or even spooky. We’re going to explore how to add cool things like explosions, glowing objects, and shimmering portals. Don’t worry if you’re just starting out – we’ll take it step-by-step!
Understanding the Basics of Roblox VFX
Before we jump into creating amazing effects, let’s talk about what makes them work. Roblox uses a few different tools to create visual magic. You can think of them like different kinds of paintbrushes for your game.
Particles: The Tiny Building Blocks
Particles are like tiny little dots or shapes that move around. Imagine a bunch of these dots swirling to create smoke, or sparkling to show fairy dust. You can control things like how fast they move, what color they are, and how long they last. Roblox has a cool feature called “ParticleEmitters” that you’ll use to create these. Think of it like the machine that sends out these tiny little dots.
Here’s what you’ll generally adjust when using ParticleEmitters:
- Texture: This is the picture you want your particle to look like. It could be a dot, a star, or even a custom image you upload.
- Rate: How many particles come out per second. The higher the rate, the more particles you’ll see.
- Speed: How fast the particles move when they’re emitted.
- Color: The color of your particles. You can even use a gradient, changing colors as they move.
- Lifetime: How long each particle exists before disappearing.
- Size: The size of the particle itself, from very small to very large.
Transparency: Making Things See-Through
Transparency controls how see-through something is. A transparency of 0 is completely solid, and a transparency of 1 is totally invisible. You can use this to make things fade in or out, create glowing effects, or make semi-transparent parts for your effect. For instance, you can make a ghost appear by starting with a higher transparency, and then lowering it to make it visible. It’s a simple yet powerful tool.
Color: Painting with Light
Color can make a huge difference in how your effect looks. You can use color to convey different moods like happy, scary, or magical. You can use a simple base color or create more complex, color-changing effects. Remember, colors can also interact with light within your game, so play around and see what you can achieve. When creating fiery effects, for example, you can start with a deep orange at the base and move to yellow or even white at the top, giving the illusion of real flames.
Light: Adding Shine and Glow
Roblox allows you to use different types of lights within your games. We’ll be looking at using light effects to add shine, glow, and different atmospheres to the visual effects we are creating. Adding a bright light source in the center of an explosion can amplify the intensity, or creating a dim, red glow on a haunted object can create a spooky effect.
- Point Lights: These lights radiate light out in all directions from a single point.
- Surface Lights: These lights shine from the surface of an object.
- Spot Lights: These lights shine in a cone shape.
Creating Simple VFX: A Step-by-Step Guide
Alright, let’s get our hands dirty and create some basic VFX.
Making a Simple Sparkle Effect
Let’s start by making a sparkle effect. This is like the glitter that can make something look magical.
- Create a Part: In Roblox Studio, add a new part (e.g., a sphere). This will be the object we’ll add our sparkle effect to.
- Add a Particle Emitter: Select the part, and click the “+” button next to its name in the Explorer window. Add a “ParticleEmitter.”
- Configure the Emitter: In the Properties window, you’ll see the options for the ParticleEmitter. Let’s set these up for a sparkle:
- Set “Texture” to a white circle or a custom star image, if you have one.
- Adjust the “Rate” to about 50. This means 50 particles will come out every second.
- Set “Speed” to 1. This will create slower, floaty sparkles.
- Set “Lifetime” to 1. This means the sparkles will disappear after one second.
- Set “Size” to a value like 0.3 so the sparkles are not too large.
- Set the “Color” to white.
- Test it out: Press the “Play” button and watch your part sparkle! You can adjust the settings to make it exactly how you want it.
Creating a Basic Explosion Effect
Next, let’s make a simple explosion. This involves using particles and transparency in a cool way.
- Create a Part: Add a part, it can be any shape but for this we will use a sphere and it will act as the explosion center.
- Add a Particle Emitter: Add a “ParticleEmitter” to your part like you did for the sparkle.
- Configure the Emitter:
- Set “Texture” to a circle or an explosion image, if you have one.
- Set “Rate” to something high like 200.
- Set “Speed” to 5. These particles will move very fast at the start.
- Set “Lifetime” to 0.8. This explosion effect should be quick.
- Set “Size” to a value like 2 and add a size sequence that start from small to big (Example: 0.3, 2)
- Set “Color” to orange, red, and yellow and add a color sequence.
- Add a Script: Now we’ll add a script to actually make the explosion happen. Add a script to the part.
- Write the Script: In the script, write the following:
local part = script.Parent local emitter = part:FindFirstChild("ParticleEmitter") wait(2) -- wait for a couple of seconds emitter.Enabled = true -- Start the emitter wait(0.8) -- wait for the duration of the effect emitter.Enabled = false -- Stop the emitter part:Destroy() -- destroy the part - Test it out: Run your game and after 2 seconds, you should see a quick explosion effect on your part.
Advanced VFX Techniques: Adding Depth
Now that you have a hang of the basics, let’s move on to some more advanced tricks that can take your visual effects to a new level of amazing.
Using Transparency to Make Things Fade
Using transparency in a dynamic way can make your effects even better. You can make things appear and disappear gradually, which adds a nice touch to your VFX.
Let’s take our explosion effect and make the particles fade out using a transparency sequence:
- Configure the Emitter: In the Properties window, open the ParticleEmitter and set the following:
- Set “Transparency” to a sequence that start from 0 and goes up to 1 (Example: 0, 1).
- Test it out: Now test your effect and you will see that the explosion particles will fade away over time.
Creating Trails
Trails make your visual effects more dynamic and add motion to fast-moving objects. Here’s how you can do it:
- Create a Part: Add a part, which we will call a moving part, that moves.
- Add a Particle Emitter: Add a “ParticleEmitter” to the moving part.
- Configure the Emitter:
- Set “Texture” to a circle or a star shape.
- Set “Rate” to something like 20.
- Set “Speed” to 0. This will create stationary particles.
- Set “Lifetime” to 0.4.
- Set “Size” to a value like 0.3.
- Set “Drag” to 4
- Adjust the “Color” to your liking.
- Add a Script: Add a script to the moving part
- Write the Script: In the script, write the following:
local part = script.Parent local emitter = part:FindFirstChild("ParticleEmitter") while true do part.CFrame = part.CFrame CFrame.new(0,0,1) wait(0.1) end - Test it out: Run your game. You will see that the part will move and the particles will leave a trail behind it.
Using Light Sources for Dynamic Effects
Adding light sources to your effects makes them stand out and adds another layer of depth. Let’s add a point light to our explosion effect:
- Add a Point Light: Select the part that acts as the explosion center, and add a “PointLight” to it.
- Configure the PointLight:
- Set “Range” to a value like 20 so the light covers a wide area.
- Set “Brightness” to 4.
- Adjust the “Color” to match the explosion effect.
- Add a Script: You need to add the light to the previous explosion script.
- Modify Script: Modify the script as follow:
local part = script.Parent local emitter = part:FindFirstChild("ParticleEmitter") local light = part:FindFirstChild("PointLight") wait(2) -- wait for a couple of seconds emitter.Enabled = true -- Start the emitter light.Enabled = true -- Start the light wait(0.8) -- wait for the duration of the effect emitter.Enabled = false -- Stop the emitter light.Enabled = false -- Stop the light part:Destroy() -- destroy the part - Test it out: When your explosion goes off, it will also emit a bright light at the same time. This really enhances the effect and makes the explosion more vibrant.
Tips for Designing Great Roblox VFX
Creating good visual effects is a balance of artistic flair and technical skill. Here are some tips to keep in mind:
Keep it simple: Don’t overdo your effects. Sometimes less is more. A simple effect done well can be more impactful than a complicated one that’s confusing. Start simple, and add more only when you feel it will help.
Use references: Look at other games or real-life effects for inspiration. This helps you understand what kind of look you’re aiming for.
Experiment: Don’t be afraid to play around with different settings and combinations. That’s how you learn what works best.
Performance: Keep an eye on how your effects affect performance. Too many particles or complicated scripts can slow down your game. Aim for effects that look good but are also efficient.
Theme: Make sure your effects match the overall theme of your game. A magical game should use sparkles and glows while a sci-fi game might use lasers and energy effects.
Sound: Pair your visual effects with sound effects to amplify their impact. A good sound effect can make the visual effect feel much more realistic and engaging. For example, an explosion effect will be much more intense if it’s paired with a loud boom sound.
By understanding the tools Roblox provides, practicing and experimenting, you can create awesome visual effects that really make your games stand out and become more appealing for the players.
With all the information and step-by-step guides we have covered here, you can really start making some awesome visual effects in your own games. Remember, the best way to learn is by experimenting and trying new things.
How to Make Professional VFX and Abilities in Roblox Studio #roblox #robloxstudio
Final Thoughts
In short, creating compelling visuals in Roblox requires practice. The tips provided should help you make impressive effects. Remember to experiment with different settings to find what suits your game best. A good roblox visual effects tutorial can be your key to success.
You can achieve a wide array of effects with a little effort. These effects can greatly improve your game’s appearance and attract players. Keep iterating and applying new things you learn.
With patience and practice, you will become skilled in visual effects creation. Remember to use a good roblox visual effects tutorial for reference. Have fun making your dream games!

